
-min.jpg)
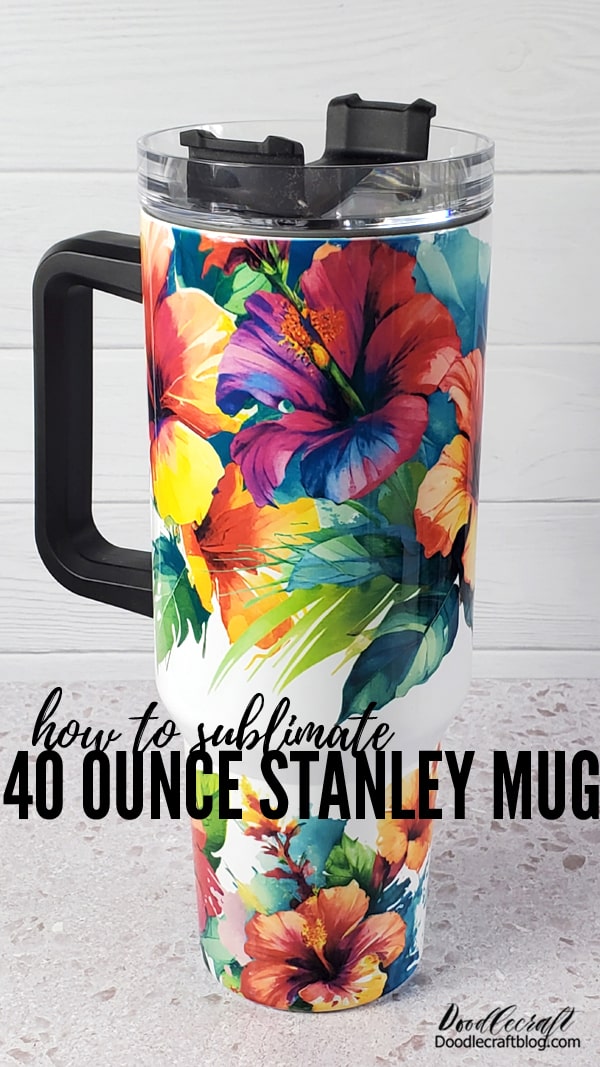
40 Ounce Sublimation Stanley Mug with FREE Templates!
Learn how to make a 40 oz tumbler with sublimation using free templates at the end of the post.
I love the cuteness of the 20 ounce tumblers, but 40 ounce is where it's at.
This sublimation mug is perfect for a custom gift that will definitely get used--I would have loved this as a little girl!
When it comes to drink containers, I want the biggest possible so I can drink my daily amount of water and not refill it all the time.
-min.jpg)
I looked all over, trying to find a free template and I couldn't find anything great.
I decided to just make my own open concept template, you can add your own sublimation design on it in photoshop or canva.
This template is made for printing on an 8.5x11 standard sheet of sublimation paper.
If you have a bigger printer, you can print 12 inches wide for the upper part of the tumbler!
⬇️⬇️⬇️FREE template link at the end of the post. ⬇️⬇️⬇️
-min.jpg)
Supplies Needed for 40 Ounce Sublimation Tumbler:
- Sublimation Stanley Mug (40 oz sublimation tumbler comes with plastic straw)
- Sublimation Oven
- Epson Ecotank Printer Converted to Sublimation (craft gold gold!)
- Sublimation Paper
- Heat Gun
- Shrink Plastic
- Heat Resistant Tape
- Heat Resistant Tape Dispenser (optional but super nice)
- Mug Templates (end of post)
- Design (I bought these loose watercolor hibiscus off Etsy for $2)
Step 1: Design
Begin by downloading the FREE PNG template files for the 40 ounce mug.
All sublimation blanks are a bit different, so if you aren't buying this exact one from Heat Transfer Warehouse, it might not be the right size, so be sure to measure it for full wrap designs.
Also, if you have a Sawgrass printer that can print 11x17, then you can scale the top template up to 12 inches across instead of just 11 inches across.
This template is made for regular 8.5x11 printers. (For best results print the image twice on the same paper, to make the image more vivid and high quality color sublimation transfer.)
-min.jpg)
Use a program like photoshop (pixlr is free) or a popular choice is Canva to design your tumbler wrap for the perfect fit.
I use photoshop from the olden days because we bought it and I'm very familiar with it.
Overlay the digital files or images you like over the template as a guide, overlap and lay them out the way you like it.
Then select the outside of the template and remove anything outside the guide line.
Then remove the template, reverse your image and print your design.
-min.jpg)
Step 2: Tape and Heat
Use the 40 oz sublimation blank, order number: WB-WB40OZ-Black from Heat Transfer Warehouse.
Use a lint roller to remove any dust or debris before taping.
Cover the mug in shrink plastic.
I didn't have a sleeve big enough for the top part of the mug...so I cut mine down the side and taped it on the mug and shrunk it around the mug as best as I could...and it worked!
Then plug in the Sublimation oven and set it to 365*F and 9 minutes, place the shrink wrapped mug inside.
The oven will get to temperature and then begin the countdown.
After printing, cut around the design loosely and use heat resistant tape to adhere it to the white sublimation tumbler blank.
-min.jpg)
After the heating process, remove from the oven and let the sublimation mug cool down completely.
The double wall 40 oz travel tumblers are perfect for handmade gifts with custom full wrap designs for everyone on your gift giving list.
-min.jpg)
Step 3: Reveal
Then it's super easy to remove the shrink plastic, heat resistant tape and the sublimation paper to reveal the mug design.
-min.jpg)
I love how amazing the sublimation transfers look!
When printing with a sublimation printer, the ink comes out looking like different colors and pretty dull and muted.
It surprises me every single time I heat press to see how vibrant and wonderful the colors actually look on the blank!
I love sublimation!
-min.jpg)
Heat Transfer Warehouse has everything you need for sublimation crafting.
They have an awesome stash of sublimation blanks at great prices and all the printers, heat presses and other things you need to get started.
Check out my landing page at Heat Transfer Warehouse and see the things I like!
-min.jpg)
Step 4: Handle
Now use a screwdriver to screw the handle on the mug. (The optional handle removal is super nice when sublimating on tumblers)
It was a bit tricky to get that inside screw, but I managed to after some fidgeting.
Oh, make sure the mug is installed so the screw does not show from the top or looking down on the lid...you want it to be underneath.
-min.jpg)
These Stanley dupe mugs are the best.
The size is awesome, they still fit in the car drink holder because of the narrower base, but they can hold a lot of drink.
The lid screws on top, to prevent leaking and pop offs.
The black cover on the lid moves around to cover the sip opening...or allows for a straw to be placed through.
-min.jpg)
I love how this 40 ounce sublimation mug turned out.
It's easy to use and customize too!
These make a great handmade gift for any and all occasions.
This is a tumbler anyone would absolutely love!
-min.jpg)
If you don't want to design your own 40 ounce tumbler, there are so many different ways to get awesome tumbler designs.
There's facebook groups that put them up for free.
You can buy them from places like Etsy or Design Bundles.
Here's a few I like:
-min.jpg)
That's it!
If you haven't tried sublimation crafts yet, it's so much fun!
It's easy to customize projects and make things just for the recipient.
Make 40 ounce sublimation mugs for everyone on your gift giving list this holiday season!
Like, Pin and Save!
40 Ounce Sublimation Tumbler Stanley Mug Upper and Lower Templates (FREE!)
Check out these other fun tumblers and sublimation mugs!
How to Make a Mug with Cricut Infusible Ink in the Oven!
Making a mug using Cricut Infusible Ink is a game changer! Cricut Infusible Ink works on a sublimation ceramic mug and can be done without a heat press in your own oven.
Make a custom mug using Cricut Infusible Ink as the perfect handmade gift...with no mug press.
This post will teach you all about making a sublimation mug using Cricut Infusible ink in your own oven.
The CRICUT MUG PRESS will make mug making a cinch--but here's how to do it without one.

Mirror Tile Disco Ball Tumbler
Make a Disco Ball tumbler!
This fun drink tumbler is perfect for a party, gift or just as the best accent on your desk to keep your drinks warm or cold!
Mirror tiles are easy to apply and come in sticker strips, so this only takes a few minutes for a sparkly DIY!
-min.jpg)
HTVRont Tumbler Party for Girl Scouts
I was honored to be asked to participate in HTVRont Cares & Tumbler Heat Press Charity event this year!
HTVRont asked me to help give back to my community by creating custom tumblers for a group of people.
I recieved the HTVRont Auto Tumbler Heat Press as well as stainless steel tumbler blanks and sublimation paper, and things to make my set up awesome.
-min.jpg)
Tinted Glass Jar Sublimation
I love doing sublimation crafts!
The greatest thing about sublimation is it's rise in popularity means there are many more sublimation blanks!
These tinted canning jar cups are sublimation blanks and are perfect for a whimsical floral!
-min.jpg)
HTVRont Auto Tumbler Heat Press!
Making sublimation tumblers is so much fun!
There really is something so amazing about designing something or printing something off and then having it sublimated like magic onto a surface blank.
I love making sublimation things for custom gifts; perfect for teachers, birthday's, holiday gifts and more!
-min.jpg)
Mini Tumbler Wraps and Template FREEBIE
Sublimation mini tumblers--everyone needs a mini tumbler--they are so much cuter!
These darling 3 oz tumblers are so cute and the perfect little sublimation project!
I designed a template for the top and bottom of them and it's free at the end of the post!
This is my last freebie of the 12 days of Giveaways--I hope you've loved them!
-min.jpg)
Watercolor Floral Tumblers
Sublimation tumblers are my favorite!
They are easy to make and personalize.
Sublimation tumblers make great gifts for every occasion!
Learn how to make a watercolor florals sublimation 30 ounce tumbler in just a few minutes!
-min.jpg)
Anthropologie Inspired Monogram Mug DIY with Cricut
Learn how to make an Anthro inspired monogram coffee mug with Cricut Infusible Ink and Cricut Mug Press.
This DIY is a little complex, using 4 colors of infusible ink, but it's finish is well worth the effort!
Plus, the mug is dishwasher and microwave safe--this would be a great gift with a mug cake mix! Be sure to watch the video tutorial in this post!
-min.jpg "Anthropologie Inspired Monogram Mug DIY with Cricut Infusible Ink Learn how to make an Anthro inspired monogram mug with Cricut Infusible Ink and Cricut Mug Press. This DIY is a little complex, using 4 colors of infusible ink, but it's finish is well worth the effort! Plus, the mug is dishwasher and microwave safe! Be sure to watch the video tutorial in this post!")
Go2Craft Auto Tumbler Heat Press
Go2Craft just released a new auto seamless tumbler heat press that has a vertical orientation!
It's a cool design with added features that make pressing a tumbler so simple.
Let me show you everything you need to know about the Go2Craft Auto Tumbler Heat Press!
-min.jpg)
Sublimation Camping Enamel Mugs
Make a custom pair of enamel camping mugs with a sublimation printer, sublimation paper and a sublimation oven.
These enamel mugs are super chic, showcasing a classic black and white tropical print!
-min.jpg)
3D Sublimation Tumblers
Making sublimation tumblers is so much fun!
3D designs are so easy and simple to put on a sublimation tumbler.
Learn how easy it is to put a 3D design on a sublimation tumbler using the Sublimation WALAPress Oven from Heat Transfer Warehouse.
-min.jpg)
Glitter Resin Tumblers
Learn how easy and fun it is to make glitter resin tumblers.
These tumblers are super sparkly with a variety of glitter colors and sizes! These would be perfect for a little mermaid party!
Customize these tumbler for any occasion! Wedding party color scheme, Graduation gift school colors, or just a favorite color!
-min.jpg)
Power Word Affirmation Sublimation Tumbler Wraps
Get ready for the new year with a holographic sublimation tumbler wrap featuring a power word affirmation!
It's the 2nd Day of Giveaways and I'm gifting you Tumbler Wraps with Power Words--if you missed yesterday's giveaway, go back a page and get it!
-min.jpg)
Mario Brothers Tumbler
Have you seen the Mario Brothers Movie yet?
We saw it last week and enjoyed it! It was full of nostalgia and bright colors. The story line was so simple, it's perfect for all ages.
I was feeling nostalgic about my days playing Super Mario Bros 3 and thought I'd do a sublimation tumbler. Perfect for a little boy or girl!
This would be awesome with a classic controller image or other classic game games!
Learn how easy it is to make a Mario Brothers Sublimaton Tumbler using Hitprex Tumbler Heat Press.
-min.jpg)
Iridescent Holographic Tumbler
Make a resin tumbler that rivals the shimmer of a mermaid tail! This iridescent resin tumbler diy is easy to make and has texture, shine and smoothness. Learn how to make an iridescent resin tumbler in this tutorial.
Resin crafts are so much fun and if you haven't tried a tumbler yet, consider this your sign!
This shiny tumbler is perfect for staying hydrated, mixed drinks or as the perfect handmade gift.
-min.jpg)
Vinyl Name Tumblers
Learn how to personalize skinny tumblers using a Cricut machine and permanent transfer vinyl.
These stunning tumblers make a great last-minute solutions as a handmade gift for teachers, bridesmaids or holidays.
Stainless steel tumblers are so customizable and the perfect crafting medium! You could add flocked vinyl for some texture too!

Glitter Resin Vinyl Tumbler
Are you on the tumbler craze yet? This was my first one and I love the intense glitter! Make a glitter glitter vinyl tumbler for the perfect handmade gift...great for school teachers, friends or family.
Customize them with favorite colors or names and intensity of glitter. It's a great reminder to drink plenty of water each day...or perfect for a warm drink on a cold morning.
-min.JPG)
This cute personalized water tumbler with Cricut vinyl is perfect for staying hydrated--the best way to care for the skin, plus some handmade ombre soap, manicure set and fabulous skin care products from Coola. Coola sent me these fun products to try and I knew they'd make the perfect gift.


-min.jpg)


Comments