
-min.jpg)
HTVRont Cares Charity Event for Girl Scouts!
I was honored to be asked to participate in HTVRont Cares & Tumbler Heat Press Charity event this year!
HTVRont asked me to help give back to my community by creating custom tumblers for a group of people.
I recieved the HTVRont Auto Tumbler Heat Press as well as stainless steel tumbler blanks and sublimation paper, and things to make my set up awesome.
-min.jpg)
Check out my post on the HTVRont Auto Tumbler Heat Press here.
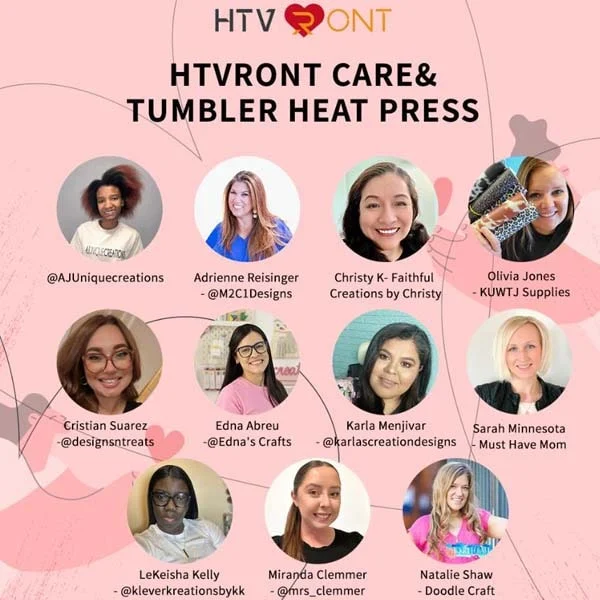
11 DIY enthusiasts in the United States and the Dominican Republic from October 10th to 15th were involved in the HTVRont Care & Tumbler Heat Press event!
I'm excited to be part of this group!
I've been planning and preparing for this big event for more than a month.
I got supplies to set up a work station and make it extra convenient to have everything on wheels.
I love wheeled carts, the utility cart is perfect for all my sublimation supplies.
It's easy to store in my craft room and roll it out as needed for events or working in other rooms.
-min.jpg)
I reached out to the local Girl Scout Troop.
Who would want a custom tumbler more than an adorable group of young girls!?
The group of 12 girls and 5 leaders was just the perfect size group to make custom tumblers for!
-min.jpg)
I remember being young...just hoping to find my name on a keychain in a gift shop. (who am I kidding, I still love seeing my name on things)
I loved customized items and felt so happy with anything that said Natalie.
-min.jpg)
These cute Girl Scouts and a couple of their leaders came to my house and were thrilled with custom tumblers, complete with each of their names.
Our schools were on Fall Break, so some of the girls couldn't make it that night, but I sent their tumblers home with the leasers.
%20small-min.jpg)
I was able to demonstrate how the HTVRont Auto Tumbler Heat Press works so they could all experience the magic!
-min.jpg)
AHEAD OF TIME:
I worked on a 3 different mock-ups of a possible tumbler design for the Girl Scout Troop leaders to decide on.
They liked things about one and things about another, so I reworked the pattern until it had all the elements that they loved.
I love using the glitter background--I was impressed that it translated so well onto a tumbler.
-min.jpg)
Here's all the things I used for Tumbler Making:
- HTVRont Auto Tumbler Heat Press (includes heat resistant gloves)
- Sublimation Paper
- Sublimation Tumbler Blank (20 ounce or 30 ounce)
- Sublimation Printer (set up with sublimation ink)
- Heat Resistant Tape
- Tape Dispenser (optional but totally worth it!)
- Lint Roller
- Paper Cutter
-min.jpg)
Here's everything I used for the Display:
- Hexagonal Metal Hoops in Acrylic Stands
- Blank Sublimation Banner (and these metallic balloon letters from etsy)
- Felt/Hot Glue/Scissors
- HTVRont Mini Heat Press
- 4 Tier Mesh Utility Cart
- Utility Cart on Wheels
- Tiered Wood Cupcake Stand
- 6 Foot Conference Table
- Satin Ribbon
- Butterfly Picks
- Tumbler Rotating Display
Step 1: Printing
I received the list of the names of the girls and customized each one with their name...because everyone wants something custom made just for them.
I used my Epson Eco-Tank Printer and printed out the image on HTVRont Sublimation Printer, after personalizing each and every one with their name. (here's more on setting up a sublimation printer with sublimation ink)
I used the FREE font Adelia for the names running up the tumbler.
Measure the exact tumbler you are using (all tumblers vary in size, even if they are 20 ounce tumblers) and print the image to size.
After printing, use the paper cutter to cut the paper to size.
**NOTE: Sublimation printing is done after reversing the image so the pressed image is the correct direction**
-min.jpg)
Step 2: Clean Sublimation Blank
Use a lint roller to clean dust and debris off the sublimation tumbler blank.
Even the littlest piece of dust will obstruct the image and it will be noticeable in the finished piece.
-min.jpg)
Step 3: Wrap and Tape Paper
Wrap the sublimation paper around the tumbler with the ink side touching the sublimation blank.
The heat will turn the ink to a gas and it will infuse into the blank seamlessly!
Line the seams of the paper up as tight as possible and use heat resistant tape to stick it in place.
-min.jpg)
I have never had an issue with this yellow heat resistant tape, although some people online say the yellow stains the tumblers.
I use it exclusively and have never had an issue.
Tape down each seam completely.
If parts and left untaped, the sublimation image can be foggy or blurry looking.
-min.jpg)
Tape around the top edge of the tumbler and the bottom edge of the tumbler covering all the paper edges.
-min.jpg)
This stage of the process goes pretty quick, but I am glad I wasn't rushed trying to make tumblers for the girl scouts as they waited.
I wanted to make sure they were done to the best quality, so I did them all the day before.
It took about 8 minutes for each tumbler, for the taping and including the heat press time.
-min.jpg)
Step 4: Auto Tumbler Heat Press
I set the HTVRont Auto Tumbler Heat Press to 385*F and set the timer to 200 seconds (just over 3 minutes).
I place the tumbler in the sleeve and pressed the go button.
-min.jpg)
After the full 200 seconds, I rotated the tumbler about 90 degrees and did another 200 seconds.
It took a couple other tries to get the exact right temperature and time...
-min.jpg)
If the black ink starts to look brown or rusty, it's too hot for too long.
**NOTE:
I messed up 2 tumblers...but I'll show you what to do with messed up tumblers in a future post--don't throw them away!
After removing them from the HTVRont Auto Tumbler Heat Press, let the tumbler sit on a hot pad for a few minutes to cool down.
-min.jpg)
Step 5: Reveal!
The reveal is always my favorite part--and I get so nervous just hoping it turns out perfect!
Guess, what!?
Most often, it does!
-min.jpg)
After the tumbler has cooled down, remove the tape and paper, revealing the perfectly sublimated image!
-min.jpg)
This pic looks slightly blurry because it's a screen shot of a video, the tumbler turned out perfect!
-min.jpg)
Then repeat the process another 18 times!
These tumblers would be a really fun favors for a birthday party too--depending on the number you are making, you could make them throughout the party night.
-min.jpg)
Step 6: Finishing Touches
Finish off the tumblers by applying the rubber foot on the bottom, and the cup lid in the top.
The tumblers come with a stainless steel straw and a straw cleaner as well.
-min.jpg)
Party Time!
I tied a satin ribbon around the tumbler box and slipped the straw and straw cleaner in the ribbon.
I stuck a little butterfly pick in there too, because it's so cute.
Then I lined them all up on the conference table so they were ready for the girls to see.
It was a big WOW factor!
-min.jpg)
I wore a HTVRont button I made using their logo.
Did you know HTVRont sells a Button Maker too?
-min.jpg)
Celebrate Good Times!
It's party time.
Everything is set up, I made some yummy treats and invited the Girl Scout troop over to my house to celebrate with me!
%20small-min.jpg)
They were excited to find their name on a tumbler and know it was just for them!
Then I demonstrated the tumbler making process, how to tape on the sublimation paper and put it in the Auto Tumbler Heat Press.
Then the reveal was just as exciting for them as it is for me!
%20small-min.jpg)
Everyone loved seeing the process in action and knowing how their own tumblers were made.
I forget how magical the sublimation process is, because it's so familiar to me, so it was fun to see it through their eyes!
-min.jpg)
The Girl Scouts were so fun to have over!
The quote they put on their tumbler said "I am smart, I am strong and I can do anything!"
I told them that they really can do anything--that for my work, I get to stay at home and craft!
They agreed that it was a pretty awesome job!
-min.jpg)
That's it!
I had such a great time representing HTVRont Care & Tumbler Heat Press event!
I loved sharing my talents with the Girl Scouts, the future Girl Boss leaders and hope it's something they look back on as a fun memory--empowering them to know they can do anything!
Like, Pin and Save!


-min.jpg)


Comments