
-min.jpg)
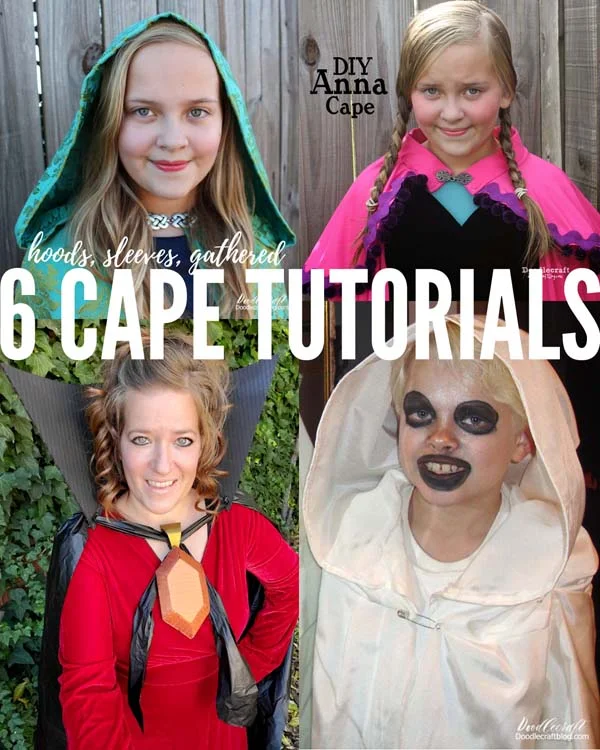
How to Make a Cape in 20 Minutes (Easy DIY Tutorial)
Learn how to make the perfect gathered cape out of fabric for costumes, Halloween, fantasy or cosplay in just a few minutes.
This fun DIY costume cape only has 2 straight line stitches of sewing--so it's a great craft for any sewing skill level and a great idea for every costume!
Only 2 consumable supplies needed...fabric and cord--this is such a simple cape pattern that anyone can make...it can also be made as a no-sew option using fabric glue instead of the sewing machine.
How to make a cape in less than 20 minutes. I made mine in 10 minutes...so I'm over estimating for my readers here!
-min.jpg)
I love how this shimmery cape turned out! Best part--it only took me 10 minutes to make...seriously, I knew I wanted to make this cape and wear it to an event...I just had half hour before I had to leave and I got it finished, pictures take and made it to the even on time and looking fabulous!
This is a LONG cape, floor length, but you can alter the length easily, just by cutting the fabric and sewing a bottom edge hem.
-min.jpg)
This cape is a perfect accessory for a Halloween costume, fantasy cosplay, renaissance faires and more!
I wore this cape to church because it is just so much fun--and it looks fabulous over a tee shirt and jeans too!
I love capes. They change and enhance the look of every costume. They add some amount of warmth--for those of us that experience Halloween in the cold season!
-min.jpg)
Let's talk about fabric.
Here's the trick for making a quick cape...use fabric that does not need to be hemmed around the edges. Find a material that does not fray.
This fabric cut was 45 inches tall and I had them cut me 2 yards, so 72 inches wide.
21 years ago!
That's right! I bought this fabric in 2001 before my first child was born!
It's old enough to die for its country. It's old enough to vote...and barely old enough to buy dry ice and spray paint!
So it was time to use it for something amazing.
Do you have fabric just sitting there that is too nice to actually use?
Make a cape for the perfect costume accessory today!
-min.jpg)
Here you can see the gathered collar, this cape does not have a hood, but I have other posts with hooded capes, like this one!
Once Upon a Time's Belle Cosplay
Pull on the tied ends on both sides and it cinches and gathers absolutely beautifully at the neck of the cape.
You can add a clasp, a piece of velcro, a brooch or just tie it in a knot like me.
-min.jpg)
I love the black with the deep blue/violet shimmer. It looks amazing in the sunshine!
Let's talk about capes!
The history of capes is rich and diverse, evolving from practical garments to symbolic and fashion statements.
Originally, capes served functional purposes, providing warmth and protection from the elements in various cultures throughout history.
In ancient Rome, the toga was a draped garment that could be considered a precursor to the cape.
During the Middle Ages, capes became more stylized, with knights wearing decorative cloaks over their armor.
The Renaissance saw the emergence of capes as fashionable accessories, often worn by royalty and nobility.
In the 18th and 19th centuries, capes remained popular, with voluminous cloaks becoming a symbol of elegance and refinement.
The 20th century saw capes adapted for practical purposes in military uniforms and rainwear.
Superheroes in comic books and movies popularized capes as iconic elements of their costumes, symbolizing heroism and power.
Meanwhile, in the fashion world, designers like Coco Chanel embraced capes as chic and versatile pieces.
Today, capes continue to be both functional and stylish.
Designers regularly incorporate capes into runway collections, and individuals use them for everything from formal events to everyday wear.
The history of capes reflects their enduring appeal, combining utility, symbolism, and fashion throughout the ages.
-min.jpg)
Supplies Needed to Make a DIY Cape in Less Than 20 Minutes:
- 2 Yards of Fabric (for an adult) SEE BELOW
- 2 Yards of Cord (I'm using paracord)
- Sewing Machine
- Bodkin (or Safety Pin)
- Lame is awesome costume material, sparkles, doesn't fray and comes in all colors
- Cool fabric with stars and moons in 1.7 yard length
- Iridescent Hologram Fabric (cut into 1 yard pieces, so it would just need one additional seam)
- Hologram Metallic Stretch
- Spider Web Lace Fabric
-min.jpg)
Step 1 to Make a DIY Cape: Iron
Pre wash 1-2 yard of fabric and iron it...if you want.
I didn't, although I should have because of it's age and all, still I was in a hurry and it didn't get laundered...and it still worked great.
-min.jpg)
Step 2 to make a cape: Fold
Lay the fabric down flat on a large surface, with the right sides facing down.
I am not going to sew the sides or bottom edges of this cape...it will have the raw edge of the fabric.
If you are planning on sewing up all those edges, begin the cape making process with folding over the edges twice and stitching them down.
Then fold the casing as follows:
Fold over the top edge of the fabric the entire length of the wide fabric, creating a overlap of 2 inches.
-min.jpg)
Step 3 to Make a Cape: Pin
Pin the folded edge if desired, this is highly recommended for beginner sewers...I rarely pin or clip anything and sometimes it works out great for me...other times, it would have been worth the little bit of time to just pin it.
If you are in a big hurry like me (trying to get this cape done in the few minutes before church so I can wear it) then don't worry about pins--you've got eyeballs--right?
-min.jpg)
Step 4: How to Sew a Cape
Sew a long stitch down the folded edge as pictured above. (this is sewing the part of the cape that will rest around the neck)
I am using fabric that does not fray or unravel, because of this, I am not folding under the fabric edge, and I'm just leaving the selvage edges instead of seaming them.
If your fabric does fray, fold over the cut edge and hem it before sewing the casing.
Next step, sew another long stitch down the middle of the entire sew casing, creating a double casing, as pictured below.
-min.jpg)
Boom! Such an easy cape pattern! 2 simple stitches down the straight edge of the black cape.
Double casing is sewn. Ends on both sides of the neck hole are open.
-min.jpg)
Step 5 to Make a Cape: Cord
Now cut the 2 yards of paracord in 1 yard lengths so there are 2 pieces.
Melt the ends with a lighter so they don't fray.
-min.jpg)
Step 6 of Making a Cape:
Put the bodkin on the end of one piece of paracord.
You can use a safety pin if you don't have a bodkin.
Essentially you are going to thread the paracord down the length of one casing, and back through the other...repeated on both sides.
It will bunch and gather quite a bit while working, so having thinner fabric is a real nice feature.
-min.jpg)
Thread the paracord down one side of the casing using the bodkin to push it through effortlessly.
-min.jpg)
Once the paracord and bodkin come out the other end, end it right back to the first side but going through the other side of the casing.
Then tie the paracord in a knot at the end of the neck area.
-min.jpg)
Repeat the process for the other paracord string but this time starting on the opposite side.
-min.jpg)
Now, when you pull on the tied ends of the paracord, the looped paracord pulls against the other and creates the perfect gathered collar!
The ties cinch the fabric down perfectly creating gorgeous gathers in the simple rectangle of fabric.
This is great for a larger cape and perfect to scale down for smaller capes as well.
-min.jpg)
That's it!
Now the cape is ready to gather and tie around your neck.
You could also use a clasp, pin or brooch to secure the ends together for a more decorative look.
-min.jpg)
The size of this cape is perfect. It fits my height to a tee, so I didn't even need to trim a thing.
The width is perfect too, the soft fabric gathers great at the back of the cape and neck.
Alter the fabric based on the person you are designing it for.
The sunlight makes that shimmer so bright. It's sheer fabric, which is a great look for the cape too!
-min.jpg)
How to EMBELLISH A CAPE:
Let's talk about making it much more fancy.
This easy tutorial is perfect for light weight fabrics because of the intense gathering at the neck.
If you are hoping to use something thick, like a brocade, use one of my hooded patterns below.
Again if you don't want to sew, there is a no sew option by using fabric glue or even hot glue...just glue the center casing first and the edge of the casing second. Thread the same.
- This is great for an easy Superhero cape, it can be made to velcro or pin on the shoulders of a child's costumes, so it doesn't wrap around the neck.
- This can can have 2 pieces of fabric, an outer cape and an inner cape...or a different colored lining. Just sew the layers together at the neck casing stitches.
- The can be altered to fit any size, just use a tape measure for the persons height.
- Sew double folded bias tape all around the edges of your cape and across the base of the cape for an awesome and complete finish
- This technique could also be made with a half circle cape, it would taper higher in the front to low hanging on the rest of the cape and look fabulous
-min.jpg)
The perfect cape from start to finish in just 10 minutes--longer if you use pins while you work.
Take your time to make the perfect cape that you will use year after year for formal events, costumes and just for fun.
You'll love this cape for the perfect costume accessory!
-min.jpg)

Here's some other capes you might be interested in making!
Princess Anna Cape
Capes are such a great idea for every costume, and they are great to add to costumes to give the wearer a little more warmth, it's cold here in October. (Even a little mermaid costume would look great with a cape!)
.JPG)
Vampire Costume made with Cardboard!
Make a costume out of boxes and plastic table cloth--this is a great way to see the structure of a cape and how to create it out of any material.
Costumes and capes do not have to be expensive or cheap looking.
Make a fun costume out of supplies that are likely on their way to the land fill.

Once Upon a Time's Belle Cosplay
Even though Once Upon a Time was so 2011, this Belle cape is dynamite--classic and usable every year!

Jedi or Wizard Robes
Jedi robes double as wizard robes, renaissance, medieval, Kingly, Biblical time period, old olden days, and much more!
Robes are a staple in our costume wardrobe!
These are a little more complicated because of the box pleats on the chest, the additional fabric pieces, back pieces and the sleeves...but the look is perfect for so many costumes.
These capes can also be lined with a different color than the outer fabric, perfect for Hogwarts robes.

Harry Potter Cosplay: Harry Potter
Here's a great last minute Halloween Costume--with the maroon lined black robe. (same pattern as the jedi robe above)
Harry Potter is iconic for his round glasses and lightning bolt shaped scar.
It's easy to create this costume for super cheap and rock this awesome cosplay!
-min.JPG)
Again, a great cape makes the costume, this one is hooded and no sleeves or gathers.
The top edge of fabric is cut with the neck opening and the hood sewn in, so it hangs beautifully when not on the head.
This fabric is a little too slick to wear the hood unless clipping it on the hair.


Comments