How to Make a DIY Spinner Prize Wheel!
This simple DIY craft making a Spinner Prize Wheel will make you a Rockstar!
Don't you just love spinning a prize wheel and hoping you land on the jackpot prize at the fair or other event?
A spinning wheel is so much fun and this DIY pattern is easy for anyone to make with little investment.
I thought they would be fun for backyard parties, trunk-or-treats, events and even chores--so I invented this DIY version that you can make for all your events!
It features a dry erase surface in pie slices, so all the prizes, activities or chores can be written on and then changed!
This fun post is a throwback to 2013--when my kids were little and loved everything I did--I really was a rockstar back then.
This prize wheel is still being used a few times a year and is in great shape--this is the craft that keeps on giving.
It's traveled with us through 3 different moves--even one across the country, it's been used at tons of trunk-or-treats, parties and church activities and it's been such a fun blog post--and goes viral every Spring/Summer time!
Anyone that has watched "The Wheel of Fortune" or "The Price is Right" has longed to spin that giant prize wheel.
When we went to the fair last summer, there were booths set up with smaller, but awesome prize wheels that the kids got to spin...once. Only once? I vowed to remedy that.
Say hello to the DIY spinner prize wheel!
The spinning prize wheel offers universal enjoyment by combining anticipation, vibrant aesthetics, and communal engagement.
Its dynamic, colorful display creates a festive atmosphere, appealing to all age groups. Participants experience a shared sense of excitement, fostering connections and making it a social focal point at events.
The element of surprise adds a playful and unpredictable dimension, turning each spin into a lively adventure.
In essence, the spinning prize wheel transcends its utilitarian role, transforming any occasion into a memorable and enjoyable experience where the thrill of chance intertwines with the joy of shared moments.
Supplies for Spinner Prize Wheel:
- Wooden Lazy Susan
- Board slightly larger than the spinner
- Wooden dowel, 1/2 inch wide and about 3 inches long
- Zip Tie
- 1" nails
- Dry Erase Vinyl
- Acrylic Craft Paint/Paintbrush
- Wooden 2" ball
- Washi Tape
Tools Needed:
- Drill Bit the size of the wooden dowel (a forstner bit is great)
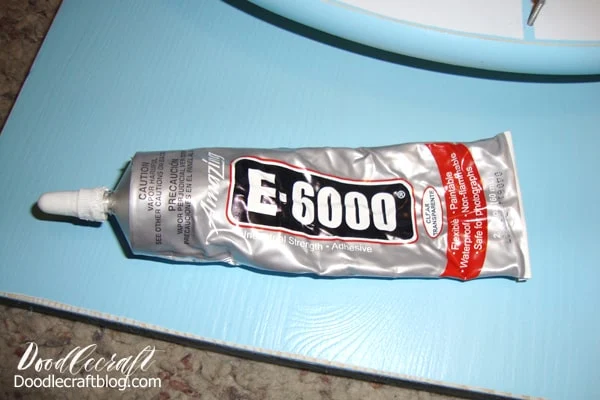
- E6000 glue
- Hammer
Step 1: Dowel
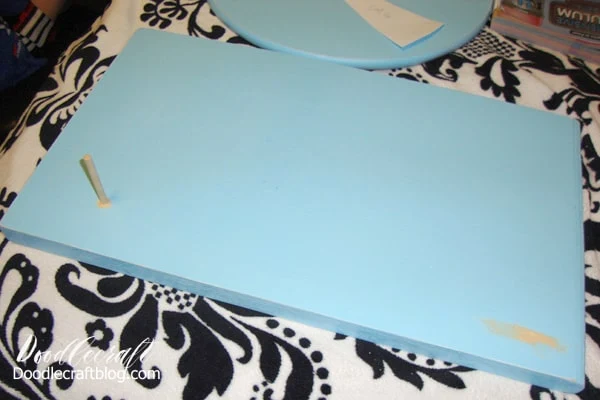
Begin by setting the Lazy Susan on the board and marking where the wooden dowel should go. About 1 inch away from the Lazy Susan and off to the right side.
Then drill about a 1/2" hole for the dowel to stick inside. Then paint the board and Lazy Susan with acrylic craft paint and let them dry.
Next we need the dry erase vinyl.
Step 2: Dry Erase Vinyl
I've done these boards a few ways now, and this is the best way yet.
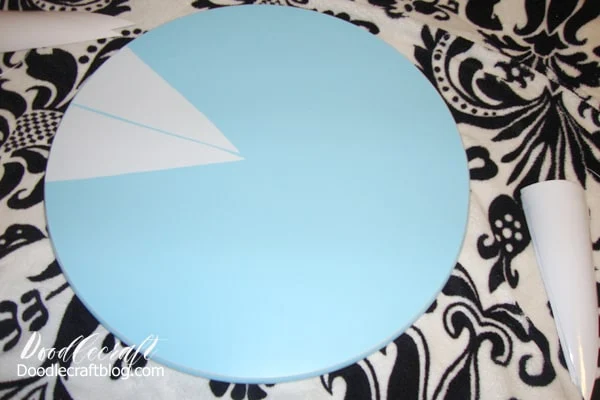
Cut a piece of vinyl the size of the Lazy Susan and trace around it on the backside of the vinyl.
Then cut out the circle and cut an additional half inch or so from the edge of the wheel. Then peel off the paper backing and place the vinyl on the top of the Lazy Susan.
It's not perfectly straight, but no big deal.
Step 3: Washi Tape or Vinyl Strips
Next, use some fun Washi tape to make the section divisions on the front of the spinner.
(The thinner strips of Washi tape, the better). Hot glue the ends of the washi tape down firmly.
Step 4: Small Nails
Next, hammer those 1 inch nails in between each "pie piece" section all around the lazy susan board. Let them stick up about 3/4th's the length of the nail.
They just need to be tacked in enough to hold firmly in place.
Step 5: E6000 Gluing Wheel
Now turn over the Lazy Susan and add E6000 Glue all over the part that sits on the table.
Then press it into place on the wooden board and let it set for 4 hours...or to be safe, overnight.
Be patient and don't try to spin it until it's completely dry. Trust me on this--or it will wiggle loose and all the work will be lost.
Let the glue dry overnight to be safe.
Step 6: Zip Tie
Scrunch a zip tie onto the top of the dowel...cut the zip tie so it is long enough to hit all the nails as they spin by!
It also makes a very satisfying clicking sound--just like Wheel of Fortune!
Step 7: Center Knob
Now sand one side of the wooden ball smooth, so it sits firmly on the surface of the spinning wheel.
Then use E6000 to glue it in the center of the spinner wheel.
Tips and Tricks:
For the first spinner wheel I made, I cut these triangle pie slices out of the vinyl. It was hard to line them up perfectly and the tips, edges and corners of them lifted after a while.
This is why I recommend the full vinyl with washi tape as outlined above.
Washi tape will loosen up after time as well, so vinyl tape is good, like for pinstriping a car!
Use a dry erase marker to write your hearts desires onto the triangles!
The things you write on the dry erase board can totally depend on the party or reason to have the spinning wheel out at a party.
It can be the perfect Summertime prize wheel after chores are finished, party favors for a party or as the perfect advertising novelties at a fair or event!
Everyone, even adults, literally everyone, wants to spin the prize wheel!
Have the kids spin the wheel from one nail or from the ball in the center. They will have a tendency to touch the dry erase vinyl and mess up the writing from time to time.
It's an easy fix though--just keep those dry erase markers on hand!
Fun ideas to write on the spinner prize wheel:
- Chores
- Things to do/places to go this Summer
- 30 second activities (run, jump, crawl...)
- Church lessons
- Birthday party games
- Trunk-or-Treat
- Carnivals or Fundraiser prizes!
- Bucket list items
- Books to read this Summer
- Party favors
My kids love to play with it--spinning the wheel is a reward in its own!
I think they each spun the wheel 100 times---and did lots of jumping jacks, push-ups and army crawls without complaint!
Erases easily. I wipe clean with a baby wipe. Wipe from the center to the edge.
Sometimes the thin plastic sheet on the top of the vinyl starts to peel...no problems so far, but they will be easy to replace when they are too worn.
Again, when the dry erase vinyl gets worn out or peels off, it can be replaced with another piece of dry erase vinyl.
I made this spinning prize wheel back in 2013 and I still have it, use it and love it today!
Ultimate Prize wheel!
In closing, if you make this DIY Spinner Prize Wheel, you will be the envy of your friends...
You'll get high 5's wherever you go...you'll be the coolest to your kids...
they will actually want to hang out with you...
because you're a totally awesome ROCKSTAR!
Like, Pin and Share!
Here's some other fun carnival/Summer fun crafts!
Altoid Fishing Kit
Bean Bag Toss


-min.jpg)


Comments
http://funfamilycrafts.com/spinning-wheel/
If you have other kid-friendly crafts, we'd love it if you would submit them. If you would like to display a featured button on your site, you can grab one from the right side bar of your post above. Thanks for a wonderful project idea!
http://squeezeyourcreativejuice.blogspot.com/2013/06/the-greatest-fun-on-earth-new-catalog.html
Thanks for the tutorial...you have a new fan!
Sheena Perron
{Little LDS Ideas}