Posts

Showing posts from July, 2020

Cricut Infusible Ink Tote Bag Craft

Cricut Infusible Ink Tote Bag Craft Have you given Cricut Infusible Ink a try yet? It's so amazing--add a seamless image on a shirt, tote, or pillow! This cute Motherhood tote would make a great gift and it's quick to make. Supplies Needed for Infusible Ink Tote: Cricut Cutting Machine Cricut EasyPress and Mat Cricut Infusible Ink Transfers Cricut Infusible Ink Blanks Image Begin by designing the image you love in Cricut Design Space. Then place the Infusible Ink Transfer Sheet on the Cricut Mat. Try not to touch it too much. Place the Cricut Tote Bag Blank on the EasyPress Mat and clean off any lint with a lint roller or some painters tape. Cut the image in reverse or the "mirror image" setting. Then weed the extra Infusible Ink Transfer away from the image. Warm up the tote bag with the EasyPress, then place the image directly on the bag, don't shift it around. Then place the included butcher paper on t

Spray Painted Rolling Storage Cart DIY

Spray Painted Rolling Storage Cart DIY! I love to keep things organized. I have a craft room, but it's basically a craft storage room. I pull out the supplies I need into my family room, where I have a giant craft table, and work from there. If I decide to clean things up, I can put them back into my craft room. This is a pretty sweet system...and I have a ton of craft supplies! So I started using a few rolling carts like this. I can put all my Cricut crafting stuff in one, and wheel it out when I need it. I also have another cart full of my Tombow art supplies. I got a couple rolling carts from Oriental Trading and decided to paint one of them Mermaid, or teal. It's a quick DIY that makes me happy. Let's get started!   Supplies Needed: We R Memory Keepers A La Cart Colorshot Spray Paint in Mermaid I used Mermaid paint because I love teal...but pick the color you love most. Begin by opening up the box and assembling the cart. It's just easier to

Gold Leaf Necklaces with Resin Jewelry Clay

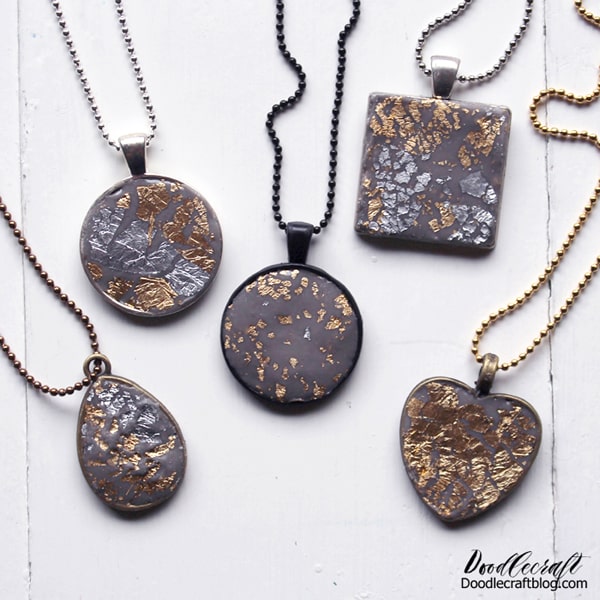
Gold Leaf Necklaces with Resin Jewelry Clay Have you given resin crafting a try yet? There are so many types of resin. These gorgeous necklaces are made using a resin-based jewelry clay. Make a stunning necklace using Jewelry Clay with gold and silver leafing. This post was live on  Resin Crafts Blog  previously as part of their design team. SUPPLIES NEEDED FOR JEWELRY CLAY NECKLACES: Envirotex Jewelry Clay Disposable Gloves Pendant Bezels & Chains Alcohol Ink (for color) Gold & Silver Leaf Hobby Knife Rolling pin or Pen Step 1: Mixing Resin Clay Begin by opening the jewelry clay and read the directions carefully. Wear gloves. Get the same size of piece from each tub. Mix the clay together until there is no marbling remaining. Step 2: Adding Color Add a couple of drops of Alcohol Ink to add some color to the clay. Do not add too much or the clay will change chemically and won’t set up. Mix the color int