
-min.jpg "How to Engrave Wood Spoons with LOKLiK iEngrave Laser")
How to Engrave Wood Spoons with LOKLiK iEngrave Laser
Learn how to easily engrave wooden spoons using the new LOKLiK iEngrave laser cutting machine.
LOKLiK has done it again, giving us an affordable entry level laser machine, that gives enough diode laser power to customize, cut and create wonderful pieces.
I'm super excited to get a chance to review the LOKLiK iEngrave and love how these wooden spoons turned out, perfect for a personal touch on a gift!
I received this product in exchange for review, all opinions are my own.
Let's get started!
-min.jpg "How to Engrave Wood Spoons with LOKLiK iEngrave Laser")
LOKLiK iENGRAVE LASER ENGRAVING MACHINE:
The LOKLiK iEngrave did awesome etching into these wooden spoon handles, it's just 10W power, but it can do so much!
The LOKLiK iEngrave All-in-One Kit is on sale right now, use code: IE170 (until 9/27/25) on the HTVRONT website.
HERE'S SOME DETAILS ABOUT THE LOKLiK iENGRAVE:
- The All-in-One Kit comes with the enclosed covered laser, the air assist, the honeycomb riser, rotary attachment and extender legs
- 10W Diode Laser
- Workable area is 11.8 inches square
- Works with a regular 120 Volt outlet
- Pre-Assembled Laser (just slide it in and connect the wire cable)
-min.jpg "How to Engrave Wood Spoons with LOKLiK iEngrave Laser")
PROS AND CONS OF THE LOKLiK iENGRAVE:
PROS:
- Beginner Friendly
- Easy Setup
- Engraving Speeds up to 30,000mm/min
- Works with over 300 materials (wood, acrylic, leather, etc)
- Works on Curved Surfaces with the Rotary Attachment
- Works with Softwares: LaserGRBL, LightBurn and LOKLiK app
- Wifi Connects to Device
- Runs Quietly
- Lightweight and Portable
- 11.8 Square Working Surface
- Safety Features (key, emergency button and switch)
- All-in-One Kit is LESS than $1000
CONS:
- Only works on Apple device LOKLiK app (not computer)
- Only 11.8 Square Working Surface (which I also listed as a pro)
-min.jpg "How to Engrave Wood Spoons with LOKLiK iEngrave Laser")
Let's talk about the LOKLiK iEngrave size.
I received the standard kit, which is the laser engraver without the cover.
It's lightweight and portable, so that gives me options that I can't do with a heavy machine with the base and cover.
The size is really compact and wonderful for a space-saving creator, at some point you may want a bigger laser cutting bed, but the nearly 12 inch square is perfect for most projects!
If you have never used a laser machine, this is a great beginner friendly laser that will satisfy all your laser needs for years.
-min.jpg "How to Engrave Wood Spoons with LOKLiK iEngrave Laser")
ENGRAVE WOODEN SPOONS:
For my first project I am engraving a set of wooden spoons, similar to these on Amazon.
I wanted these to have a fun personal touch so I could give them as a wedding gift to a friend.
I used my ipad and the LOKLiK app to connect my iEngrave and begin engraving.
I set the LOKLiK iEngrave on some cardboard and had the laser engrave the text right on the cardboard.
Then I used a little tacky putty and stuck the wooden spoon right over the top of the engraving, so it lined up perfectly.
-min.jpg "How to Engrave Wood Spoons with LOKLiK iEngrave Laser")
Next, I don't think I set the power and speed to quite the right setting, but it was easy to just hit the "start" button on my ipad a second time and the laser engraves in the exact same spot, so you can make the engraving as deep and dark as you want with a few more passes.
-min.jpg "How to Engrave Wood Spoons with LOKLiK iEngrave Laser")
I repeated the simple process for all 4 of my wooden spoons and the entire process took about an hour or so.
I was pleased with the results and am impressed with the price to value ratio!
If you've been wanting a laser, this one is highly recommended.
I do hope they update their software to be able to use straight from the computer, but most people use phones, so that seems like maybe something I'll have to adapt to.
-min.jpg "How to Engrave Wood Spoons with LOKLiK iEngrave Laser")
There's lots of helpful advice from the LOKLiK community too, so when you buy your iEngrave, be sure to join the official facebook group, so you can ask questions and post successes for others to enjoy.
NOTE: If you are going to cut materials, get the honeycomb riser so you don't cut into your table.
-min.jpg "How to Engrave Wood Spoons with LOKLiK iEngrave Laser")
My wooden spoons outline engraved read:
- Homemade because I licked the spoon!
- Homemade because I stirred it!
- Homemade because I say so!
- Homemade because I added extra sprinkles!
What would you engrave on wooden spoons?
-min.jpg "How to Engrave Wood Spoons with LOKLiK iEngrave Laser")
That's it!
Engraving with the LOKLiK iEngrave is easy, user friendly and successful in just minutes!
With over 300 materials compatible with this 10W diode laser, you will have no end of fun things to create with the iEngrave.
Get the LOKLiK iEngrave All-in-One Kit while they are still 17% off, use code: IE170 before (9/27/2025 when the price goes up)
Like, Pin and Save!
-min.jpg "How to Engrave Wood Spoons with LOKLiK iEngrave Laser")
Check out these other GREAT Posts about LOKLiK and HTVRONT next level heat presses--plus lots of tutorial crafts!
HOW TO USE THE NEW LOKLiK iCRAFT CUTTING MACHINE
Learn how to use the newest LOKLiK iCraft electronic cutting machine.
It's easy to set up and really just plug and play but we'll go through the features and what to expect when you are using it, plus a couple projects.
If you are looking for a great electronic crafting machine, look no further.
-min.jpg "How to use the New LOKLiK iCraft Cutting Machine")
HTVRONT Manual Heat Press Review for Sublimation Tote
Learn how to make a sublimation and iron-on tote bag using the new HTVRONT Manual Heat Press, perfect for all kinds of heat needing crafts.
This manual heat press is my favorite for shirts, totes, flat sublimation blanks and much more.
It's compact, easy to use, versatile heat temperature and time dial and comes in a variety of colors!
-min.jpg "HTVRONT Manual Heat Press Review for Sublimation Tote")
Learn how to make a sublimation and iron-on tote bag using the new HTVRONT Manual Heat Press, perfect for all kinds of heat needing crafts.
This manual heat press is my favorite for shirts, totes, flat sublimation blanks and much more.
It's compact, easy to use, versatile heat temperature and time dial and comes in a variety of colors!
HTVRONT Auto Heat Press 2 Review and Sublimation Sequin Pillow
Sublimate a handsome Squidward reversible sequin pillow for the perfect White Elephant gift idea, funny gift for a friend who has everything, or just to make your visitors laugh!
This sublimation pillow craft is easy and so much fun even if you aren't a big fan of Spongebob, you can make it of whatever you like!
I love giving handmade gifts and sublimation makes it a breeze--add a personalized photograph, a child's drawing or anything you can print off onto something amazing!
Plus, I'm reviewing the new HTVRONT Auto2 Digit Heat Press, and I'll tell you all about it in this post--be sure to watch the video tutorial too!
New HTVRONT auto heat press
-min.jpg "HTVRONT Auto Heat Press 2 Review")
Sublimate a handsome Squidward reversible sequin pillow for the perfect White Elephant gift idea, funny gift for a friend who has everything, or just to make your visitors laugh!
This sublimation pillow craft is easy and so much fun even if you aren't a big fan of Spongebob, you can make it of whatever you like!
I love giving handmade gifts and sublimation makes it a breeze--add a personalized photograph, a child's drawing or anything you can print off onto something amazing!
Plus, I'm reviewing the new HTVRONT Auto2 Digit Heat Press, and I'll tell you all about it in this post--be sure to watch the video tutorial too!
New HTVRONT auto heat press
HTVRONT Hat Heat Press
Meet the New HTVRONT Hat Heat Press!
The HTVRont Hat Heat Press is arguably the best compact hat heat press on the market!

HTVRONT Mini3 Heat Press Review (Small Project)
Learn how to make an rose gold metallic iron-on tote using the new heat press mini.
The HTVRONT Mini3 Heat Press is the perfect small project heat press for iron-on, HTV, heat transfer projects, DTF Transfers and even gets hot enough for sublimation!
This post is a review on the Mini3 Heat Press and a quick heat transfer vinyl tote project to showcase it's awesome abilities!
-min.jpg)
Learn how to make an rose gold metallic iron-on tote using the new heat press mini.
The HTVRONT Mini3 Heat Press is the perfect small project heat press for iron-on, HTV, heat transfer projects, DTF Transfers and even gets hot enough for sublimation!
This post is a review on the Mini3 Heat Press and a quick heat transfer vinyl tote project to showcase it's awesome abilities!
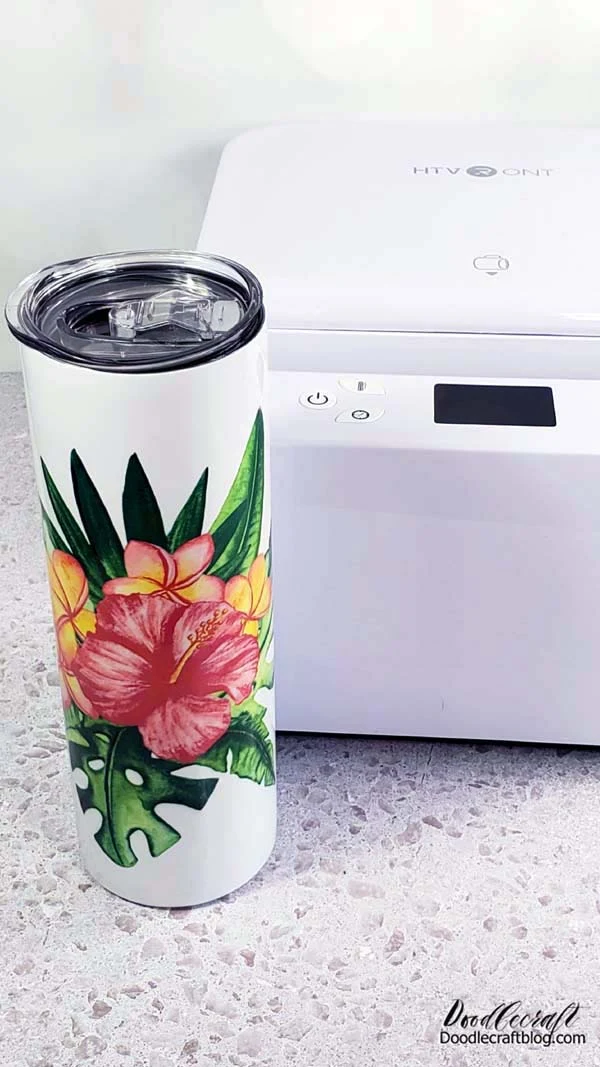
HTVRONT Auto Tumbler Heat Press
Making sublimation tumblers is so much fun!
There really is something so amazing about designing something or printing something off and then having it sublimated like magic onto a surface blank.
I love making sublimation things for custom gifts; perfect for teachers, birthday's, holiday gifts and more!
Learn how easy it is to use the HTVRont Auto Tumbler Heat Press to make custom tumblers with ambitious designs and mugs for every occasion!
Better than the Cricut mug press because it can do glass cans and tumblers too!
-min.jpg)
Making sublimation tumblers is so much fun!
There really is something so amazing about designing something or printing something off and then having it sublimated like magic onto a surface blank.
I love making sublimation things for custom gifts; perfect for teachers, birthday's, holiday gifts and more!
Learn how easy it is to use the HTVRont Auto Tumbler Heat Press to make custom tumblers with ambitious designs and mugs for every occasion!
Better than the Cricut mug press because it can do glass cans and tumblers too!
Follow me on social media, instagram and tiktok - make craft tutorials regularly!


-min.jpg)


Comments