
-min.jpg "How to use HTVRONT Manual Hat Heat Press Review")
How to use HTVRONT Manual Hat Heat Press Review
Learn all about the HTVRONT Manual Hat Heat Press and let's do a darling layered bow hat together.
This easy to use heat press is perfect for adding leather patches, heat transfer vinyl, sublimation prints, DTF transfers, puff HTV and much more to hats!
If you are looking for a solid workhorse with all the pressure needed to make hats a success, look no further, this is it!
Let's get started!
-min.jpg "How to use HTVRONT Manual Hat Heat Press Review")
HTVRONT sent me this manual hat heat press to review and try out, and I absolutely love it!
I'll be using it in a few upcoming crafts too! It comes with suction cups to secure to the work table, it comes with a large curved platen already mounted and an additional smaller curved platen for smaller hats.
I was super happy to receive the BLUE machine, but it comes in white as well.
-min.jpg "How to use HTVRONT Manual Hat Heat Press Review")
Let's make a layered bow on a distressed hat for a fun, quick and easy DIY!
SUPPLIES NEEDED FOR LAYERED BOW HAT DIY:
affiliate links
- HTVRONT MANUAL HAT HEAT PRESS
- DISTRESSED HAT (OR ANY HAT BLANK)
- PINK HEAT TRANSFER VINYL (comes in multicolor htv roll pack)
- HOLOGRAPHIC PINK HEAT TRANSFER VINYL
- CRICUT CUTTING MACHINE
- TEFLON OR BUTCHER PAPER
- HEAT RESISTANT TAPE
- HEAT RESISTANT TAPE DISPENSER (OPTIONAL)
-min.jpg "How to use HTVRONT Manual Hat Heat Press Review")
STEP 1: CUT THE HEAT TRANSFER VINYL
I found this darling layered bow in Cricut Design Space, just by typing in "bow" in the search.
I love the 2 layers and it's delicateness...is that a word?
I decided to do a bright pink bow with a holographic wispy outline, measure the desired open space on the hat and scale the image to that size.
As you are setting up your project in design space, remember to mirror the image and place the HTV on the mat upside down...or color facing down.
-min.jpg "How to use HTVRONT Manual Hat Heat Press Review")
I put both pieces of scrap iron-on vinyl on my mat and set the image to the same color, this way I don't have to change mats.
Then lined it up so the image would cut on the piece and sent it to cut.
-min.jpg "How to use HTVRONT Manual Hat Heat Press Review")
STEP 2: WEED THE VINYL
After cutting out the HTV, weed the excess vinyl using a hook tool.
-min.jpg "How to use HTVRONT Manual Hat Heat Press Review")
Go carefully on the thin lines of the detailed bow to make sure you don't tear the heat transfer vinyl in a critical place.
-min.jpg "How to use HTVRONT Manual Hat Heat Press Review")
Now the bows are ready to adhere to the hat using HTVRONT Manual Hat Heat Press.
-min.jpg "How to use HTVRONT Manual Hat Heat Press Review")
STEP 3: HEAT UP THE HTVRONT Manual Hat Heat Press
Now set the heat temperature and the time.
Simply press the "Sunshine" button and then arrow up and down to change the temperature.
HTVRONT has an amazing chart of the exact times and temperatures to heat your hat, so check out that form on this page here.
I'm doing 300*F and 15 seconds, with a cold peel.
-min.jpg "How to use HTVRONT Manual Hat Heat Press Review")
STEP 4: PRESS THE FIRST LAYER ON HAT
Place the heat transfer vinyl on the hat and tape it in place with the heat resistant tape.
Then place the hat on the hat stand portion of the heat press.
-min.jpg "How to use HTVRONT Manual Hat Heat Press Review")
Cover the hat with a ptfe teflon sheet, butcher paper, parchment paper or other non stick cover.
-min.jpg "How to use HTVRONT Manual Hat Heat Press Review")
Then clamp the manual hat heat press down and adjust the pressure with the knob as needed.
-min.jpg "How to use HTVRONT Manual Hat Heat Press Review")
The machine will beep when the time counter runs down to zero and then lift up the handle and remove the hat.
Let the hat cool down completely before removing the carrier sheet, then peel it off.
-min.jpg "How to use HTVRONT Manual Hat Heat Press Review")
There are a few little wrinkles here, but I think the second pressing will help smooth those out.
-min.jpg "How to use HTVRONT Manual Hat Heat Press Review")
STEP 5: SECOND HEAT TRANFER PRESS
Now line up the holographic vinyl over the top of the pink vinyl, but slightly to add to the distressed look.
Secure it with heat tape.
-min.jpg "How to use HTVRONT Manual Hat Heat Press Review")
Then line up the hat on the press, cover with teflon, and clamp it down for the recommended time.
-min.jpg "How to use HTVRONT Manual Hat Heat Press Review")
After the beep, remove the hat and let it cool completely before peeling off the tape and carrier sheet.
-min.jpg "How to use HTVRONT Manual Hat Heat Press Review")
Then remove the cover for the perfect heat transfer layered hat reveal...except mine is blurry! lol!
-min.jpg "How to use HTVRONT Manual Hat Heat Press Review")
There, much better!
I love the holographic shine of the wispy lines and the bold pink!
This hat looks like it's ready for October (Breast Cancer Awareness Month) or any day of the week.
It's beautiful, fast to make and makes an awesome gift!
-min.jpg "How to use HTVRONT Manual Hat Heat Press Review")
Check out HTVRONT (and LOKLiK) website for lots of great deals on the auto tumbler heat press machine, sumblimation paper, HTVRONT auto heat press machine, sticker paper, sublimation ink, blank hat blanks, multi-color htv, sublimation paper, heat tape and materials and much more.
There's always super valued bundle promotions--and if you join the mailing list, there's typically a benefit of saving $$ on your great value bundle order.
Plus, free shipping for orders over just $39.
-min.jpg "How to use HTVRONT Manual Hat Heat Press Review")
That's it!
Making a hat with the HTVRONT Manual Hat Heat Press is easy, effortless and fast!
I love that I can give an item a custom touch in just a couple of minutes.
This hat press would be great if you are making the whole ball team's uniform hats...or just making one as a gift here and there.
I'm really excited about all the hat possibilities!
Like, Pin and Save!
-min.jpg "How to use HTVRONT Manual Hat Heat Press Review")
Check out these other GREAT Posts about LOKLiK and HTVRONT next level heat presses--plus lots of tutorial crafts!
How to use HTVRONT Manual Hat Heat Press Review
Learn all about the HTVRONT Manual Hat Heat Press and let's do a darling layered bow hat together.
This easy to use heat press is perfect for adding leather patches, heat transfer vinyl, sublimation prints, DTF transfers, puff HTV and much more to hats!
If you are looking for a solid workhorse with all the pressure needed to make hats a success, look no further, this is it!
-min.jpg "How to use HTVRONT Manual Hat Heat Press Review")
Learn all about the HTVRONT Manual Hat Heat Press and let's do a darling layered bow hat together.
This easy to use heat press is perfect for adding leather patches, heat transfer vinyl, sublimation prints, DTF transfers, puff HTV and much more to hats!
If you are looking for a solid workhorse with all the pressure needed to make hats a success, look no further, this is it!
How to Engrave Wood Spoons with LOKLiK iEngrave Laser
Learn how to easily engrave wooden spoons using the new LOKLiK iEngrave laser cutting machine.
LOKLiK has done it again, giving us an affordable entry level laser machine, that gives enough diode laser power to customize, cut and create wonderful pieces.
I'm super excited to get a chance to review the LOKLiK iEngrave and love how these wooden spoons turned out, perfect for a personal touch on a gift!
-min.jpg "How to Engrave Wood Spoons with LOKLiK iEngrave Laser")
Learn how to easily engrave wooden spoons using the new LOKLiK iEngrave laser cutting machine.
LOKLiK has done it again, giving us an affordable entry level laser machine, that gives enough diode laser power to customize, cut and create wonderful pieces.
I'm super excited to get a chance to review the LOKLiK iEngrave and love how these wooden spoons turned out, perfect for a personal touch on a gift!
HOW TO USE THE NEW LOKLiK iCRAFT CUTTING MACHINE
Learn how to use the newest LOKLiK iCraft electronic cutting machine.
It's easy to set up and really just plug and play but we'll go through the features and what to expect when you are using it, plus a couple projects.
If you are looking for a great electronic crafting machine, look no further.
-min.jpg "How to use the New LOKLiK iCraft Cutting Machine")
Learn how to use the newest LOKLiK iCraft electronic cutting machine.
It's easy to set up and really just plug and play but we'll go through the features and what to expect when you are using it, plus a couple projects.
If you are looking for a great electronic crafting machine, look no further.
HTVRONT Manual Heat Press Review for Sublimation Tote
Learn how to make a sublimation and iron-on tote bag using the new HTVRONT Manual Heat Press, perfect for all kinds of heat needing crafts.
This manual heat press is my favorite for shirts, totes, flat sublimation blanks and much more--use with HTVRONT sublimation paper a sure way to succeed!
It's compact, easy to use, versatile heat temperature and time dial and comes in a variety of colors!
-min.jpg "HTVRONT Manual Heat Press Review for Sublimation Tote")
Learn how to make a sublimation and iron-on tote bag using the new HTVRONT Manual Heat Press, perfect for all kinds of heat needing crafts.
This manual heat press is my favorite for shirts, totes, flat sublimation blanks and much more--use with HTVRONT sublimation paper a sure way to succeed!
It's compact, easy to use, versatile heat temperature and time dial and comes in a variety of colors!
HTVRONT Auto Heat Press 2 Review and Sublimation Sequin Pillow
Sublimate a handsome Squidward reversible sequin pillow for the perfect White Elephant gift idea, funny gift for a friend who has everything, or just to make your visitors laugh!
This sublimation pillow craft is easy and so much fun even if you aren't a big fan of Spongebob, you can make it of whatever you like!
I love giving handmade gifts and sublimation makes it a breeze--add a personalized photograph, a child's drawing or anything you can print off onto something amazing!
Plus, I'm reviewing the new HTVRONT Auto2 Digit Heat Press, and I'll tell you all about it in this post--be sure to watch the video tutorial too!
New HTVRONT auto heat press
-min.jpg "HTVRONT Auto Heat Press 2 Review")
Sublimate a handsome Squidward reversible sequin pillow for the perfect White Elephant gift idea, funny gift for a friend who has everything, or just to make your visitors laugh!
This sublimation pillow craft is easy and so much fun even if you aren't a big fan of Spongebob, you can make it of whatever you like!
I love giving handmade gifts and sublimation makes it a breeze--add a personalized photograph, a child's drawing or anything you can print off onto something amazing!
Plus, I'm reviewing the new HTVRONT Auto2 Digit Heat Press, and I'll tell you all about it in this post--be sure to watch the video tutorial too!
New HTVRONT auto heat press
HTVRONT Hat Heat Press
Meet the New HTVRONT Hat Heat Press!
The HTVRont Hat Heat Press is arguably the best compact hat heat press on the market!

HTVRONT Mini3 Heat Press Review (Small Project)
Learn how to make an rose gold metallic iron-on tote using the new heat press mini.
The HTVRONT Mini3 Heat Press is the perfect small project heat press for iron-on, HTV, heat transfer projects, DTF Transfers and even gets hot enough for sublimation!
This post is a review on the mini heat press machine and a quick heat transfer vinyl tote project to showcase it's awesome abilities!
-min.jpg)
Learn how to make an rose gold metallic iron-on tote using the new heat press mini.
The HTVRONT Mini3 Heat Press is the perfect small project heat press for iron-on, HTV, heat transfer projects, DTF Transfers and even gets hot enough for sublimation!
This post is a review on the mini heat press machine and a quick heat transfer vinyl tote project to showcase it's awesome abilities!
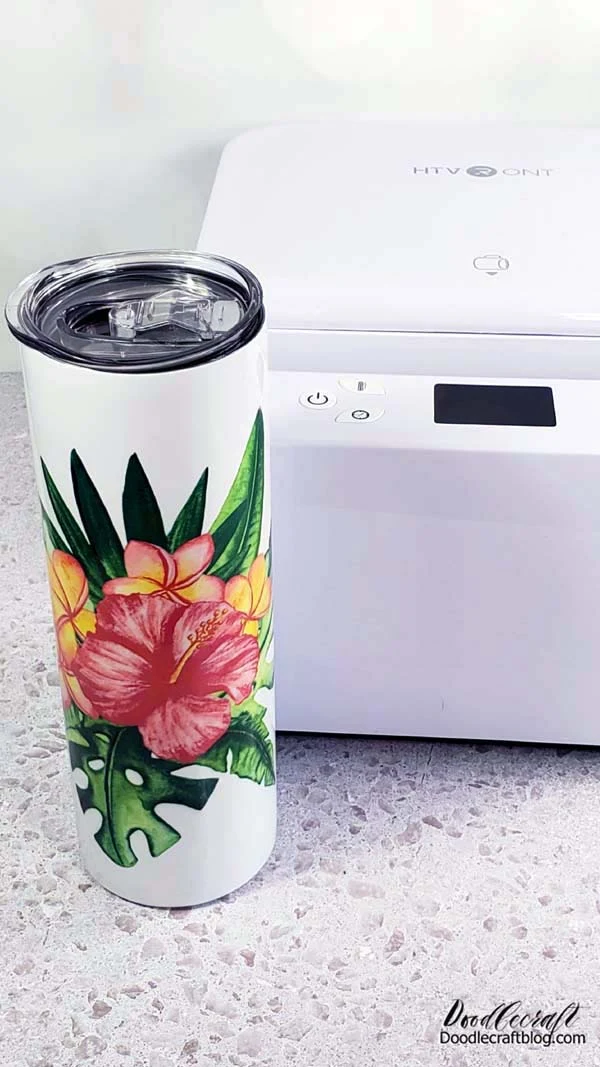
HTVRONT Auto Tumbler Heat Press
Making sublimation tumblers is so much fun with this tumbler press!
There really is something so amazing about designing something or printing something off and then having it sublimated like magic onto a surface blank.
I love making sublimation things for custom gifts; perfect for teachers, birthday's, holiday gifts and more! Tumbler blanks available at HTVRONT as well.
Learn how easy it is to use the HTVRont Auto Tumbler Heat Press to make custom tumblers with ambitious designs and mugs for every occasion!
Better than the Cricut mug press because it can do glass cans and tumblers too!
-min.jpg)
There are so many awesome machine bundle packages at HTVRONT, so you can build up your collection fast and at the best deal!
Making sublimation tumblers is so much fun with this tumbler press!
There really is something so amazing about designing something or printing something off and then having it sublimated like magic onto a surface blank.
I love making sublimation things for custom gifts; perfect for teachers, birthday's, holiday gifts and more! Tumbler blanks available at HTVRONT as well.
Learn how easy it is to use the HTVRont Auto Tumbler Heat Press to make custom tumblers with ambitious designs and mugs for every occasion!
Better than the Cricut mug press because it can do glass cans and tumblers too!
Follow me on social media, instagram and tiktok - make craft tutorials regularly!


-min.jpg)


Comments