

How to Make Resin Rainbow Coasters DIY
Make stunning rainbow coasters with resin.
These glossy rainbow coasters are a simple acrylic paint/resin pour and can be made in less than an hour...plus drying time.
Have you tried acrylic pouring yet? It's so fun and a highly addictive crafting medium...I want to pour paint on every surface in my house!
Posted first on Resin Crafts Blog

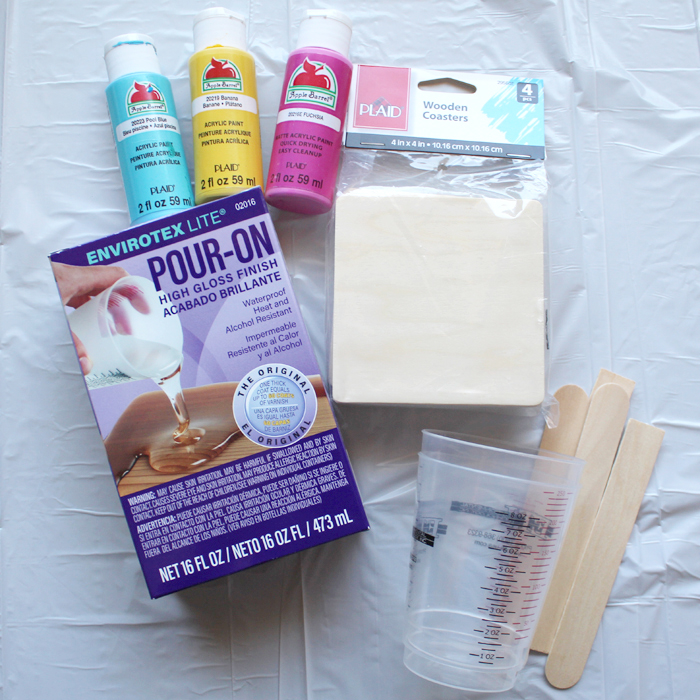
SUPPLIES NEEDED:
- Envirotex Lite Pour-On High Gloss Finish
- Wooden Coasters
- Acrylic Craft Paint in fuchsia, yellow and blue
- Mixing Cups, Stirring Sticks, Disposable Worksurface and Gloves
- Heat Gun or Embossing Gun

Step1: Prep
Begin by covering your work surface with something disposable. I used a plastic tablecloth. Then place little cups on the table. Place the coasters on top of the cups.

Keeping the coasters off the table makes it so the excess resin can run off instead of puddling around it.

Step 2: Resin
Next mix the resin according to the package directions.
The resin I am using, Envirotex-Lite High Gloss resin, is just like varnishing a project 50 times.
Mix the resin in the 2 phase mixing process.

Proper mixing is the only way to ensure that the resin will work properly.
1 part resin and 1 part hardener mixed for 2 minutes.
Then transfer the resin to a second cup and stir with a second stick for a full minute.
Now it's ready to use.

Step 3: Colors
Pour out the resin into smaller cups.
Add a pea sized amount of acrylic paint in each cup and stir the paint in completely.
Pink, Yellow, Blue and White.

Step 4: Pour
Now it's time to pour the resin on the wood coasters.
Start by pouring the pink resin on the top edge of the wood coasters.

Next add a stripe of blue resin in the center of the coasters.

Finally add a band of yellow resin at the bottom of the coasters.
**TIP: Color theory is important in this context, as the colors will blend a little together creating new colors. The blue and pink will make purple, the blue and yellow will make green.
Don't use colors that blend to make brown (unless that is what you are going for) like green and red, purple and yellow or blue and orange.

Step 5: Mix
Now the fun part!
Make sure you are wearing gloves and gently smear/blend the 2 colors together.
The pink and the blue swirl and mix to look purple.
Wipe your gloves off with a baby wipe.

Then repeat the process for the blue and yellow...to make a little green.

Next, add little strips of white resin to the coasters, between the color changes.

Step 6: Heat Gun
Then use the embossing heat gun to blow across the resin gently.
This will pop any bubbles that have formed and add some movement to the coasters.
They will look like a beach wave with bubbly foam.

Repeat the process for each of the 4 rainbow coasters. Then let the resin dry and cure overnight.

Then do a quick sanding on the bottom edge to remove any drips that formed.
That's it!
They are ready to set on the coffee table for drinks or give as a thoughtful handmade gift!

That's it!
Resin pours are so much fun and there's no way to duplicate them identically.
Each one is a surprise--or like Bob Ross says "a happy accident"!
Experiment with using different colors, or use all blues for a beach pour.
Like, Pin and Share!


Check out these fun Paint Pour Crafts for beginners too!


-min.jpg)


Comments