
.jpg)
How to Throw Tie Dyeing Baby Shower (Tie-Dye Onesies)
If you’re looking for a baby shower idea that’s equal parts meaningful, memorable, and hands-on fun… this is it.
I recently hosted a shower with the theme “Tie Dyeing to Meet You” and it turned out to be one of the most interactive and heartfelt parties I’ve ever put together.
Instead of traditional games, guests created their own custom tie dye onesies for the new baby—and let me tell you, it was a total hit.
.jpg)
Not only did everyone have a blast, but the mom-to-be walked away with a whole collection of one-of-a-kind baby onesies made with love by her friends and family.
I handled the rinsing and finishing afterward, so she received a beautifully curated bundle of wearable memories.
If you want to recreate this experience, I’ve got you covered with a full, step-by-step tutorial—from setup to final wash.
.jpg)
🎨 Tie Dyeing to Meet You: Baby Shower Craft Tutorial
Why Tie Dye Onesies?
- It’s beginner-friendly
- Everyone can participate (no skill level required!)
- Each piece turns out unique
- It doubles as a meaningful gift
- It's something unique and different
Plus, there’s something really special about dressing a baby in clothes that were handmade by people who already love them.
.jpg)
Supplies You’ll Need for Tie Dye Party:
- Plain white baby onesies (100% cotton or cellulose fibre works best)
- Optional: sibling shirts so older siblings can join in the fun
- Tulip One Step Tie dye kit or individual dye bottles
- Rubber bands (or zip ties)
- Washable markers (like Crayola)
- Extra gloves (trust me—you’ll need more than you think)
- Plastic tablecloth to protect your workspace
- Paper towels for quick cleanup
- Large bucket or sink
- Lukewarm to cold water
- Plastic bag for each dyed item
- Laundry detergent
You'll need a stunning hand painted banner for the party guests to enjoy the theme as well!
This banner is easy to make with Plaid Craft Paint and Kraft Paper.
.jpg)
Step 1: Set Up Your Tie Dye Station
Start by creating a designated dyeing area.
Lay down a plastic tablecloth over your tables to protect surfaces. Tie dye can get messy, so don’t skip this step.
- Dye bottles
- Rubber bands
- Gloves
- Stacks of baby onesies
Have a roll of paper towels nearby for spills and sticky fingers.
If you’re hosting outdoors—highly recommended—it makes cleanup even easier.
.jpg)
Step 2: Prep the Onesies
For best results, your onesies should be slightly damp before dyeing.
Be sure to pre-wash the baby bodysuits before hand, then have a 5 gallon bucket near the tie dye station filled with luke warm water.
Wet the onesie and ring it out to dampen them right before guests begin tie dying.
These wet onesies absorb dye more evenly and create brighter, more vibrant results.
Make sure guests understand that the fabric should be damp—not dripping.
.jpg)
Step 3: Show Basic Folding Techniques
Before everyone jumps in, give a quick demo of a few simple tie dye styles.
Spiral Design:
Pinch the center of the onesie
Twist into a spiral
Secure with rubber bands (divide into sections)
Scrunch Design:
Scrunch fabric randomly
Secure with multiple rubber bands
Stripe Design:
Fold the onesie accordion-style
Add bands along the length
Encourage creativity—there’s no wrong way to do it!

Step 4: Secure with Rubber Bands
This is where the magic starts.
Once folded, guests should use rubber bands or zip ties to hold their design in place.
The tighter the bands, the more white space you’ll have in the final design.
Adding a second, third and fourth rubber band to the gathered bodysuit will add more places for different colors, use as many as needed!
.jpg)
Step 5: Apply the Dye
Now for the fun part—adding color!
Have guests:
- Put on gloves
- Choose their dye colors
- Apply dye to each section
- Use a little bit of dye at first—you can always add more
- Rotate the onesie to ensure full coverage
- Avoid oversaturating (too much dye can lead to muddy colors)
Encourage guests to experiment with color combinations.
.jpg)
If you are tie dying a shape, use a washable marker to draw the basic shape on the shirt as it is folded in half, seen with this half heart below.
Then gather the fabric on the marker line and secure that exact shape with rubber bands or zip ties.
Then add color.

Step 6: Let the Onesies Set
Once dyed, carefully place each onesie into its own plastic bag.
This step is important because:
- It keeps the fabric damp
- Helps the dye set properly
- Prevents colors from bleeding onto other items
Label each bag with the guest’s name if you want to remember who made each piece.
Let the dyed items sit for at least 6–8 hours, or overnight for best results.

Step 7: Rinse Out the Excess Dye
After the dye has set, it’s time for rinsing.
This is the part I handled after the party so the mom-to-be didn’t have to worry about cleanup.
- Remove the onesie from the plastic bag
- Rinse under cold water
- Keep rinsing until the water runs mostly clear
This removes the excess dye and prevents bleeding during washing.
.jpg)
Step 8: Wash and Dry
Once rinsed:
- Wash all onesies together in cold water
- Use a small amount of detergent
- Avoid mixing with other laundry
You may notice a little bit of dye still releasing during the wash—that’s normal.
After washing:
Dry as usual
Press or fold neatly

Whether the baby gender has been revealed or not, tie dyed onesies work for all babies.
They add a little pizzazz to an ordinary white onesie, which is the wardrobe staple of every infant.
.jpg)
Step 9: Present the Finished Gift
This is my favorite part.
Once everything was clean and dry, I bundled the finished tie dye onesies together and gifted them to the mom-to-be.
You can:
Fold or roll them into a basket
Tie with ribbon
Add a tag explaining the theme
It becomes more than just clothing—it’s a collection of love from everyone who attended.

Hosting Tips for Success
Keep It Simple
Not everyone is crafty, so keep instructions easy and approachable.
Have Plenty of Supplies
You’ll go through more rubber bands, gloves, and dye than you expect.
Encourage Creativity
There’s no “perfect” design—every piece will be unique.
Plan for Cleanup
Have trash bags, wipes, and paper towels ready.
.jpg)
Why This Baby Shower Idea Works So Well
This wasn’t just a craft—it was an experience.
- Laughed, chatted and stepped out of their comfort zone
- Got creative
- Made something meaningful
The mom-to-be received something far more special than store-bought gifts.
Each onesie tells a story.
- Add matching sibling shirts
- Include burp cloths or swaddles
- Offer pastel dyes for a softer look
- Include Dimensional Fabric Paint or Paint markers for something besides tie dye.

If you’re planning a baby shower and want something interactive, meaningful, and just plain fun, tie dye is such a great option.
These tie dye onesies are:
- Practical
- Adorable
- Completely unique
- It’s simple.
- It’s colorful.
- It’s full of love.
And honestly… it might just be the best baby shower activity ever. 💕
.jpg)
That's it!
And just like that, what started as a simple fun activity turned into a heartfelt collection of tiny, wearable memories. Each of those colorful tie dye onesies carries a story—little moments of laughter, creativity, and love from everyone who gathered to celebrate that sweet new baby.
It’s such a special way to turn a baby shower into something interactive and meaningful, while still keeping things easy and stress-free. Whether you’re rinsing out that last bit of excess dye or folding up the finished pieces for gifting, you’ll see how something so simple can become incredibly sentimental.
So grab those rubber bands, lay out the plastic tablecloth, and don’t forget the extra gloves—you’re about to create something truly unforgettable. 💕
Like, Pin and Save!
pin.jpg)
Check out these other Tie Dye posts for more inspiration:
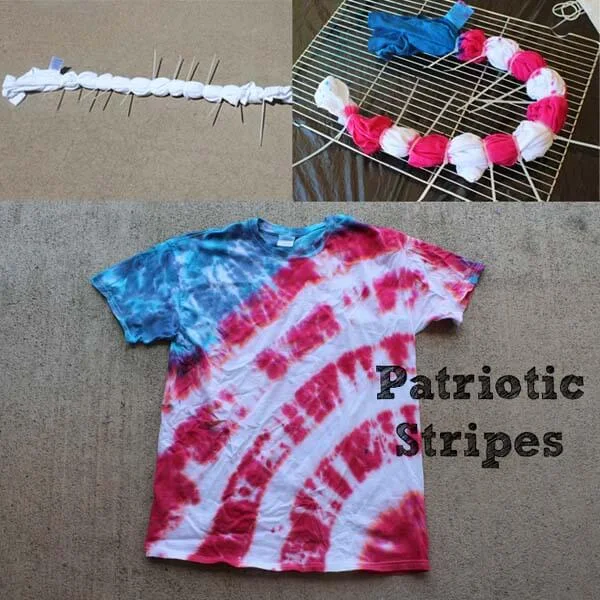
Captain America Tie Dye Shirt

Tie Dye Party!

Halloween themed Tie Dye!

Galaxy Scarf!

Galaxy Dress!

Bleach Resist Tie Dye Galaxy!

Mermaid Scale Tie Dye Shirt

How to Tie Dye Tote Bags (DIY Tie-Dye Canvas Bag)!
Learn how to tie dye high-quality colorful canvas tote bag.
It is super fun and easy it is to tie dye tote bags!
All you need is 100% cotton tote bags and Tulip Tie Dye Party Kit and you are ready to go!


-min.jpg)


Comments