

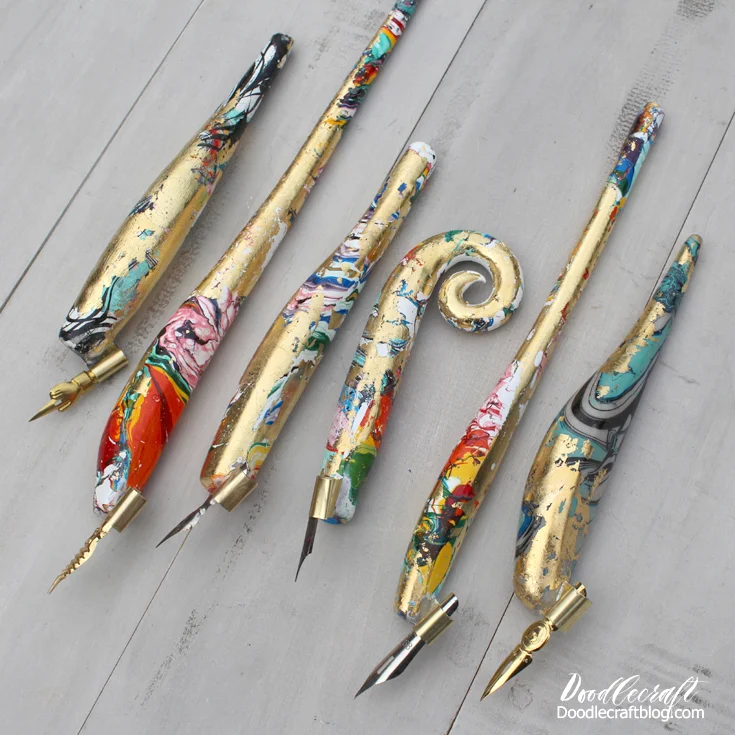
Faux Greenstone Resin Oblique Calligraphy Pen DIY
Make a shiny oblique calligraphy pen holder that looks like greenstone! Have you used an oblique calligraphy pen before? They are my favorite, maybe because they look weird...but they let you angle you hand and paper and still write with the nib straight.
I love this faux greenstone look. My brother lived in New Zealand for 2 years and brought back a green stone pendant for me that is so gorgeous! New Zealand is known for the durable and vividly green stone. They call it Pounamu and it's very valuable to the Māori culture.
So I created these pen holders with that inspiration. These faux greenstone calligraphy pen holders are durable and weighted perfectly for carrot oblique holders.

Supplies Needed for Resin Oblique Calligraphy Pens:
Cornstarch
Gloves
Non-stick Work Surface
Brass Nib Holders (read this post for how to make them and all the details)
Then for writing you'll need some ink!

Step 1: Mixing Resin
Start by getting one part of the each tub of the EasySculpt Self-hardening Epoxy Modeling Clay. It's finish is smooth and wonderful, like ceramic.
Mix them until there is no more marbling.

Step 2: Add Jade Color
Then add a few drops of green pigment and a drop of brown. Then mix them into the clay. It's super sticky. Wear gloves and use cornstarch to help with the stickiness.

Separate into 4 pieces and let them set a little while, about 20-30 minutes.

Step 3: Roll Out into Pen Holders
Next, roll out the clay into unicorn horn shapes. About 6 inches long. Then let them sit for another 20-30 minutes.

Rotate the pen holders every 5-10 minutes for the next 2 hours and gently roll out any firm edges. Then let the resin dry and cure for 24-48 hours.

Step 4: Nib Holders
Now make brass nib holders (details at this post)

Step 5: Cut Pen Holder
Now use the precision saw and cut a slit in the top edge of the resin. This is a great way to make a custom oblique pen holder for a lefty or just to fit your own hand better.

Cut the slit deep enough that the brass nib fits inside and angles up about 45 degrees.

Here's the view from the top of the pen.

Step 6: Adhesive
Then use a little super glue, like this CA Thin Adhesive. Drop one drop on the top of the pen holder, right near the brass and it will secure it in place perfectly.
Be cautious, this stuff is hardcore serious!

Hold the pen while the glue dries. It dries super fast. Then repeat for all the calligraphy pens. You can make more out of wood too!

That's it!
Like, Pin and Share!


-min.jpg)


Comments