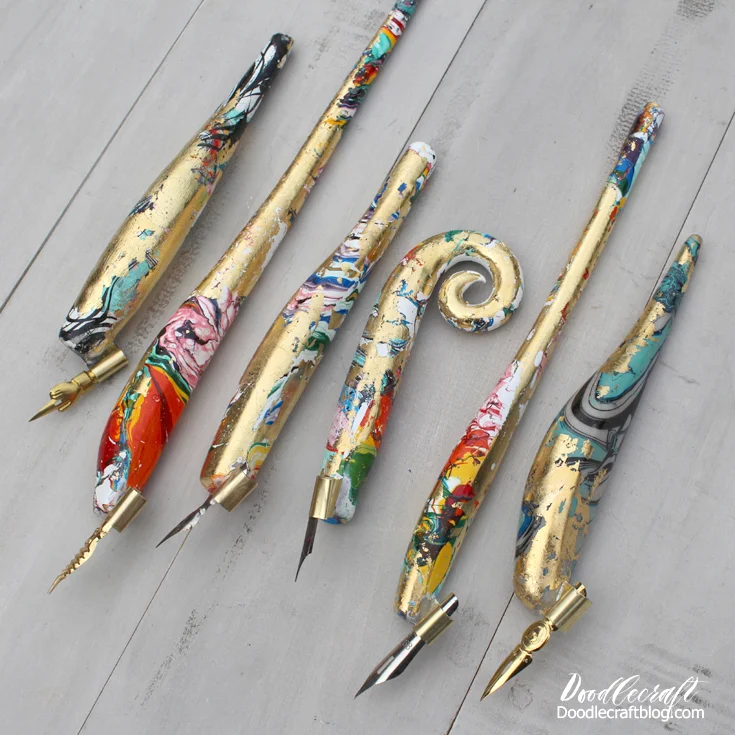
Marbled Gold Leaf Resin Calligraphy Oblique Holders DIY!
Make a marbled gold leaf resin calligraphy oblique holder. Make a calligraphy pen that fits your hand, works for a left handed calligrapher, or just to make something flashy to write with.
If you know someone that is interested in Calligraphy or learning calligraphy, this would make a great gift. Oblique holders are so fun to use because they help with the angle of the nib and plus they look so cool.
These ones are fabulous because they are handmade, marbled and gold leafed!
Supplies needed for Marbled Calligraphy Pens:
White Spray paint
Brass Nib Holders (read this post for how to make them and all the details)
Easy Sculpt is a 2 part epoxy clay. Read all the directions before use.
Step 1: Mixing Resin Clay
You need equal amounts of each pot. One part hardener and one part resin.

Then mix it together until it is smooth and not marbled.
It is super sticky, but it is made to let it sit for a while to reduce stickiness and ease of molding.
Step 2: Roll Resin Clay
I rolled them into pieces and let them sit for about 20 minutes.
Then rolled them into the desired shapes. Be creative and make the holding part about 3/4 inch to an inch around. Use cornstarch if the clay is too sticky.
Let them rest on parchment paper. If they are still moldable, they may flatten as they sit. Rotate them regularly for about an hour or 2. Then let them cure overnight.
Step 3: Brass Flanges
Now you will need the brass flange, instructions on this post.
Step 4: Cut Resin Holders
Use the precision saw to cut a slit in the end of the pen holder. It should be cut about half way in the center of the end.
Step 5: Glue
Insert the flanges and glue in place with CA thin or superglue.
It just takes a few seconds to dry.
Step 6: Paint
Next cover the flanges with some painters tape.
Give them a couple light coats of spray paint.
Sand down if you want a distressed look.
Step 7: Marbling
Next the marbling! Some people call it Hydro-Dipping!
Marbling is so much fun. Instead of going into all the details here, check out this post.
Drop in paint, swirl with a pin and dip in the pen holder. Prop up on something to dry.
Use a cotton swab and some acetone to clean up the flanges, if necessary.
Step 8: Gold Leaf
Now use a little gold leaf adhesive and paint it on the pen holders in places you want covered in gold. Let the glue dry for a minute.
Then cover with gold leaf. Roll on a piece of gold leaf, press with fingers.
Then use a stiff paintbrush to remove gold leaf that did not adhere to the adhesive.
Step 9: Finish Spray
Spray with a few light layers of lacquer and let them cure overnight.
Now you are ready to add some nibs and get writing!
Or give as a wonderful handmade gift!
I love how this one curls!
Like, Save, Share, Comment, Follow and Pin!
Check out these other fun Marbling posts!
And Marbled Notebooks!
And more Calligraphy here:
Vinyl | Oblique 2 | Mantras | Waterbrush |
Envelopes | Copper Calli | Oblique | Galaxy Art |
Invitations | Brush Lettering | Gift Bags | Faux Calli |
Ombre | Place settings | Fabric Lettering | Wood Slice |


-min.jpg)


Comments