Hello Vinyl Sign with Bright Felt Flowers!


This post may contain affiliate links, sponsored content and products received at no cost.
6:00 AM
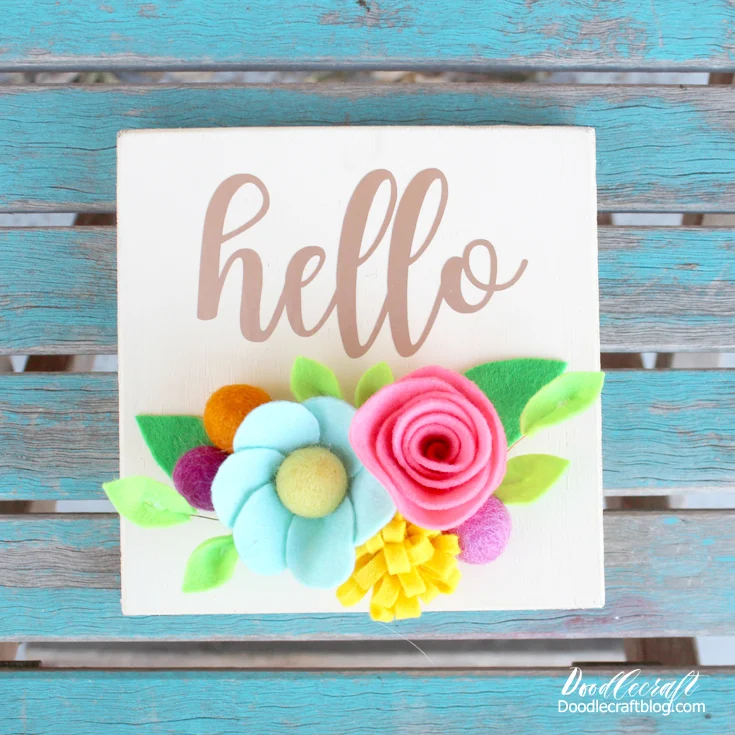
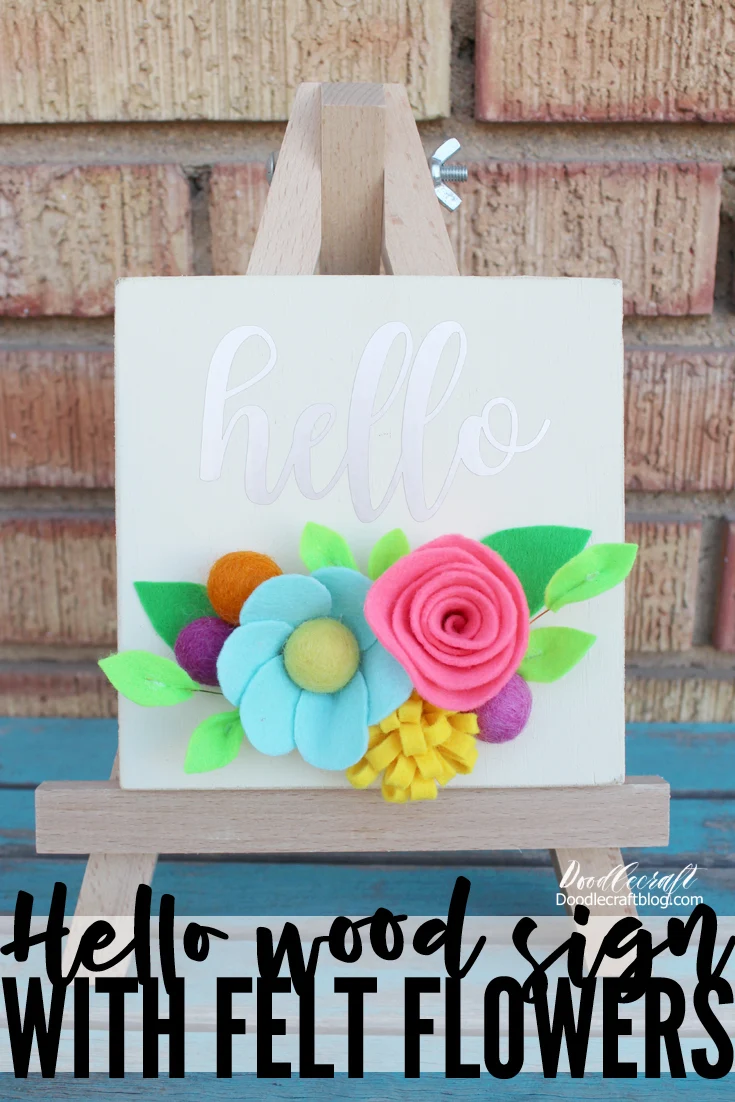
Hello Vinyl Wood Sign with Bright Felt Flowers! Isn't this hello sign perfectly bright and cheery with these colorful felt flowers!? Just a few supplies make this perfect Spring decoration for the mantle, bookshelf or in the entryway. Let me show you how to make felt flowers to add color to a vinyl wood sign for the perfect home decor piece!

Hello Vinyl Wood Sign with Bright Felt Flowers!

Isn't this hello sign perfectly bright and cheery with these colorful felt flowers!? Just a few supplies make this perfect Spring decoration for the mantle, bookshelf or in the entryway. Let me show you how to make felt flowers to add color to a vinyl wood sign for the perfect home decor piece!

It's super simple to make and then options are endless when it comes to adding a greeting.  Let's craft this cute sign in less than an hour!

Make a bunch and sell them at a Spring craft show--they will fly off the shelf!

Hello Vinyl Wood Sign with Bright Felt Flowers! Isn't this hello sign perfectly bright and cheery with these colorful felt flowers!? Just a few supplies make this perfect Spring decoration for the mantle, bookshelf or in the entryway. Let me show you how to make felt flowers to add color to a vinyl wood sign for the perfect home decor piece!  It's super simple to make and then options are endless when it comes to adding a greeting.  Let's craft this cute sign in less than an hour!  Make a bunch and sell them at a Spring craft show--they will fly off the shelf!

Supplies Needed for Wood Sign with Felt Flowers: (affiliate links)

Metallic Permanent Adhesive Vinyl
Scissors
Paintbrush
Hot Glue/Gun

Supplies Needed for Wood Sign with Felt Flowers: (affiliate links) 6x6 inch Wood Board Apple Barrel Antique White Paint Metallic Permanent Adhesive Vinyl Cricut Maker Felt Sheets in Various Colors (I chose brights) Felted Balls Floral Wire Scissors Paintbrush Hot Glue/Gun

I love the bright colored felt and happy Spring flowers, especially during a bleak Winter.  You can pick whichever colors are your favorite.  

Step 1: Paint Base

Paint the wood with Antique White paint.

I love a slightly off white paint, it helps it have the look of being painted, rather than a "primer" look. Paint one thin coat of paint all over the wood base and let it dry. Then paint another coat of paint on the base. 

The layers of paint can dry while you are making felt flowers and cutting out your vinyl. Use that time well!

I love the bright colored felt and happy Spring flowers, especially during a bleak Winter.  You can pick whichever colors are your favorite.

Step 2: How to Make Felt Flowers

Let's begin with the Fringe Yellow Flower:

Begin by cutting a Yellow strip of felt, 2x8" long.

Step 2: How to Make Felt Flowers Let's begin with the Fringe Yellow Flower: Begin by cutting a Yellow strip of felt, 2x8" long.

Then hot glue and fold it in half so it makes a long tube.  Then snip every 1/4 inch about 1/4 inch away from the glued edge.

Then hot glue and fold it in half so it makes a long tube.  Then snip every 1/4 inch about 1/4 inch away from the glued edge.

Continue cutting knicks down the entire length of the tube until the entire felt tube is fringed.

Continue cutting knicks down the entire length of the tube until the entire felt tube is fringed.

Then use the hot glue and roll the felt tightly to make a little yellow poof.  This works great as a stand alone flower or as a flower center. 

I used it as a stand alone flower.

Then use the hot glue and roll the felt tightly to make a little yellow poof.  This works great as a stand alone flower or as a flower center.   I used it as a stand alone flower.
 

Step 3: How to Make a Felt Flower

Now Let's Make a Large Petal Flower

For the next flower, cut 6 felt circles and hot glue them around a felt ball to make the perfect flower. The petals overlap just slightly and give it a natural look.

Step 3: How to Make a Felt Flower Now Let's Make a Large Petal Flower For the next flower, cut 6 felt circles and hot glue them around a felt ball to make the perfect flower. The petals overlap just slightly and give it a natural look.

Step 4: How to Make a Felt Rosette

And finally, the perfect rosette.  For the tutorial on the rose, click to this Unicorn planter post for the instructions and full pictures.

Cut a 4 inch circle of felt. Then begin on the outside edge and cut a spiral into the center of the circle. 

Next, roll up the spiral beginning with the outside edge, hot gluing as you go. Continue the length of the spiral and then hot glue it to a circle of felt to hold it all securely.

Step 4: How to Make a Felt Rosette And finally, the perfect rosette.  For the tutorial on the rose, click to this Unicorn planter post for the instructions and full pictures.  Cut a 4 inch circle of felt. Then begin on the outside edge and cut a spiral into the center of the circle.   Next, roll up the spiral beginning with the outside edge, hot gluing as you go. Continue the length of the spiral and then hot glue it to a circle of felt to hold it all securely.

Step 5: How to Make Felt Leaves

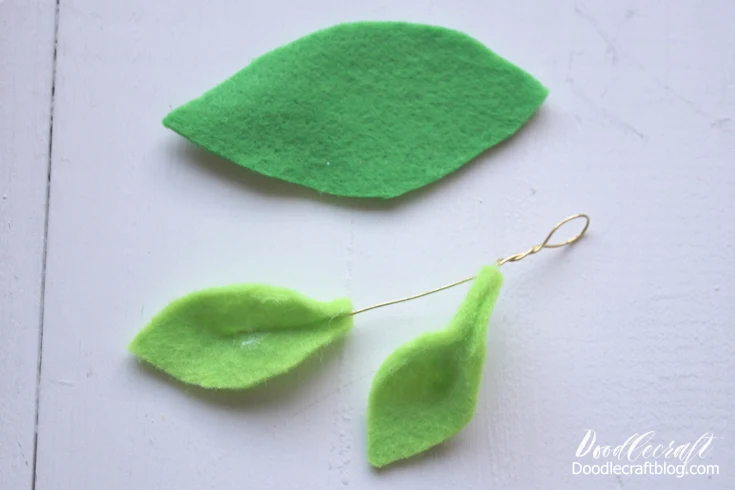
To make the flower spray a little more dimensional, clip some floral wire about 4 inches long.  Hot glue a green leaf shape on each end, pinching it around the wire in the center.

Don't worry if some hot glue shows, it just looks like the morning dew!

Step 5: How to Make Felt Leaves To make the flower spray a little more dimensional, clip some floral wire about 4 inches long.  Hot glue a green leaf shape on each end, pinching it around the wire in the center.

Fold the wire in about half and give it a few twists.

Fold the wire in about half and give it a few twists.

Step 6: Cutting Vinyl Wording

Pause the flower making festivities to put the vinyl on the wood board.  Use a Cricut Maker or other cutting machine to cut your desired greeting out of metallic vinyl.  

Apply the greeting to the top of the wood board. Mine is a simple Hello!

Step 6: Cutting Vinyl Wording Pause the flower making festivities to put the vinyl on the wood board.  Use a Cricut Maker or other cutting machine to cut your desired greeting out of metallic vinyl.    Apply the greeting to the top of the wood board. Mine is a simple Hello!

Remove the transfer paper and now it's ready to hot glue some flowers on it.

Remove the transfer paper and now it's ready to hot glue some flowers on it.

Step 7: Felt Flower Arrangement

Arrange the gorgeous felt flowers however you like.  Add a few more felt balls on it.  Hot glue the wires under the flowers so the leaves peek up a little.

Once you've laid it out the way you like it, hot glue each individual piece in place. 

Step 7: Felt Flower Arrangement Arrange the gorgeous felt flowers however you like.  Add a few more felt balls on it.  Hot glue the wires under the flowers so the leaves peek up a little.  Once you've laid it out the way you like it, hot glue each individual piece in place.

That's it!  

Under an hour and this sign is absolutely adorable!  Makes a great welcome on a gray day. This cute sign would make darling Spring decor, seasonal decor--like Easter, or even a name on it for bedroom decoration. 

That's it!   Under an hour and this sign is absolutely adorable!  Makes a great welcome on a gray day. This cute sign would make darling Spring decor, seasonal decor--like Easter, or even a name on it for bedroom decoration.


Like, Pin and Share!


Hello Vinyl Wood Sign with Bright Felt Flowers! Isn't this hello sign perfectly bright and cheery with these colorful felt flowers!? Just a few supplies make this perfect Spring decoration for the mantle, bookshelf or in the entryway. Let me show you how to make felt flowers to add color to a vinyl wood sign for the perfect home decor piece!  It's super simple to make and then options are endless when it comes to adding a greeting.  Let's craft this cute sign in less than an hour!  Make a bunch and sell them at a Spring craft show--they will fly off the shelf!


facebook Follow Me on Pinterest Youtube Instagram twitter
postscript

Comments

Unknown said…
Which font did you use for "Hello"
Doodlecraft said…
It's a font called Joshico