Products in post were given to me at no cost. Affiliate links included. All opinions are mine.

Silver Star Tree Topper on Blue Christmas Tree with Cricut Maker
I love the blue and silver combo! Is it the Silver Bells song...or is it the Blue Christmas song...? Maybe a mash-up! I've done a
blue and silver themed tree in the past, but the tree was green and so it just didn't stand out like this one does! I love this one. I love the simplicity too! Plus, this tree has a on off button on the floor that you can step on to shut off at bedtime. Perfect!
If you've been here a while, you'll recognize this tree! If you haven't been here long, let me spoil this secret. This tree is from
Treetopia from the Halloween Tree campaign! I decorated this amazing tree in a spooky Halloween fashion. I love the vintage vibe, the mixed metallics...and that amazing crow topper!

After Halloween, I quickly re-did the tree to match a
Doctor Who theme...since the new season came out. I love the weeping angel topper!

Okay, so this is a BLUE tree done THREE ways! I love this unconventional colored tree. And when it comes to the perfect tree decorating, I really think the topper makes the tree! What could compete with a crow and a weeping angel? I am a huge sucker for stars. I love a shiny star on top!
Since I didn't have one to match, I decided to DIY it! I used shimmery silver cardstock from DCWV that was perfect.
You will need:
Cricut Maker
Double Scoring Wheel
Silver Cardstock
Hot Glue/Gun
Glitter
Cardboard Toilet Paper Roll
Stapler
I put it in the
Cricut Maker and
used this easy to start project. It uses 4 pieces of paper.
Use the double scoring wheel and the fine point blade.
Heat up the hot glue gun for the assembly...also I used a stapler too.
Fold all the score lines. Then put hot glue on the flap.
Fold it to the other side and glue in place, creating a cone.
Get all the pieces into their cone shape. There are 6 small cones, 1 medium and 1 large.
Hot glue and staple the cones as you put them together...this 3D Star is pretty tricky...
Especially this last part! Hot glue the final two pieces together...hold together until the glue dries completely.
Okay, great--ish. It's so hard to put it together, so the center doesn't match up perfectly...nor do the lines.
What to do? Add a row of hot glue every where there's a line and sprinkle glitter all over it.
And finally, add the center layered filigree star...it's the best way to cover up that mess in the middle!
Hot glue a little glitter on top too!
Okay, best trick ever! Hot glue a toilet paper roll onto the back of the star.
Perfect for sliding over that pine top.
Then I used these 3D snowflake papers from DCWV...but they are easy to make.
Check out this post.
And they are simple to staple together...
again, details on this post.
Staple all 6 of them together for the perfect snowflake!
They look fabulous! I love the mixed metallics...but mostly the blue, white and silver!
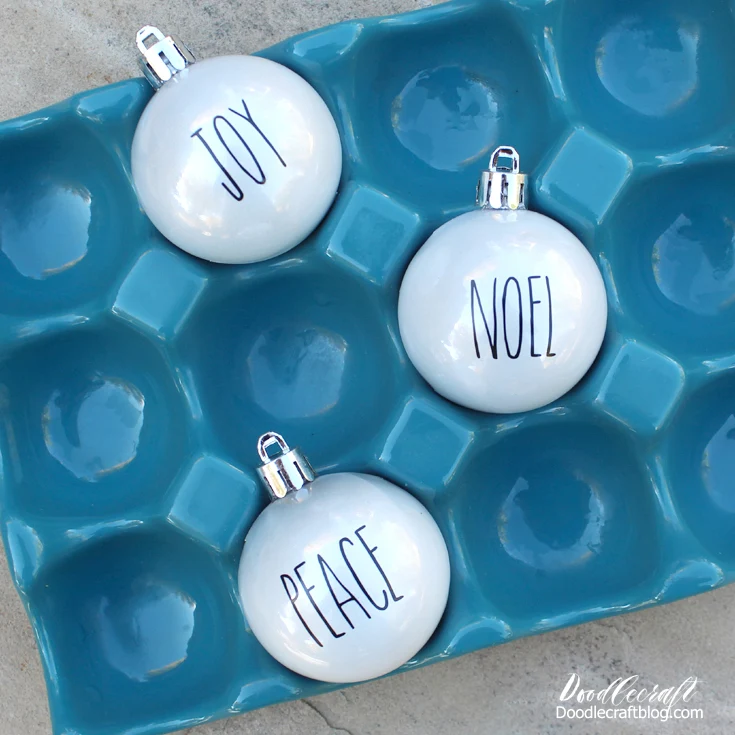
Hey, you can make these cute Rae Dunn inspired ornaments with the Cricut Maker too!
Check out the details on this post.
They look fantastic on the tree! I love the glitter mesh, the shiny ornaments and the bright lights.
Alright, let's be real...we live here. This is what the house looks like on an average day. We put our table on casters so we can push it around wherever we want!
Check out that post here.
Like, Share and Pin!


-min.jpg)


Comments