


I bought this table and chairs a while back for $20...
with the intention of doing something more
to it than just keeping it black!
Well, I found a whole gallon of charcoal paint at Walmart for $5...so I had to get it.
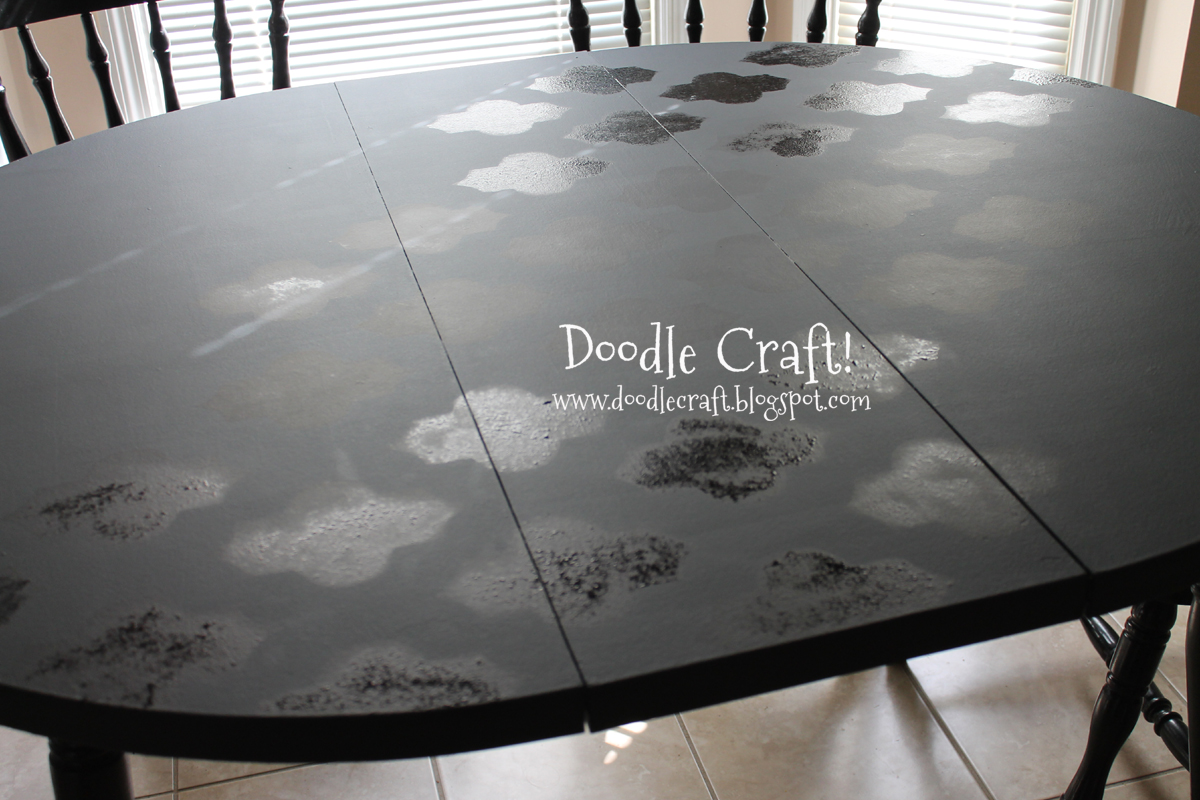
I promptly painted the table top gray with a roller. I did several coats.

Then I made a stencil. Because no stencil
company has given me free stencils
so I make my own...and I am trying
to come in under budget...always.
I have about 5 sheets left of this super thick plastic!
I love this stuff, I've used it several times now...
But I used my silhouette and cut a 12 by 12 page of my design.
Moroccan pattern.
I used a sharpie and traced it on the plastic.
Same idea as this stenciled and stained furniture!

It didn't always line up absolutely perfect, but I went with it!

Then used scissors to cut out my shapes...I put an x where
I am cutting out for good measure...been known
to cut the wrong space out!

half pieces are good for lining up the stencil.

Okay, so I measured the table and marked the exact
(well, exact for me) center.
I started in the center because I wanted it to flow from there...
and not be uneven...so there, center!

Right there...where those 2 lines would intersect!

I just used craft paint, a palette and a stippling or stencil brush!

And taped the stencil down with painters tape.
Then with just downward dabs, filled in the spaces...
You want to be careful so the paint doesn't get underneath
the stencil so only press down lightly on the edges...
but be thorough too!

It was actually a lot of fun!


Once I did all the spaces, I took the stencil off...while it was still mostly wet.
and then waited for that section to dry completely before doing the next!

This took most of the day...waiting, stenciling, waiting, stenciling, etc!

It looked super super subtle.
shapes that had been missed...so it didn't
take as long for things to dry...


And, done! Very subtle...but awesome!

Then I used a roller and put a light coat of polyurethane on top!
OH NO!!!

A bazillion little bubbles appeared everywhere! Rats, all that work!

I sanded it lightly with fine grit stuff...
not as helpful as I would have liked...
I decided to just go with it for now!

After all, my table nearly always looks like this...

so no one will see the little air bubbles!
And it's still really cool.

Someday I'll do it again, but for now, I will sit back and enjoy it!


Linking up to THESE parties this week!


-min.jpg)


Comments
Luvs,
Annie Rose