
-min.jpg "How to Make DIY Rubber Stamps xTool (Cat Stamp Set)")
How to Engrave Rubber Stamps xTool DIY (Cat Stamp Set)
Learn how to make your own rubber stamps set!
This fun craft tutorial will take you through the designing, engraving and stamping process for a custom set of stamps.
I love how these kitties turned out and they would make a perfect DIY gift!
Let's get started!
Pro tip: Settings: 90% Power, 98mm/s, 3 passes
-min.jpg "How to Make DIY Rubber Stamps xTool (Cat Stamp Set)")
PERFECT HANDMADE GIFT
Learn how to make a set of rubber stamps, like these cute little cats, perfect for a thoughtful handmade gift!
There’s something so timeless about rubber stamps — they bring a touch of nostalgia and creativity to every paper craft project.
This week, I decided to take stamping to the next level and make my own rubber stamps using my xTool S1 20W diode laser and the gray laser-safe rubber sheet.
The result is a darling set of cat-themed stamps inspired by coloring book pages, each one engraved in amazing detail and mounted for easy use.
-min.jpg "How to Make DIY Rubber Stamps xTool (Cat Stamp Set)")
MAKE ONE RUBBER STAMP OR AN ENTIRE MATCHING SET
These custom kitty cat stamps turned out beautifully — crisp lines, clean edges, and perfect impressions.
Whether you’re new to laser crafting or just looking for your next step in creative projects, making your own stamps is easier than you might think.
-min.jpg "How to Make DIY Rubber Stamps xTool (Cat Stamp Set)")
Here’s the full step-by-step tutorial for making your custom stamp kit with professional results at home.
I'm sure you can think of several cute kids that would love a rubber stamp set like this--this is exactly what 7 year old me would have wanted!
-min.jpg "How to Make DIY Rubber Stamps xTool (Cat Stamp Set)")
Supplies Needed for Engraving Rubber Stamps Set:
- xTool S1 20W diode laser
- Gray laser rubber sheet
- xTool Creative Space software
- Cat coloring book pages (Creative Fabrica or your own artwork)
- Cling back mounting foam (or double-sided adhesive foam if you prefer)
- Wooden blocks for mounting (optional for a vintage style look)
- Stamp pad (I love memento)
- Acrylic Stamping Block (I found some at Dollar Tree)
- Scissors or craft knife (if needed for trimming)
-min.jpg "How to Make DIY Rubber Stamps xTool (Cat Stamp Set)")
Step 1: Choose or Design Your Artwork
INVERT YOUR IMAGE, make the background black and the desired stamp lines white, so it engraves away the background.
You'll also need to mirror the image, so when it stamps, it stamps properly.
For this project, I browsed Creative Fabrica — one of my favorite creative resources — and found a few adorable cat coloring book pages.
The cool features of the site include vector files, ready-to-edit SVGs, and incredible artwork from artists all over the world.
Line art is the best for rubber stamps, so check out coloring book pages--or you can use your own line art instead!
Kitten Coloring Book Pages:
I downloaded them and altered a few to make my rubber stamp set.
-min.jpg "How to Make DIY Rubber Stamps xTool (Cat Stamp Set)")
I picked seven cat designs that matched stylistically and simplified the details a bit in my graphics program so they would all look cohesive as a set.
If you’re drawing your own images, make sure your lines are bold and closed — think coloring-book-style outlines. These translate beautifully into stamps.
-min.jpg "How to Make DIY Rubber Stamps xTool (Cat Stamp Set)")
Step 2: Prepare Your Files in xTool Creative Space
Open xTool Creative Space and import your cat images. Once they’re loaded, select each design and reverse the image (mirror it) — this is very important for stamps!
When you stamp, your design transfers backward, so mirroring ensures it prints the correct way.
Adjust the size of each cat depending on how you plan to use them.
Then, position each stamp design so they’re spaced out nicely on your rubber sheet.
-min.jpg "How to Make DIY Rubber Stamps xTool (Cat Stamp Set)")
Step 3: Set Up the Engraving
Select rubber from the material list in xTool Creative Space. The standard rubber setting works perfectly for engraving at a medium depth.
I used 3 passes, which gave me a clean, deep engraving that captures all the details while keeping the edges sharp.
Be sure to focus your laser carefully — the xTool S1 is a precision tool, and a well-focused beam gives you clean cuts and fine lines.
Once you’re ready, secure the rubber sheet to your laser bed. Double-check that the workspace is well-ventilated and that your sheet is flat against the surface for the best results.
Then click Start, and let the laser machine do its magic.
-min.jpg "How to Make DIY Rubber Stamps xTool (Cat Stamp Set)")
Step 4: Cut Out the Stamps
After engraving, the xTool will also cut around the shapes.
The clean cut-out around each cat makes them easy to handle and gives that professional, custom stamp feel.
If you prefer, you can adjust your cut line to make the border slightly larger — this gives the stamp more stability, especially for fine-line designs.
-min.jpg "How to Make DIY Rubber Stamps xTool (Cat Stamp Set)")
When the job is done, remove your pieces carefully from the sheet. Brush off any dust or residue.
You’ll immediately see how crisp the lines look — it’s always amazing to watch laser technology reproduce intricate designs like these!
-min.jpg "How to Make DIY Rubber Stamps xTool (Cat Stamp Set)")
Step 5: Mount the Stamps
This step gives your stamps their structure and grip.
For this set, I used cling back mounting foam — it’s soft, flexible, and works perfectly with acrylic blocks or stamp mounts.
I actually cut the mounting foam with the laser, too, for perfect sizing!
-min.jpg "How to Make DIY Rubber Stamps xTool (Cat Stamp Set)")
Peel one side of the foam, press your engraved rubber firmly onto it, and then trim if necessary.
If you don’t have cling foam, you can also use double-sided adhesive foam and attach your stamp to a wooden block.
This gives your set that vintage style look and feels like old-school wood-mounted stamps — a favorite among collectors and nostalgic crafters.
Make sure your adhesive is strong enough to withstand repeated use.
-min.jpg "How to Make DIY Rubber Stamps xTool (Cat Stamp Set)")
Step 6: Test the Stamps
Now the fun part — testing your own rubber stamps!
Grab an ink pad or stamp pad, lightly press your cat stamp onto it, and stamp onto a scrap piece of paper or pink eraser (if you’re testing texture).
The deep engraving from the xTool S1 gives amazing definition, especially around the whiskers and fur lines.
If you see any spots that didn’t transfer well, you can lightly trim away small raised bits with a carving tool.
Once you’re happy with the prints, your custom stamps are ready for crafting!
-min.jpg "How to Make DIY Rubber Stamps xTool (Cat Stamp Set)")
Step 7: Use or Gift Your Stamps
This custom stamp kit makes the perfect handmade gift — for a child, tween, or adult, anyone who loves cats or stamping will adore them.
You can package the set in a small box, tie it with ribbon, and add an ink pad for a thoughtful, creative present.
-min.jpg "How to Make DIY Rubber Stamps xTool (Cat Stamp Set)")
They’d also make great hosts gifts, stocking stuffers, or swaps for lively forums and crafting communities.
And of course, keep a set for yourself — these cats are perfect for journaling, scrapbooking, or decorating vintage-style stationery.
-min.jpg "How to Make DIY Rubber Stamps xTool (Cat Stamp Set)")
Tips for Success
-min.jpg "How to Make DIY Rubber Stamps xTool (Cat Stamp Set)")
Making your own rubber stamps is such a satisfying project. You get to blend modern laser technology with traditional crafting methods — creating something personal, practical, and beautiful.
The xTool S1 20W diode laser handles the detail work effortlessly, turning digital images into tangible, custom stamps with crisp lines and perfect impressions.
-min.jpg "How to Make DIY Rubber Stamps xTool (Cat Stamp Set)")
With the right setup, you can make any theme imaginable — cats, florals, holidays, or even vintage-style logos.
It’s one of those projects that shows off the cool features of your laser while giving you something fun to use every day.
So, gather your materials, pick your favorite artwork, and make your own stamp kit — you’ll be amazed at what you can create with the right tools and a bit of imagination!
-min.jpg "How to Make DIY Rubber Stamps xTool (Cat Stamp Set)")
That's it!
Making little rubber stamp kits is so much fun and makes the perfect holiday, birthday or other occasion gift for a child--or anyone!
I love these darling little kitten stamps, you can make them just like me or customize your own stamps using the xTool laser cutting machine.
Like, Pin and Save!
-minPIN.jpg "How to Make DIY Rubber Stamps xTool (Cat Stamp Set)")
CHECK OUT THESE OTHER FUN RUBBER STAMPS POSTS:
How to Make Rubber Stamps with xTool S1 Laser Cutter
Learn how to make your own custom rubber stamps with the xTool S1 Laser cutting and laser engraving machine!
I am absolutely addicted to making rubber stamps now and you will be too--they are super intricate and detailed, I'm in love!
-min.jpg)
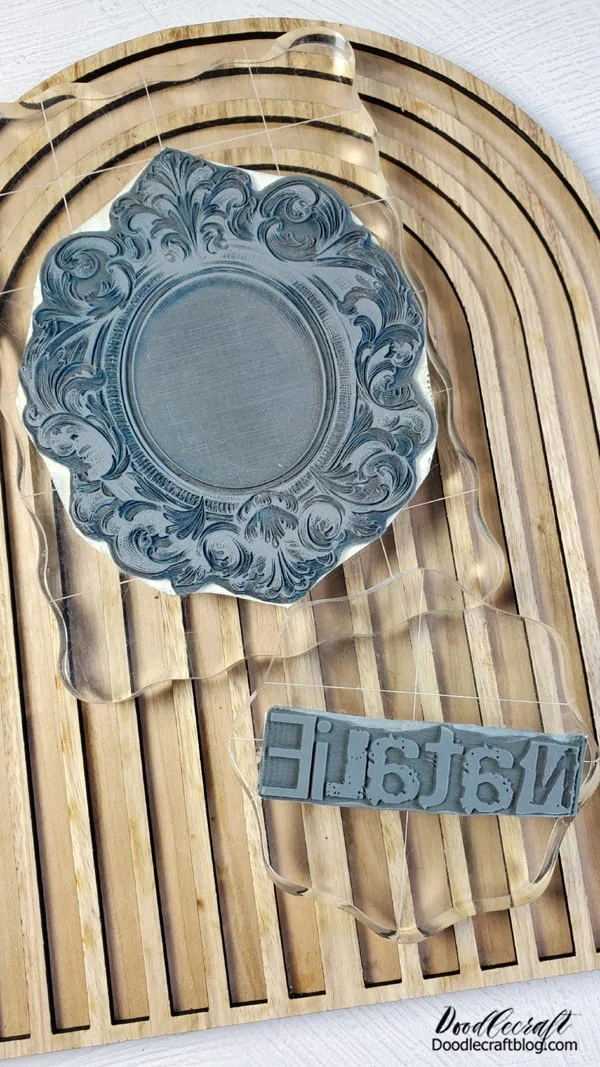
How to Make a Personalized Library Stamp with xTool!
Learn how to make a beautiful custom stamp for marking that book collection with a signature library stamp.
Custom book stamps are the perfect gift for book collectors and book lovers. Create a high quality stamp with a business logo, a favorite quote, a full name, phone number, or even just monogram stamps.
Create a personal library stamp with crisp impression lines using the xTool laser cutting machine.
-min.jpg "How to Make a Personalized Library Stamp with xTool")


-min.jpg)


Comments