How to Make a Simple Gratitude Journal


This post may contain affiliate links, sponsored content and products received at no cost.
6:00 AM
Here's a quick gratitude DIY journal you'll love! I am a firm believer in counting blessings, giving thanks and always having a positive outlook on life. Having a gratitude journal can change your life from feeling anxiety and overwhelmed to looking for those positive things that happened during the day.

How to Make a Simple Gratitude Journal

Here's a quick gratitude DIY journal you'll love! I am a firm believer in counting blessings, giving thanks and always having a positive outlook on life. Having a gratitude journal can change your life from feeling anxiety and overwhelmed to looking for those positive things that happened during the day.

This post was live on Tombow's blog as one of their Design Team members. Supplies received from Tombow. Affiliate links included.

Start by making a simple gratitude journal. Then, write three things each day that you are thankful for. It could be something as simple as “I took a shower” to noticing a new blossom on a plant in the yard. After three weeks of consistent gratitude writing, you will feel a noticeable difference and start to see the sunshine through the clouds.

Start by making a simple gratitude journal. Then, write three things each day that you are thankful for. It could be something as simple as “I took a shower” to noticing a new blossom on a plant in the yard. After three weeks of consistent gratitude writing, you will feel a noticeable difference and start to see the sunshine through the clouds.

Here's a quick gratitude DIY journal you'll love! I am a firm believer in counting blessings, giving thanks and always having a positive outlook on life. Having a gratitude journal can change your life from feeling anxiety and overwhelmed to looking for those positive things that happened during the day.

Supplies Needed for Simple Gratitude Journal:

Glossy photo paper
Binding machine or needle and thread
Copy paper for filler
Paper cutter

Supplies Needed for Simple Gratitude Journal: Tombow Dual Brush Pens Retro Pack 10-Pack or any colors you love  Tombow MONO Twin Permanent Marker  Glossy photo paper  Tombow Blending Palette and Spray Mister  Binding machine or needle and thread  Copy paper for filler  Paper cutter

Step 1: Make the Background Paper

This fun technique is one I learned from @studio.katie. She is another Tombow Design Team Member.

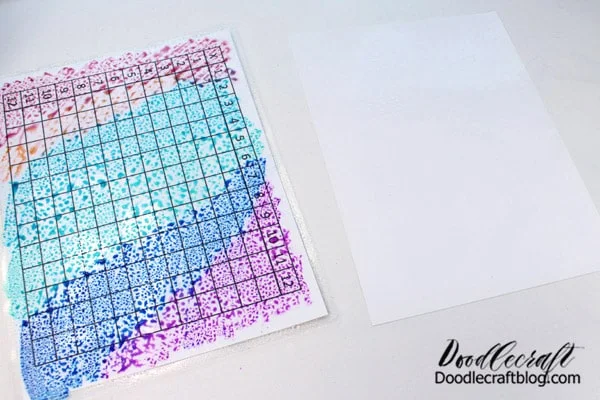
Begin by coloring with your Dual Brush Pens on your Blending Palette. I needed a larger palette, so I used a laminated times table chart.  Even a large plastic zipper bag would work. Fill the page with color.

Begin by coloring with your Dual Brush Pens on your Blending Palette. I needed a larger palette, so I used a laminated times table chart.  Even a large plastic zipper bag would work. Fill the page with color.

Then, spritz the entire page with water from the Spray Mister.

Then, spritz the entire page with water from the Spray Mister.

Spray the glossy surface of the photo paper as well.

Spray the glossy surface of the photo paper as well.

Then, press the Blending Palette onto the photo paper.

Then, press the Blending Palette onto the photo paper.

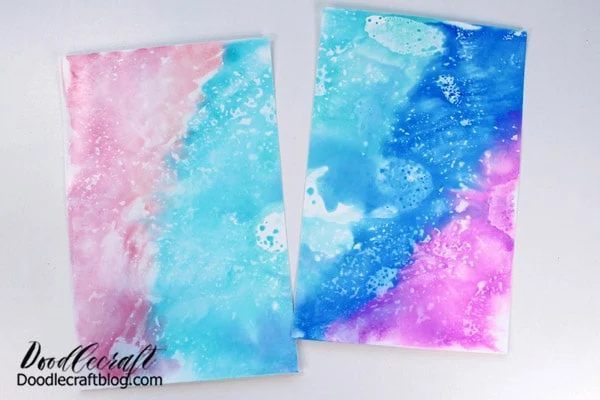
Lift off the palette and reveal the fabulous aquatic-like design on the photo paper. The photo paper dries nearly instantly! Wipe off the Blending Palette and table surface with a wet cloth or baby wipe.

Lift off the palette and reveal the fabulous aquatic-like design on the photo paper. The photo paper dries nearly instantly! Wipe off the Blending Palette and table surface with a wet cloth or baby wipe.

Step 2: Assemble the Journal

Now, there are a couple ways to assemble the gratitude journal. I have a binding machine, so I cut my paper in half. I punched the holes and repeated the process for the filler paper as well. Then, I clamped them in the binding wires. Local copy stores can usually do this for you as well.


Now, there are a couple ways to assemble the gratitude journal. I have a binding machine, so I cut my paper in half. I punched the holes and repeated the process for the filler paper as well. Then, I clamped them in the binding wires. Local copy stores can usually do this for you as well.

Now, the journal is ready to doodle on and decorate.

Now, the journal is ready to doodle on and decorate.

I used the MONO Twin Permanent Marker to write some faux calligraphy on. If you are learning how to do hand lettering, check out this post to get started. 

I used the MONO Twin Permanent Marker to write some faux calligraphy on. If you are learning how to do hand lettering, check out this post to get started.

Now, the journal is ready for you to fill with all the positive things from your day. Leave out anything negative…just load it up with positivity! 

Now, the journal is ready for you to fill with all the positive things from your day. Leave out anything negative…just load it up with positivity!

I am mostly grateful for this cute gratitude journal!
That's it!
Like, Pin and Share!

Here's a quick gratitude DIY journal you'll love! I am a firm believer in counting blessings, giving thanks and always having a positive outlook on life. Having a gratitude journal can change your life from feeling anxiety and overwhelmed to looking for those positive things that happened during the day.


facebook Follow Me on Pinterest Youtube Instagram twitter
postscript

Comments