How to do an Ocean Resin Pour on USA Cutout DIY
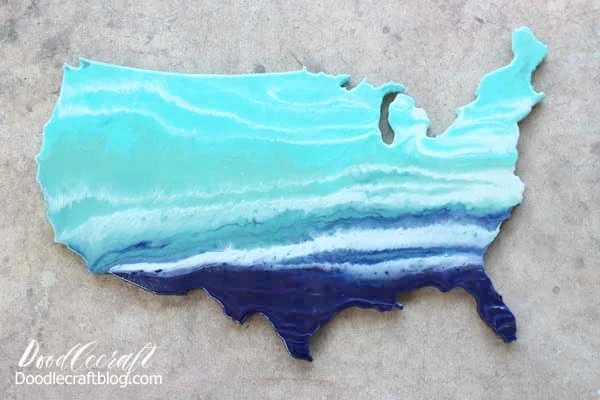
I am obsessed with ocean resin pours. Pouring out glossy colored resin to mimic the depth and waves of the ocean is so satisfying! This piece of ocean resin art is perfect year round, but especially great for the patriotic holiday!
When I finished this I pictured it saying "from Sea to shining Sea"...so I did a little hand-lettering on my ipad. The funny thing is that I bought this wood cutout of the USA about 3 years ago at the thrift store for $2. I knew I wanted it and would someday do something amazing with it...but it took until now!
Supplies Needed:
- Folk Art Acrylic Paint in White, Navy, Turquoise, Teal and Mint
- Small Paper Cups
- Stirring sticks
- 2 large resin mixing cups
- Plastic table cover
- Something to prop the wood on (I'm using more resin mixing cups)
- Hair Blow Dryer
- Straw
- Disposable Gloves
Step 1: Mix Resin
Begin by mixing the resin according to the package instructions. Put 4 ounces of resin and 4 ounces of hardener in one mixing cup. Stir gently for 2 full minutes, scraping the edges.Then pour the mixed resin into a second mixing cup and stir with a new stick for 1 full minute. The mixing process is essential for success when using resin.
Step 2: Mix Color in Resin
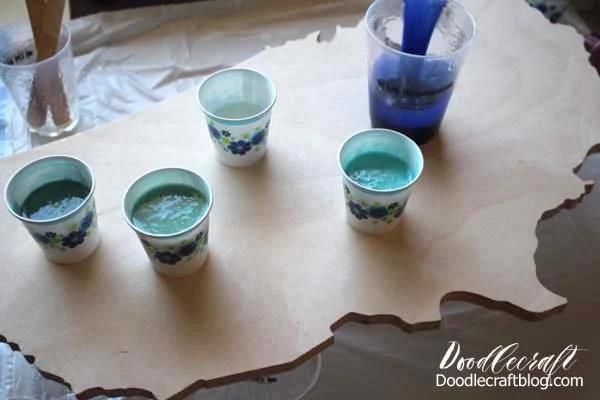
Then pour some resin into 4 small paper cups, leaving some in the original mixing cup. Put about a marble size of paint in each cup, so they are each a different color.Stir each color in gently so it does not add a lot more bubbles in the mix.
Step 3: Pour the Resin
Then begin with the lightest color at the top. Pour the resin all over the top edge of the map...or board. Continue working down the map with darker and darker colors. Pour them out and let the cups sit upside down for a brief moment. Then remove the cups and pour the next line.Step 5: Blend the Colors
Use your gloved fingers to gently push the resin to the edges and blend the colors together with some swipes of your fingers. Then pour the white resin across the map where the colors blend.Step 6: Make Waves
Next, use the blow dryer to warm and push the resin. Blow the white lines across the map. They will spread, looking like seafoam. Don't over use the heat or it will prematurely harden the resin. Just swift, long blows across the board to look like waves.Step 7: Pop Air Bubbles
Last thing to do is watch for air bubbles rising to the surface and gently blow on them with a straw. Then cover with a giant box and let it sit and cure overnight, about 12 hours.Step 8: Let Resin Cure
It's important to cover, especially in the Summer time, so that flies or other flyers don't land on it. Also, pet hair can be an issue. I don't have pets, so I forget this is a thing.I do this right in my main room of the house and have not been bothered by the smell. It's great, if you haven't worked with resin before, it's fun!
Next day use the paint that you used for the pour and paint the edges of the board to match. There are some drips on the backside, but it's not a big deal. They sand down easily.
That's it!
The finish is glossy and super shiny! The waves of the Ocean resin pour are perfection. It's the perfect home decor for the 4th of July--or any time of year! Perfect for a beach themed room too, so many possibilities!
Like, Pin and Share!
Leave a comment, let me know what you think!
 |
| USA Resin Paint Pour |


-min.jpg)


Comments