
Resin Tree Branch Jewelry Organizer DIY!
If you walk around the mall or store for a while, you'll see jewelry trees everywhere! I just knew I had to figure out a way to make my own. This tree is perfect for hanging rings, necklaces and bracelets on to keep track of all the fancy things.
 You will need:
Tree Branch
Log Slice
EasyCast Epoxy Resin
Paintbrush
Disposable work surface, mixing cups, gloves, stirring sticks, etc.
Gold Spray Paint
E6000 glue

Begin by finding the perfect tree branch. Mine was outside in the gutter.
 Find a way to rig the branch so it is hanging upside down over the disposable tablecloth. I clothes-pinned the branch to a lamp without a bulb.
 Mix up 2 ounces of EasyCast Resin according to the package directions. Then use the paintbrush to paint the resin all over the branch. It will drip onto the tablecloth...and it will also ruin the paintbrush.
 Once it drips for a few minutes, scrape the resin off the table with a stirring stick and put it back on the branch. The resin will help strengthen and stabilize the branch, so the more the merrier.
 Then let it dry and cure completely, at least 24 hours.
 Next, spray paint the entire branch gold...or copper, like me.
 Drill a hole the same size as the base of the branch into the log slice base.

Add some E6000 glue and stick the stick right in the hole! Let it dry for about 4 hours and then it is ready to use!
 Looks super chic and keeps track of all that lose jewelry.
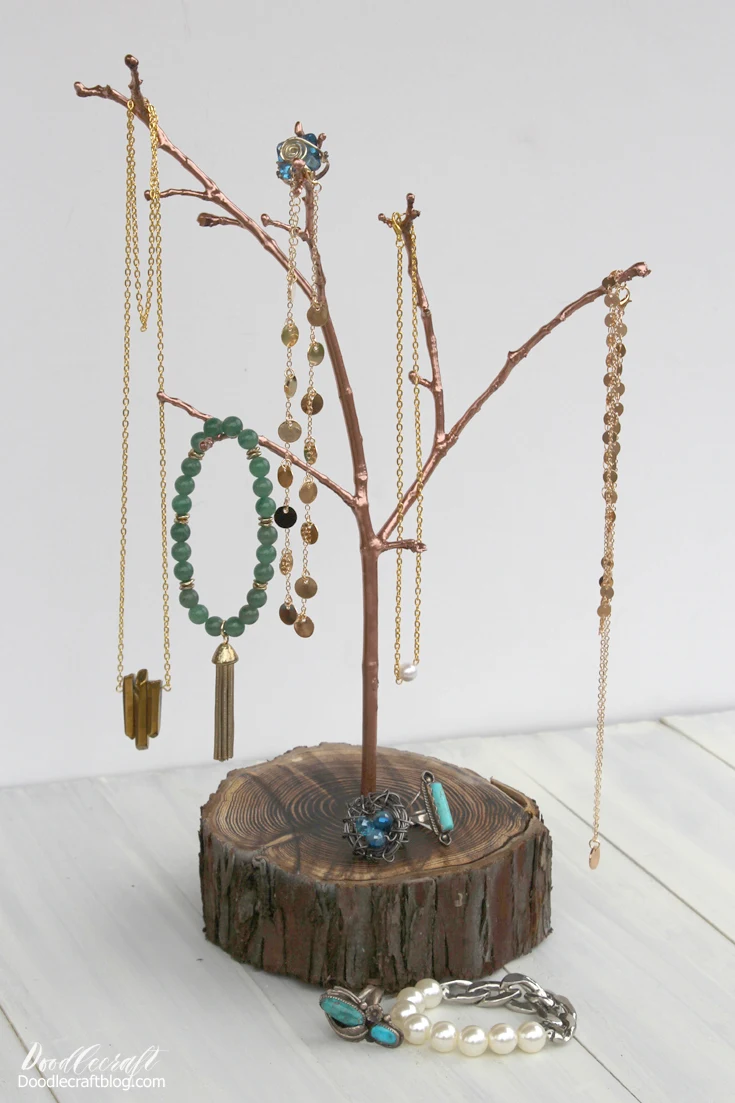 It's darling, it works as home decor as well. I love how well this craft turned out.
 Like, Save, Share, Comment, Follow and Pin!


If you walk around the mall or store for a while, you'll see jewelry trees everywhere! I just knew I had to figure out a way to make my own. This tree is perfect for hanging rings, necklaces and bracelets on to keep track of all the fancy things.

Tree Branch
Log Slice
EasyCast Epoxy Resin
Paintbrush
Disposable work surface, mixing cups, gloves, stirring sticks, etc.
Gold Spray Paint
E6000 glue

Begin by finding the perfect tree branch. Mine was outside in the gutter.


Add some E6000 glue and stick the stick right in the hole! Let it dry for about 4 hours and then it is ready to use!


This post published on Doodlecraft first


-min.jpg)


Comments