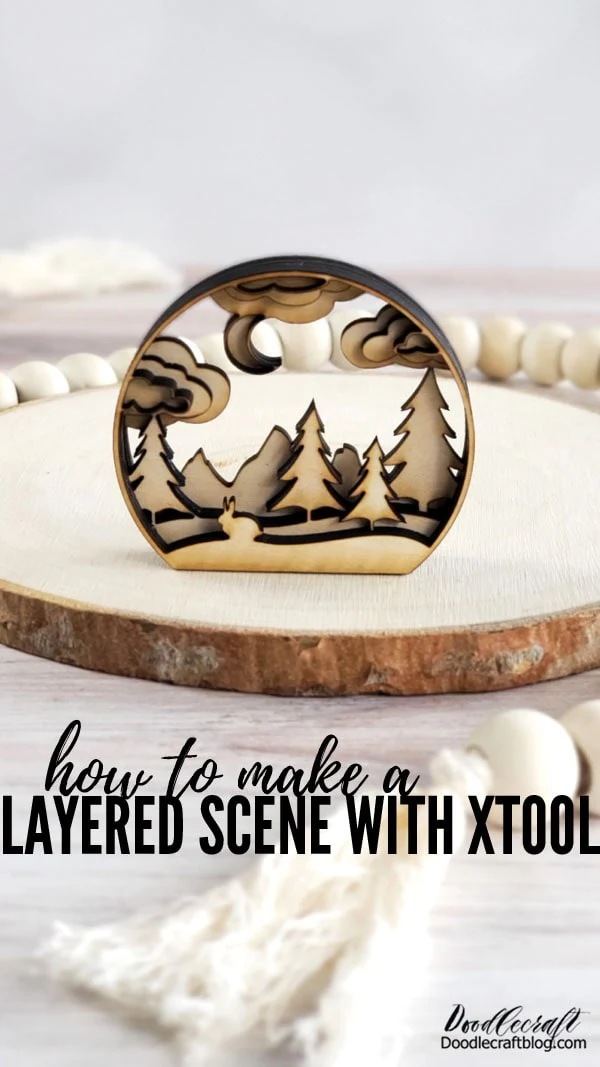
How to Make a Layered Snowglobe Scene


This post may contain affiliate links, sponsored content and products received at no cost.
6:00 AM
How to Make a Layered Scene with xTool  Learn how to make a layered scene using a laser cutting machine.    I am having so much fun using my new xTool laser cutter. It's easy to set up and can cut all sorts of materials.   Today I'm sharing these cute little snowglobe/window/layered scenes and how simple they are to create.

How to Make a Layered Snowglobe Scene


Learn how to make a layered snowglobe scene using a laser cutting machine and wood sheets. 


I am having so much fun using my new xTool laser cutter. It's easy to set up and can cut all sorts of materials.


Today I'm sharing these cute little layered snowglobe scenes and how simple they are to create.


How to Make a Layered Scene with xTool  Learn how to make a layered scene using a laser cutting machine.    I am having so much fun using my new xTool laser cutter. It's easy to set up and can cut all sorts of materials.   Today I'm sharing these cute little snowglobe/window/layered scenes and how simple they are to create.

Supplies Needed for Layered Scene:


Supplies Needed for Layered Scene:  xTool M1 Laser Cutting Machine 3mm Basswood xTool Creative Space Snowglobe File from Design Bundles E6000 or wood glue

Step 1: Design Time!


Begin by using xTool Creative Space or XCS and import an svg file. 


This snowglobe file doesn't fit the cut space so the software will resize everything to scale to fit the page. 


Then move the images around to fit on the basswood placed on triangular prisms in the laser cutter.


Set to cut on the side bar and then process, and it takes just about 5 minutes to get these cut.


Step 1: Design Time!   Begin by using xTool Creative Space or XCS and import an svg file.    This snowglobe file doesn't fit the cut space so the software will resize everything to scale to fit the page.    Then move the images around to fit on the basswood placed on triangular prisms in the laser cutter.    Set to cut on the side bar and then process, and it takes just about 5 minutes to get these cut.

Step 2: Puzzle Time!


After the laser cutter cuts the pieces, remove them from the machine and remove all the little cut pieces that might still be stuck in place.


If the wood doesn't get cut all the way through in places, just carefully use a hobby knife to finish the cut on the backside.


Step 2: Puzzle Time!  After the laser cutter cuts the pieces, remove them from the machine and remove all the little cut pieces that might still be stuck in place.   If the wood doesn't get cut all the way through in places, just carefully use a hobby knife to finish the cut on the backside.

Then line up all the snowglobe scene pieces, decide which one is the base piece...the moon and the mountain range.


When I was little I sat on the school bus one morning...on my way to Kindergarten, around age 5. 
I decided that I needed to figure out what my favorites are.
I was looking out the window, I even remember what road we were on. 
I was looking at the golf course at the nearby country club.
I decided that blue was my favorite color...like sky blue, aqua blue.
and then I decided that a bunny was my favorite animal.
I love fluffy white little baby bunnies.


Then line up all the snowglobe scene pieces, decide which one is the base piece...the moon and the mountain range.

At this point, you could paint each of the layers if you desire.


I love the look of just beautiful plain wood, so I wouldn't dream of painting...but do what you like.


What do you think? Would you paint them?


At this point, you could paint each of the layers if you desire.   I love the look of just beautiful plain wood, so I wouldn't dream of painting...but do what you like.    What do you think? Would you paint them?

Step 3: Glue Time!


Now take the base layer and place it on the worksurface. 


Then add a little glue to the backside of the second layer and place it on the base layer.


Then repeat with the next layer. 


The entire backside doesn't need glue, because parts of it are just floating, so just glue where it will press onto the previous layer.


Step 3: Glue Time!  Now take the base layer and place it on the worksurface.    Then add a little glue to the backside of the second layer and place it on the base layer.   Then repeat with the next layer.    The entire backside doesn't need glue, because parts of it are just floating, so just glue where it will press onto the previous layer.

I am so astounded by the thin, delicate little lines of wood!


The laser cutter is super precise! 


I am so astounded by the thin, delicate little lines of wood!   The laser cutter is super precise!

I love how this little snow globe layered scene turned out. 


That little bunny just melts my heart! 


This would totally work for Easter and Spring decor, right!?


I love how this little snow globe layered scene turned out.    That little bunny just melts my heart!    This would totally work for Easter and Spring decor, right!?

These little layered scenes have 5 layers each. 


They glue together to make them still delicate, but pretty sturdy.


I am just in love with them!!!


These little layered scenes have 5 layers each.    They glue together to make them still delicate, but pretty sturdy.   I am just in love with them!!!

The file I used has 6 different snowglobe designs and they are all so cute. 


Some are very Winter/Holiday themed, but these 2 that I did are perfect for year round.


The file I used has 6 different snowglobe designs and they are all so cute.    Some are very Winter/Holiday themed, but these 2 that I did are perfect for year round.

That's it!


The xTool M1 laser cutter is a welcome addition to my family of craft tools and I can't imagine not using it now.


I've got more posts coming--so stay tuned!


Like, Pin and Share!


How to Make a Layered Scene with xTool  Learn how to make a layered scene using a laser cutting machine.    I am having so much fun using my new xTool laser cutter. It's easy to set up and can cut all sorts of materials.   Today I'm sharing these cute little snowglobe/window/layered scenes and how simple they are to create.


Comments