
How to Make a Reusable Cake Stencil with Cricut!
Did you know you can stencil a cake!? It's true, stenciled cakes are stunning, unique and gives the viewer an experience of awe; wondering how they got that pattern on the tiers of the cake.
Let me show you how to make a reusable cake stencil using the Cricut Maker.
Check out this cake all decked out and decorated for my Downton Abbey themed party here!
-min.jpg)
This cute cake was made by SomethingSpecial_custom.cakes --check out all her fun cakes on instagram!
-min.jpg)
I made the stencil and hired Cassidy to bake, layer, fill, coat, frost, and stencil this tiered cake. She did all the hard part and I got to add some decorations on it--post to come!
I loved not having to make the cake myself...lol. Sometimes you just let someone do the things that they are the best at.
The plan was to have it just stenciled so I could do more decorating at home for a fun project that I'll show you on Friday May 13th!
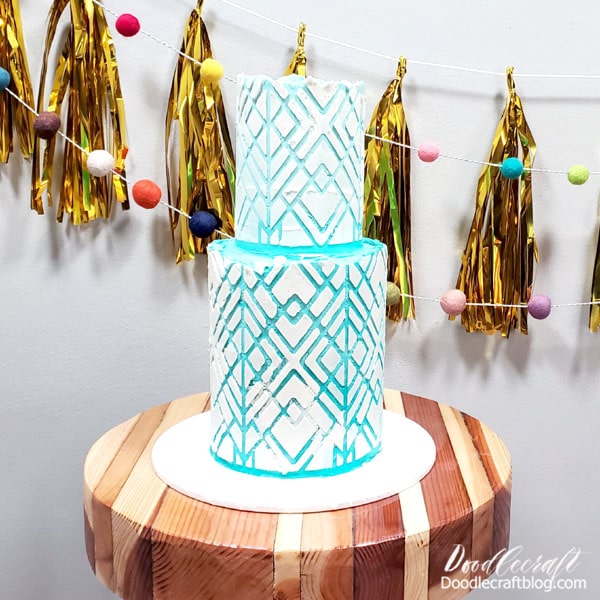
It was not necessary to stencil the entire cake, and I love those raw, rough edges!
Make it as smooth and refined as you want.
-min.jpg)
Supplies Needed for Reusable Cake Stencil:
-min.jpg)
Step 1: Cut the Reusable Cake Stencil!
Place the stencil material on the mat.
Insert the deep cut blade (or use the fine point blade and just do multiple passes).
Click the Make it button on Cricut Design Space project or design your own stencil pattern.
Then cut the stencil!
-min.jpg)
Step 2: Stencil the Cake!
-min.jpg)
Smooth some buttercream frosting over the stencil and it will help hold it in place.
-min.jpg)
Continue filling the stencil area with frosting until covered thickly in a layer of sweet buttercream frosting.
-min.jpg)
Then use a scraper and smooth out the layer of buttercream frosting.
At this point you can even spray the cake with an airbrush or paint some gold on the frosting before removing the stencil.
-min.jpg)
Step 3: Remove the Stencil!
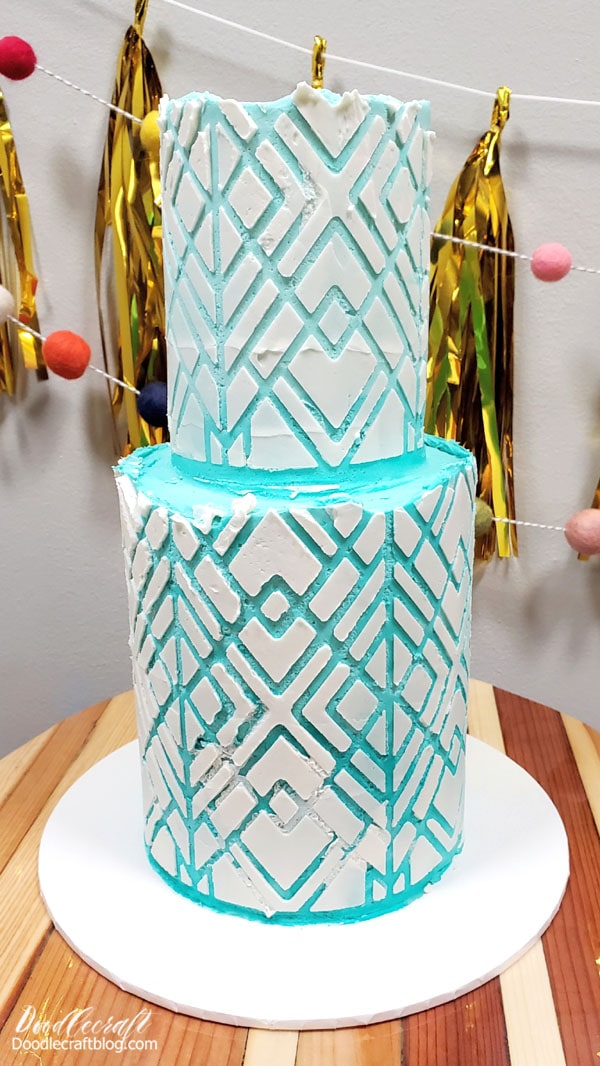
After smoothing the frosting, peel back the stencil, revealing the gorgeous art deco geometric pattern! Then just clean the frosting off the stencil--I won't tell if you eat it!
Wash the stencil gently with soap and water and then rinse clean. Let it air dry and it's ready to use again!
-min.jpg)
The contrasting colors, the texture, the juxtaposition of the rough and smooth frosting--I love it!
-min.jpg)
Now you can add pearls, sprinkles, cake toppers or any other fun decorations you want!
It's the perfect cake and such a cute size!
The top is 4" round and the base is 6" round. Such a cute little tiered cake!
-min.jpg)
The top tier is Biscoff layer cake with Biscoff filling.
The lower tier is Vanilla cake with cream cheese frosting. The aqua and white frostings are delicious buttercream!
I ate both of those cut out pieces for my lunch. So good. I cut up the rest and wrapped it up and froze them for later...just to pull out when I need a quick sweet treat!
Um, this cake is good cake.
-min.jpg)
That's it!
Make a cake stencil and make a decorated cake! This technique can also be done on a sheet cake. Perfect for serving at a party!
Like, Pin and Share!
-min.jpg)
-min.jpg)


-min.jpg)


Comments