Cricut Joy: Bridemaids Gift Basket from Dollar Store


This post may contain affiliate links, sponsored content and products received at no cost.
6:00 AM

This is a sponsored post written by me on behalf of Cricut. All opinions are 100% mine.

Is there a wedding in the future? Make a fabulous gift basket for the bridemaids and other wedding party with supplies from the dollar store.

Cricut Bridemaids Gift Basket from Dollar Store!

Is there a wedding in the future? Make a fabulous gift basket for the bridemaids and other wedding party with supplies from the dollar store. Cricut Joy makes customizing gifts easy and quick!

Cricut has made it wonderfully convenient to get started with Cricut in a wide range of budgets and space. Cricut Joy is compact and powerful--it has a couple benefits that the Maker and Explore Air 2 don't have.

If you are thinking of starting a Cricut Business or Side Hustle, check out this post.

Cricut Joy makes customizing gifts easy and quick! Cricut has made it wonderfully convenient to get started with Cricut in a wide range of budgets and space. Cricut Joy is compact and powerful--it has a couple benefits that the Maker and Explore Air 2 don't have.

Supplies Needed:

Cricut Design Space
Dollar Store goodies: Wire baskets, glasses, canvas bags, etc.

Supplies Needed: Cricut Joy EasyPress Mini Smart Iron-on Cricut Insert Cards Smart Vinyl Transfer Tape Cricut Design Space Dollar Store goodies: Wire baskets, glasses, canvas bags, etc.

Project 1: Insert Card

Insert cards are the best thing about Cricut Joy. The custom card mat, makes inserting a folded card a cinch. Open up Cricut Design Space and there are pages of insert cards. Select the one you like!

Project 1: Insert Card Insert cards are the best thing about Cricut Joy. The custom card mat, makes inserting a folded card a cinch. Open up Cricut Design Space and there are pages of insert cards. Select the one you like!

Slip the folded card into the card mat and click go. The little Joy cuts it out with a melodious mechanical hum.

Slip the folded card into the card mat and click go. The little Joy cuts it out with a melodious mechanical hum.

Then remove the card from the mat and use the spatula to remove the cut-outs. Then insert the shiny gold insert into the corner notches. More details on card making on this post.

Then remove the card from the mat and use the spatula to remove the cut-outs. Then insert the shiny gold insert into the corner notches

Repeat the card making process for as many cards as you desire. This is the answer to the Christmas card question, they turn out perfectly!

Repeat the card making process for as many cards as you desire. This is the answer to the Christmas card question, they turn out perfectly!

Project 2: Cosmetic Bags

The second thing that Cricut Joy is king at is cutting with smart surfaces. This means that you don't need to use a cutting mat! Just insert the iron-on or vinyl and cut, it's smart enough to cut through the layer of material but not cut the backing.

Project 2: Cosmetic Bags The second thing that Cricut Joy is king at is cutting with smart surfaces. This means that you don't need to use a cutting mat! Just insert the iron-on or vinyl and cut, it's smart enough to cut through the layer of material but not cut the backing.

Find a design on Cricut Design Space, I picked "fabulous". Then size is and select the mirror-on option. Cut out the design directly on the iron-on, no mat needed. Then remove and weed away the excess iron-on.

Find a design on Cricut Design Space, I picked "fabulous". Then size is and select the mirror-on option. Cut out the design directly on the iron-on, no mat needed. Then remove and weed away the excess iron-on.

When turned over the lettering should look correct. The plastic cover, carrier sheet, will protect it during the pressing process.

When turned over the lettering should look correct. The plastic cover, carrier sheet, will protect it during the pressing process.

Heat up the EasyPress mini! I love my mini--it works great for small projects and takes up very little space. With Cricut Joy and EasyPress Mini space saving is perfection!

Heat up the EasyPress mini! I love my mini--it works great for small projects and takes up very little space. With Cricut Joy and EasyPress Mini space saving is perfection!

Heat up the bag and then place the iron-on down on the warm bag. Press with the EasyPress Mini about 15 seconds on each section. Then let it cool completely and remove the carrier sheet.

Heat up the bag and then place the iron-on down on the warm bag. Press with the EasyPress Mini about 15 seconds on each section. Then let it cool completely and remove the carrier sheet.

Project 3: Vinyl on Glasses

Permanent Vinyl is perfect for sticking to glass and again, needs no mat to be cut with Cricut Joy.

Project 3: Vinyl on Glasses Permanent Vinyl is perfect for sticking to glass and again, needs no mat to be cut with Cricut Joy.

Select an image on Cricut Design Space and cut it (not mirrored) without a mat.

Select an image on Cricut Design Space and cut it (not mirrored) without a mat.

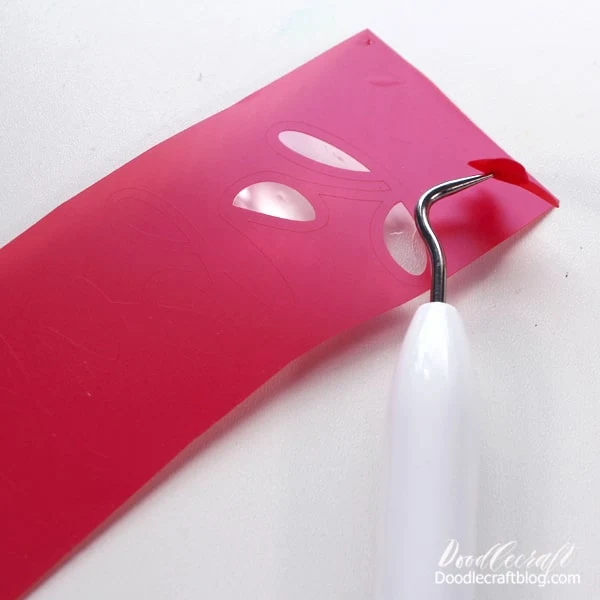
Then remove the excess vinyl using the hook tool. Be careful and work slowly around those little thin lines.

Then remove the excess vinyl using the hook tool. Be careful and work slowly around those little thin lines.

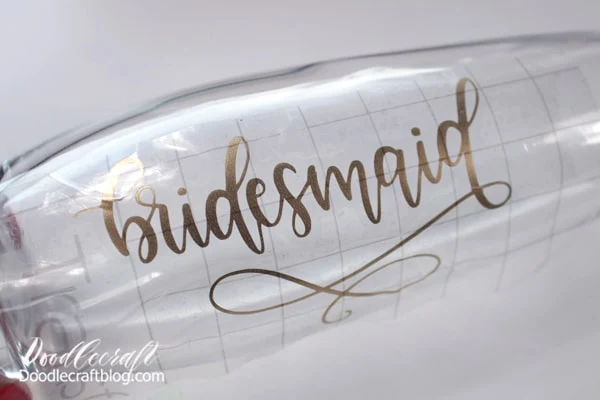
Use a piece of transfer tape over the top of the vinyl, rub it down with the scraper tool. Then peel the white backing sheet off. Then place it on a clean glass, clean it with rubbing alcohol and let it dry.

Use a piece of transfer tape over the top of the vinyl, rub it down with the scraper tool. Then peel the white backing sheet off. Then place it on a clean glass, clean it with rubbing alcohol and let it dry.

Then roll the transfer tape over itself to release it from the glass, leaving the vinyl on the glass.

Then roll the transfer tape over itself to release it from the glass, leaving the vinyl on the glass.

Then place some tissue paper and shred in a wire basket and place the items inside. Add some candy and it's perfect! Celebrate your wedding party with thoughtful and customized gifts.

Then place some tissue paper and shred in a wire basket and place the items inside. Add some candy and it's perfect! Celebrate your wedding party with thoughtful and customized gifts.

That's it!
Get a Cricut Joy and start making all the things!
Like, Pin and Share!

Make a fabulous gift basket for the bridemaids and other wedding party with supplies from the dollar store.


facebookFollow Me on PinterestYoutubeInstagramtwitter
postscript

Comments