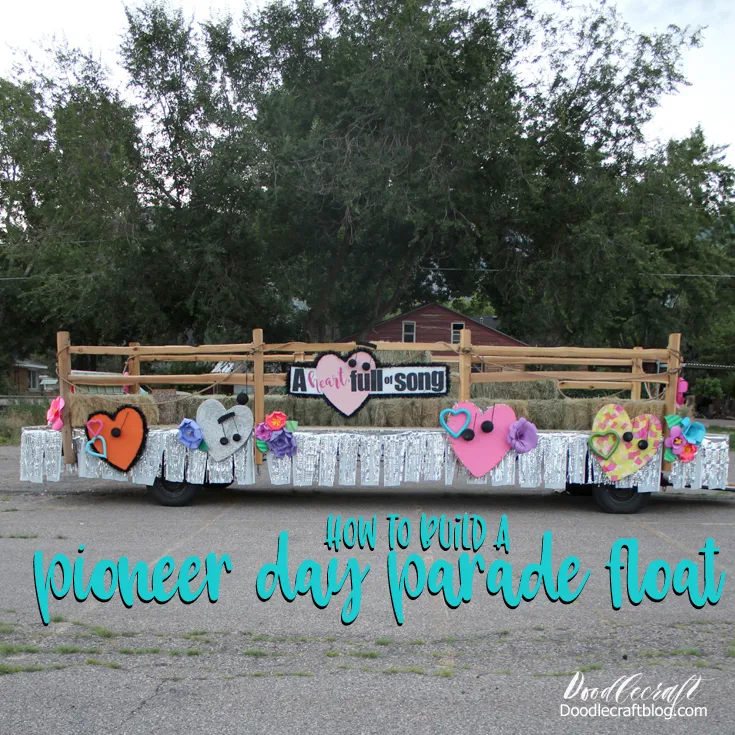
How to Build a Pioneer Day Parade Float
My husband, Mike, and I were assigned to make a Pioneer Day Parade float for our church stake for the days of 47 parade last summer. This is a fun celebration in Utah to commemorate the arrival of the pioneers into the Utah valley. We were assigned in April. Our leadership let us know that there were parade float classes held locally in January and February, so we had missed them...haha, it was just us figuring everything out. Here's what we did and what we learned...and things we would do differently if we had to do it again.
We were told the parade theme: "Lesson learned on the Pioneer Trail". We had to pick a theme for our float that went along with the overall theme. What kind of lessons did the pioneers learn along the trail? My hubby and I debated this back and forth a bit...and we didn't want to have a morbid theme...but we remembered how so many pioneer stories talk about singing while they walked, celebrating nights with music and dancing and working with a "heart full of song". We settled on that for the theme.Parade floats zip by in about a minute, so they need to be obvious and understandable. A very obvious visual metaphor of our theme is hearts with music notes! The next decision we made is that no one watching the parade will remember or care about our float...but anyone and everyone we have participate or help with it will remember it for the rest of their lives. We decided to involve as many people in the parade float as possible.
We were asked to provide a sketch of the float design. Even though some changes were made along the way, this is the doodle we sent in.

We were given a large budget we could be reimbursed up to $3800. We barely scratched that and spent about $1000. Through our city, we were able to secure a trailer base for $100. 10 feet wide and 28 feet long. We picked it up in June and parked it in our driveway. We opted to storing it ourselves, rather than finding a storage unit to keep it in. We borrowed a truck and drove it home ourselves. It was a 10 mile drive and we could only go about 20 mph, so it's slow going and super scary!!!
We found someone that was comfortable driving trailers in crowds for the actual parade day.
Now because we decided to involve so many people, we wanted to make sure the float was strong, secure and safe. We bought cedar fence posts and boards to build a fence around the trailer. This way it would look rustic, like Pioneer days, and be sturdy.
We enlisted the help of several young men to build the fence.
They sawed and chiseled notches in the posts.
And then screwed the posts into the trailer. We had permission to screw anything into the trailer. July is so hot!
The fence fit together beautifully! To make it extra sturdy, we called on the services of the best welder in the world (my father-in-law) and he welded the posts to the underside of the trailer. Super sturdy and perfect for holding up the eager kids on the float.
I received a huge shipment of Styrofoam pieces from FloraCraft. I recruited a bunch of young ladies to help me paint and do all the decorating! While enjoying some strawberry lemonade in the hot sun. (where are you now sun?)
I used my pop up tent and Finish Max paint sprayer from Home Right and painted all the music notes. Wooden dowels hot glued into styrofoam balls.

We got huge hearts too! They come in half pieces and then they can be stuck together with hot glue or toothpicks. I used outdoor safe Mod Podge from Plaid Crafts and tissue paper and covered the hearts on both sides. Twelve large hearts don't seem like much, but just decorating them takes lots of time and materials. The hearts are 24-30 inches tall!
We have this awesome building in our back yard that we call "The Room of Requirement", that we can use for whatever we need. I set up tables and placed the hearts on them to dry. If you don't have a big room to spare, think of where you can work on your float and store them. Most use storage units.
After the hearts dried, they were painted and glittered...the edges were covered with tinsel, ribbon, glitter or confetti.
The theme needed to be on the float as well, so I just used my Cricut Explore Air™ 2 machine and cut letters out of black cardstock and hot glued them right on the styrofoam sheets. Then use straight pins and stick the letters in place too. This way if the sun is hot and shiny, the hot glue won't just melt off...ask me how I know that!
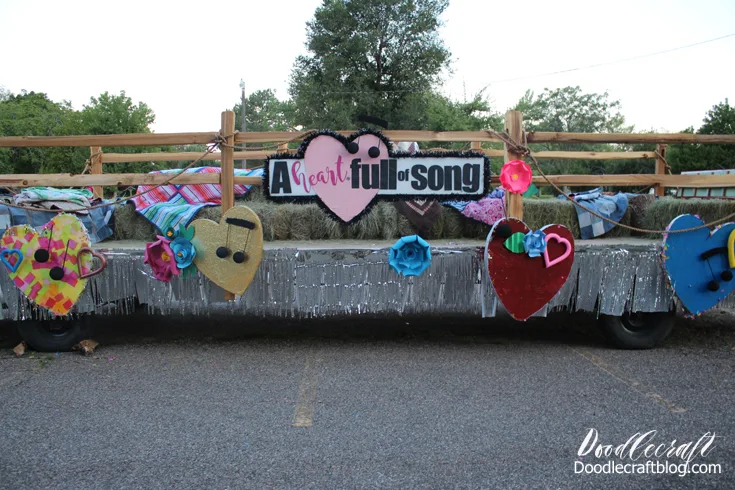
I cut Styrofoam to fit around a heart and painted the heart light pink. The white part is just plain old styrofoam. The tinsel garland was found at a party supply store at a discounted price! Score! I like the black outline...I think it's a helpful touch.
And then I did it twice! One for each side of the parade float.
We mounted the styrofoam pieces onto the wood fence and trailer frame with big long screws and washers.

We lashed some awesome rope around the posts for another rustic touch...and big straw bails for people and our brass band to sit on.

I used wooden skewers to attach the music notes to the hearts. The music notes were also instrumental in covering up the screws. And we used all my paper flowers from my daughter's birthday party in April as extra color and cuteness! Use what you've got!

We attached the flowers to the wood frame and fence with a staple gun! Easy peasy! The trailer is huge and would have taken so many supplies and decorations if we weren't making people the main attraction. This way we could just add the decor elements for a shimmery touch. We put up all the decorations the super late night before the parade...this way we could check the weather report and make sure they weren't going to be damaged outside over night. If you are concerned about weather, covered storage might be what you need!
Parade Float Checklist
*Budget
*Visual Theme
*Get a Trailer
*Truck to pull it
*Where are you storing it?
*Make it safe
*How many people will be on it?
*What resources do you have?
*Involve people
*Weather Proofing
*Transport people and parade driver
We added some white plastic table cloth material for the skirt with some tinsel curtains over. Adding the perfect amount of shimmer and sparkle to old time rustic.
I love how the combination worked out!
We had our stake name on the backside of the float too...and wrapped the edge of the Styrofoam with wide ribbon to fit perfectly.
As a finishing touch, we added brightly colored quilts on top of the straw bails for softer seats and bright colors. The parade float is finished!
We arranged with all the people that wanted to participate to be at the designated place at the designated time...in full Pioneer clothes. The clothes were sourced by the individuals and bonnets were available from the church.
Having a full crew on the parade float was the finishing touch! Then it didn't matter how decorated the float was, because the smiling faces were the best part!
We had groups of people on the float, riding the whole time...and groups of people walking along the sides of the float. We had a fabulous 3 piece brass band playing on the back of it, they played the song "Put your Shoulder to the Wheel", where you'll find the phrase "A Heart full of Song". It was perfect!
My husband had a class that day, so he missed seeing the fruits of his labors...but I sat with my youngest son, right across the street from the Ogden LDS Temple and watched as my float walked by. It was great!
My daughter was able to participate and the brass band was fabulous!
It truly was a group effort and lots of fun! We had everyone that participated and helped all along the way come over to our house right after the parade for a Root Beer Float and Pizza party to celebrate--after all, we had the budget for it! It was a glorious moment to be done with the float and the parade! It only took us a few minutes to break down the trailer. We saved the fence pieces and actually put them in our yard, as our new fence and we love it!
No better way to celebrate the end of all this work than big explosive fireworks!
Yay--it's over! If they ever try to assign us with this task again, we will politely pass and ask them to give someone else the blessings of working on a parade float! Still we had a fun experience and a wonderful parade!
Have you ever been tasked with an assignment like this?
Learn from me!
Like, Save, Share, Comment, Follow and Pin!
This post published on Doodlecraft first


-min.jpg)


Comments