
")
Hogwarts House Bunting with Cricut (Harry Potter DIY)
Which Hogwarts house will you be in this back-to-school season? I think I'm a Ravenclaw girl...but maybe because I like those colors best.
Make this layered iron-on vinyl bunting with the Hogwarts houses crests as the perfect backdrop for a party or Harry Potter themed classroom--plus more Harry Potter Party ideas at the end of this post.
Just in time for Harry's birthday at the end of July too!
")
This fabulous bunting/banner with the house crests is super simple to make and a great way to show off those house colors!
Yes, it requires a few specialized supplies...but the options are positively endless if you have a Cricut.
")
HARRY POTTER CRAFTS:
Each crest is a Harry Potter licensed Cricut Design Space image that you can purchase.
Even me, I bought every single Harry Potter design because I just love the ease of use.
Each crest costs $1.99, or you can buy all the HP designs as a bundle.
")
I'm thinking about having a Harry Potter themed home school year theme, we could all become an awesome Harry Potter expert.
I could sort my kids into their own house, I could have them send owls, we could play so many game games!
")
Supplies Needed for Hogwarts House Bunting:
- Black Felt
- Sewing Machine or Hot Glue Gun
- Cord
- Cricut Maker (of other Cricut machine)
- Iron-on Vinyl (in red, blue, yellow, green, black and gray...no white needed)
- Cricut EasyPress 2
- EasyPress Mat
- Rotary Cutter/Cutting Mat or Scissors
- Cricut Design Space Images (must be purchased through Cricut)
- 4 Harry Potter House Pride Crest Images
- Command Strips and Hooks (for hanging)
")
Step 1: Cutting the Iron-on
The magic of the images, is that there is little or no effort involved.
Just size the house emblems design to the desired size...mine are 7 inches tall.
Mirror the image so it cuts the design in reverse.
")
Click the Make button and insert the iron-on.
Place the iron-on vinyl on the mat with the shiny/slick surface facing down.
Repeat the cutting process for each color.
Cricut Design Space will let you know which color comes next, using flocked vinyl would make these extra fun!
")
Then trim down the vinyl as close as you can to the cut line to save product.
")
Then weed the excess vinyl from the cut out designs.
")
Repeat this same process for each of the layers. There are 3 layers for each crest.
")
Stack them up together to see how they will look, the Hogwarts Houses each boast their color and animal, plus a "fun geometric ghost pleasing design".
")
Step 2: Black Felt Buntings
Then get 4 pieces of black felt.
These pieces measure 9x12 inches.
Fold it in half and place the ruler at the bottom edge.
Place it right on the open ended corners and angle the ruler up 1.5 inches to the folded center.
")
Then use a rotary cutter to cut the notch out of the bottom edge.
")
Repeat for all 4 open layout buntings.
")
Step 3: EasyPress Iron-on
Now place the black felt bunting on the EasyPress mat and place the bottom layer of the crest...the gray one...on the bunting.
")
Then press with the EasyPress for just 15 seconds on the first layer.
Pressing felt temperatures should be 280*.
")
Let the iron-on cool down and then peel off the carrier sheet.
")
Then add the next layer of the crest on top of the previously pressed iron-on.
")
Press again for 15 seconds and let it cool down completely. (I rotate through each crest and when I've done all 4, the first has cooled.)
")
Same as before, remove the carrier sheet and add the next layer of iron on vinyl.
")
Press again for 15 seconds.
If 15 doesn't feel like it's adhering enough, do it a little longer...but it's heating each layer repeatedly and we don't want to over do it.
")
Final layer is the name of the crest.
Place the name on the proper space and use a carrier sheet from a previous layer to cover the entire thing.
You don't want the EasyPress to touch the iron-on directly.
")
Press for 30 seconds and then let the iron-on cool down completely for the last time.
")
Don't they look great! These fun designs would be awesome on a shirt too!
")
Now fold over the top edge of the bunting and sew it across...or hot glue it.
")
Then thread the cording through the folded over edge. I looked up which order the tables are set up in Hogwarts...and it goes Slytherin, Ravenclaw, Hufflepuff and then Gryffindor.
")
Add some tassels on the ends of the cord and hang it up with command hooks and strips.
If you are reading the Harry Potter series which book is your favorite? I love the first book, because it was a little bit like falling in love.
")
It's perfect for the Great banquet Hall!
I love how easy it was to create and how amazing it turned out!
I have tons of awesome ideas for Harry Potter crafts, parties and themed projects at the end of this post.
")

Which house do you belong in?
I think Hufflepuff gets overlooked a lot. It seems like a cool house though.
I think this banner gets Ravenclaw 50 house points!
")
I read the Harry Potter books with my oldest kids about 10 years ago.
That means my baby, who is now 13, has never actually heard or read the full books.
We decided that this is the homeschool year for him to get through all the books.
We are going to celebrate with Butter Beers and a Harry Potter Party to kick it off...and pretend we are at the Wizarding World.
")
Making a Fantastic Beasts party with a glorified cake mix, balloons, floating candles and other wizarding world crafts would be amazing.
")
That's it!
Making a fun Hogwarts house bunting or banner with flags is an easy craft DIY using the Cricut and a heat press.
I love using iron-on vinyl and the details and intricate finish you can achieve with it.
Decorate your classroom for the new school year and remind everyone of the magic of reading the series for the first time, celebrate with a Harry Potter themed party for Harry Potter fans or a little boy or little girl, or make a bunch of Hogwarts themed crafts just for fun!
Like, Pin and Share!
")
Check out these other FUN Cricut or Harry Potter crafts too!
How to Make Ghostbuster Costumes Made with Cricut DIY!
Who you gonna call? Ghostbusters!
Make the perfect Ghostbusters jumpsuit costumes for cosplay, Halloween or for a comic convention!
You could dress up like a Stranger Things crossover--like Dustin, Mike, Will and Luke dressed up as Ghostbuster!
I loved the old school Ghostbuster movies, at least the first film. It's a classic controller. I'm not crazy about the reboot with the ladies...and I haven't seen the latest.

Magical DIY Harry Potter Themed Wedding Event Ideas
Planning a magical wedding with all the Harry Potter elements is effortless with a few DIY crafts and Oriental Trading.
I am partnering with Oriental Trading (affiliate links) for these magical wedding theme ideas and can't wait to show you everything!
The big day should be elegant and over the top with a subtle nod to the classic Harry Potter books--and worth for the front page of the Daily Prophet!
-min.jpg "Magical DIY Harry Potter Themed Wedding Event Ideas Planning a magical wedding with all the Harry Potter elements is effortless with a few DIY crafts and Oriental Trading. I am partnering with Oriental Trading (affiliate links) for these magical wedding theme ideas and can't wait to show you everything! The big day should be elegant and over the top with a subtle nod to the classic Harry Potter books--and worth for the front page of the Daily Prophet!")
How to Make a Hogwarts House Banner DIY!
This large Hogwarts house large banners is made with felt fabric and big printed, cut, laminated and cut images.
Each banner is topped with a tassel in the house colors.
Free printables house crests at this post!
Easy to make for personal use, but not great for selling since these are copyrighted images and all that jazz.
-min.JPG)
Book of Monsters Journal Cover

Harry Potter Birthday Cake Topper
-min.jpg)
I'm a Fantastic Beast Shirt
-min.JPG)
Niffler Coin Purse

Harry Potter Shirts for Baby

Magic Wands

Fat Lady Necklace

How to Make a Gryffindor Tie

Chocolate Frogs Hot Chocolate Bombs

Felix Felicis Necklace

Troll Bogeys Shirt

Harry Potter Party

Butter Beer Recipe
-min.JPG)
Butter Beer Italian Soda Bar
-min.JPG "Host the perfect Harry Potter Butter Beer Italian Soda Bar!")
Chocolate Frogs and 5 Sided Boxes
-min.JPG "Make the perfect 5 sided boxes for easy Chocolate Frog storage!")
Edible Hogwarts "Wax" Chocolate Seal Cookies
-min.JPG "Make edible wax seals with the hogwarts crest, perfect cookie topper!")
Trouble Usually Finds Me Harry Potter Shirt
-min.JPG "Trouble usually finds me. Harry Potter themed iron-on shirt for the Harry Potter fan.")
Deathly Hallows Cake Toppers
If you are planning a Harry Potter themed wedding, event, birthday party or special occasions, this Deathly Hallows cake topper is the icing on the cake.
I'm sharing these 2 different cake toppers, free downloads at the end of the post, as an inexpensive way to do cake decorations with a high quality professional look.
-min.jpg "Harry Potter Deathly Hallows Wedding Cake Topper DIY If you are planning a Harry Potter themed wedding, event, birthday party or special occasions, this Deathly Hallows cake topper is the icing on the cake. I'm sharing these 2 different cake toppers, free downloads at the end of the post, as an inexpensive way to do cake decorations with a high quality professional look.")
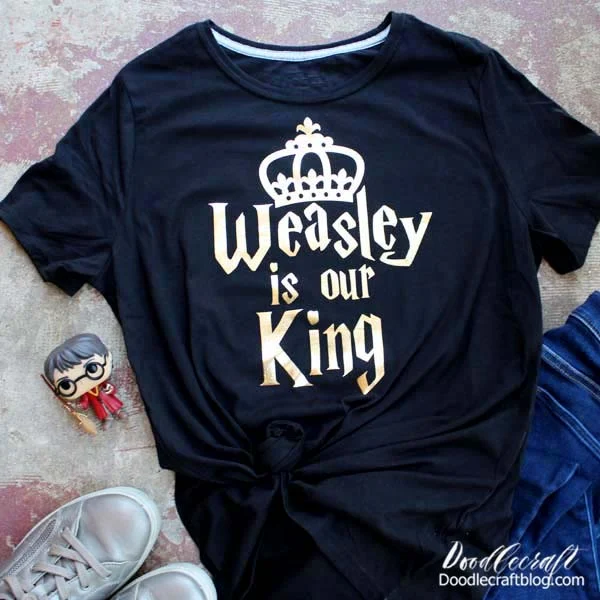
Weasley is our King Shirt
How to Make Harry Potter Golden Snitch DIY FREE SVG
If you are a Harry Potter fan, you will love this simple Harry Potter fun craft!
Make a DIY Golden Snitch tealight candle holder, perfect for a Harry Potter party, fairy garden, wedding or special event!
Video Tutorial in this post too--if you prefer to watch it quickly!
-min.jpg "How to Make Harry Potter Golden Snitch DIY FREE SVG If you are a Harry Potter fan, you will love this simple Harry Potter fun craft! Make a DIY Golden Snitch tealight candle holder, perfect for a Harry Potter party, wedding or special event! Video Tutorial in this post too--if you prefer to watch it quickly!")
Check me out on tiktok - make lots of easy DIY's


-min.jpg)


Comments