

How to Make Colored Pencil Vase Turned with Lathe DIY!
I love office and school supplies. This colored pencil vase is an especially fantastic DIY project from start to finish. My husband and I worked on this fun craft together.

Colored pencils are the best. When I was in junior high I was invited to an advanced art class, but I needed to have some supplies.
High quality colored pencils was on the list. Back in the day before the internet, it was much harder and more expensive to buy these colored pencils.
It was a financial struggle for my mom, but she got me a 24 pack of prismacolors anyway. They were more than a dollar each. But, they were the greatest colored pencils ever...and I learned my love of crafting, not art.
Haha, I am a crafter but would not consider myself an artist.

Despite using 216 colored pencils for this vase, the real star of the show for this project is the high gloss resin finish. It looks dull and unimpressive without it. Let's get started!
This craft uses 2 types of resin: deep casting resin and high gloss resin.
Casting resin is used for anything that will be more than 1/4 inch thick.
High Gloss resin is used for a high gloss finish less than 1/4 inch thick--it's the equivalent of 50 layers of spray lacquer!

Supplies Needed for Colored Pencil Vase:
- EasyCast Clear Casting Epoxy
- Mold Release Spray
- Colored Pencils (lots of them)
- Plastic Container for Casting (small vinegar bottle)
- Piece of scrap wood
- Rock or weight
- Empty Box
- Mixing Cups, Stirring Sticks, Disposable Gloves and Work surface
- Hobby Knife
- Packing Tape
- Table Saw
- Mini Wood Lathe
- Lathe Tools

Step 1: Pencils
Begin by finding a container that is about the right size for the lathe. No more than 8 inches in diameter and no more than 12 inches tall.
I found this Cleaning Vinegar at the dollar store and the container was perfect. I cleaned the bathrooms and toilets...then set off to work on the colored pencil vase.

Use the hobby knife to cut the top of the container off.

Firmly pack the colored pencils in the container tightly. I fit 216 colored pencils in the container.
The top of the pencils are pointing down into the container.

Then use some clear packing tape and wrap it around the container and the tops of the colored pencils.

Step 2: Mix Resin
Mix up 8 ounces of EasyCast resin according to the package directions in the 2 phase process. It is super important to mix the resin properly or it will not harden right.
Mix 1 part of resin and 1 part hardener, stir for 2 full minutes, scraping the stick and sides of the cup. Then pour the resin into the second cup and using a second stick, stir the resin for 1 full minute.

Step 3: Pour Resin
Then pour the resin over the top of the colored pencils. It will seep inside and in between the sticks. We pulled out one colored pencil to all it to fill easier and then stuffed it back inside at the end.

Then I placed a piece of scrap wood and a rock on top to keep the colored pencils from floating. Now just let the resin cure and harden for a few days.

After the resin is hard, use a hobby knife to cut and remove the plastic container.

Step 4: Lathe Turning
Now prepare the resin block for the lathe. In our case we screwed it on to the mount piece. But we ended up removing the wood piece and cutting the back so it was level.
If you have a center finder that would be helpful, we just screwed it on as close to center as we could eyeball it.

Then get the block spinning on the lathe. Use the lathe cutting tools to cut and form the vase. Work slowly and take little pieces off at a time.
Probably good advice to wear gloves and a mask.

This is a long process, but better not to rush it. Some of the pencil leads chip out while working, this is expected.

The vase is taking shape! We decided to dig in deeper into the inside of the bowl to expose the second layer of colored pencils from the side.

Add decorative lines and curvy shapes as desired. It's fun to cut into the vase to show all the layers of colored pencils.

When completely satisfied, we used a saw to cut the bottom edge off the vase.

And the remaining piece looks just as cool!

Now the vase is all carved and amazing!

The top looks so fun with blunt colored pencils sporadically placed around.

And the base is awesome too---it gives the full scope of the quantity of colored pencils used.

Too much handling causes the pencil lead to smudge a bit. This is precisely why it needs a high gloss resin finish.

Step 5: Glossy Finish
Supplies Needed for the Resin Finish:
- Envirotex Lite Pour-On High Gloss Finish
- Tumbler Turner
- Mixing cups, Stirring Sticks, Disposable Gloves and Work Surface

Begin by placing the vase on the cup turner. Cup turners are a life saver, they rotate the vase continuously to keep the resin from dripping.

Then mix up the High Gloss Resin according to the package direction, in the 2 phase process. Make sure you are wearing disposable gloves for this part.

Then turn on the cup turner and pour the high gloss resin out slowly on the vase. Use your fingers to spread the resin all over the vase.

Give the full vase a nice, thick coat of resin and let the cup turner work overnight.

Repeat the high gloss resin process again if necessary. Then coat the inside of the vase as well. This is done by turning the vase by hand for about an hour...then letting it sit overnight.
Some resin will puddle in the base, but it's okay.

The vase looks amazing all coating in high gloss resin. The places where the colored pencil leads have been chipped out, the resin fills in and smooths it out completely.

Fill with colored pencils or other fun office supplies. Fill it full of candy and place it on the coffee table.

Enjoy this uniquely spectacular conversation piece! Handmade resin crafts make excellent gifts too, stock up on colored pencils at back-to-school time and make some awesome turned art!

Isn't it amazing? What would you fill it with?
Some of the crafts I make, I donate, give away or gift...but this is something that I absolutely love and will keep as long as I have a house to put it in.
I love it's uniqueness and familiarity!

That's it!
Turn a few hundred colored pencils into a gorgeous work of art using casting resin, a lathe and high gloss resin.
This is a great advanced resin project that makes a great gift or unique conversation piece.
Stock up on colored pencils and make an amazing resin piece today!
Like, Pin and Share!

Rainbow Alcohol Ink Coasters
Petrified Rainbow coasters using Easy Cast resin and Alcohol ink drips.
I sold a few of these in my etsy shop years ago and everyone loves them!

Resin Vintage Frame Art Magnets
How to make mini vintage works of epoxy resin crafts art!
Casting vintage frames out of Fast Cast resin and printing famous works of art, then coating them with high gloss resin for the perfect fridge artwork.
-min.JPG "How to make mini vintage works of art! Casting vintage frames out of Fast Cast resin and printing famous works of art, then coating them with high gloss resin for the perfect fridge artwork.")
I Spy Game Trinket Tray
This I spy game resin serving tray filled with miniatures and trinkets is a fun DIY and would make a great gift!
Fill the tray with little things from the junk drawer or little heirlooms that sit in a jewelry box collecting dust. (Or you can buy a bunch of miniatures at craft stores)
With a thick layer of glossy resin--done in several thin layers, the trinkets stay in place and offer a smooth surface for using the tray for serving or a coffee table catch all.

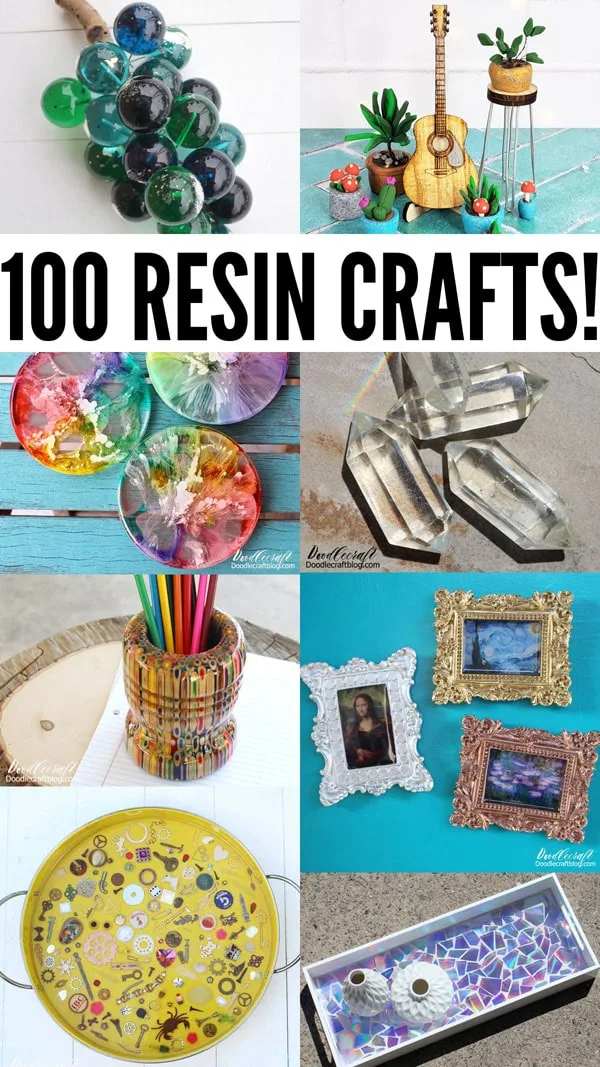
Here's 100 Resin Crafts to make!
Calling all Resin Crafters and anyone that is excited to learn all about resin crafting!
These resin projects vary in difficulty and skill level, but there is sure to be one or 12 things you love and will need to make!


-min.jpg)


Comments