
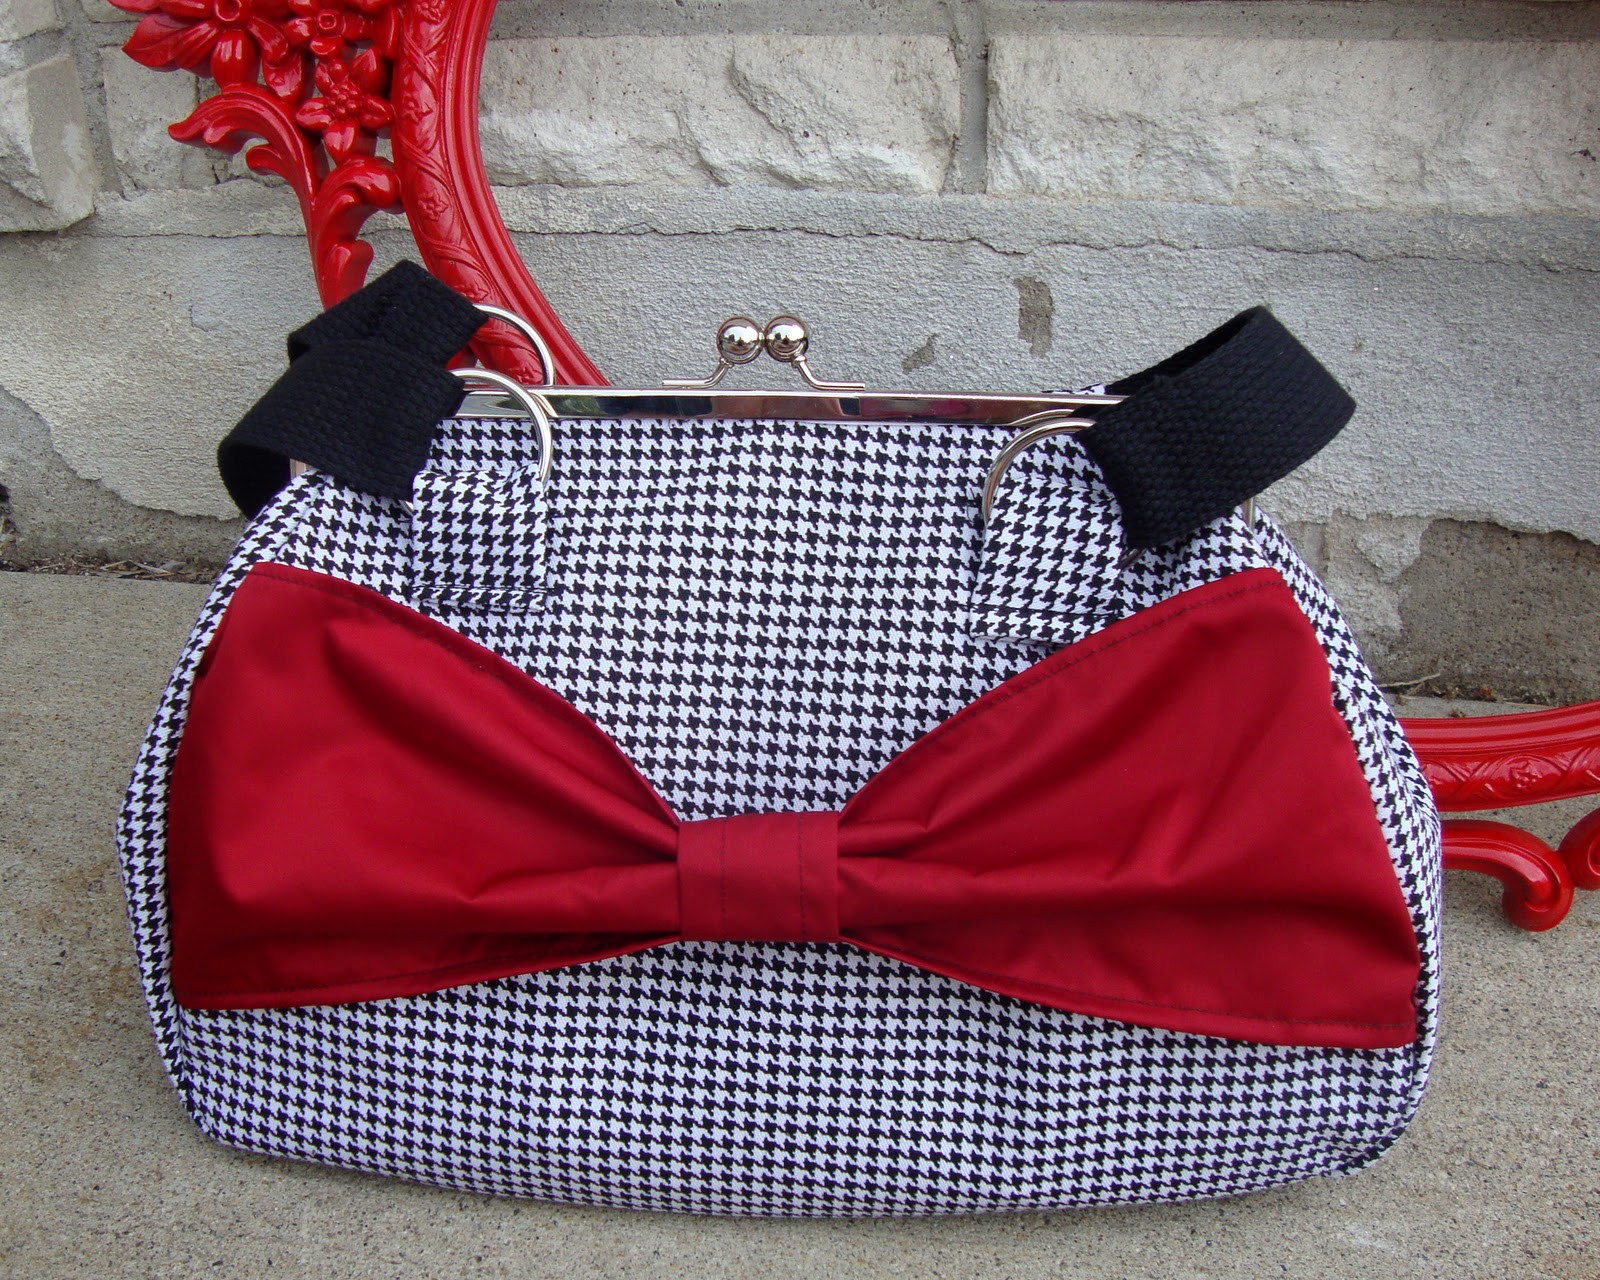
 Rockabilly Purse!
I had a purse in mind that I wanted to remodel...
So, here's that purse in all it's faded, stained glory!
Okay, when I bought it for $1,
I secretly knew all I wanted was the hardware...
I secretly knew all I wanted was the hardware...
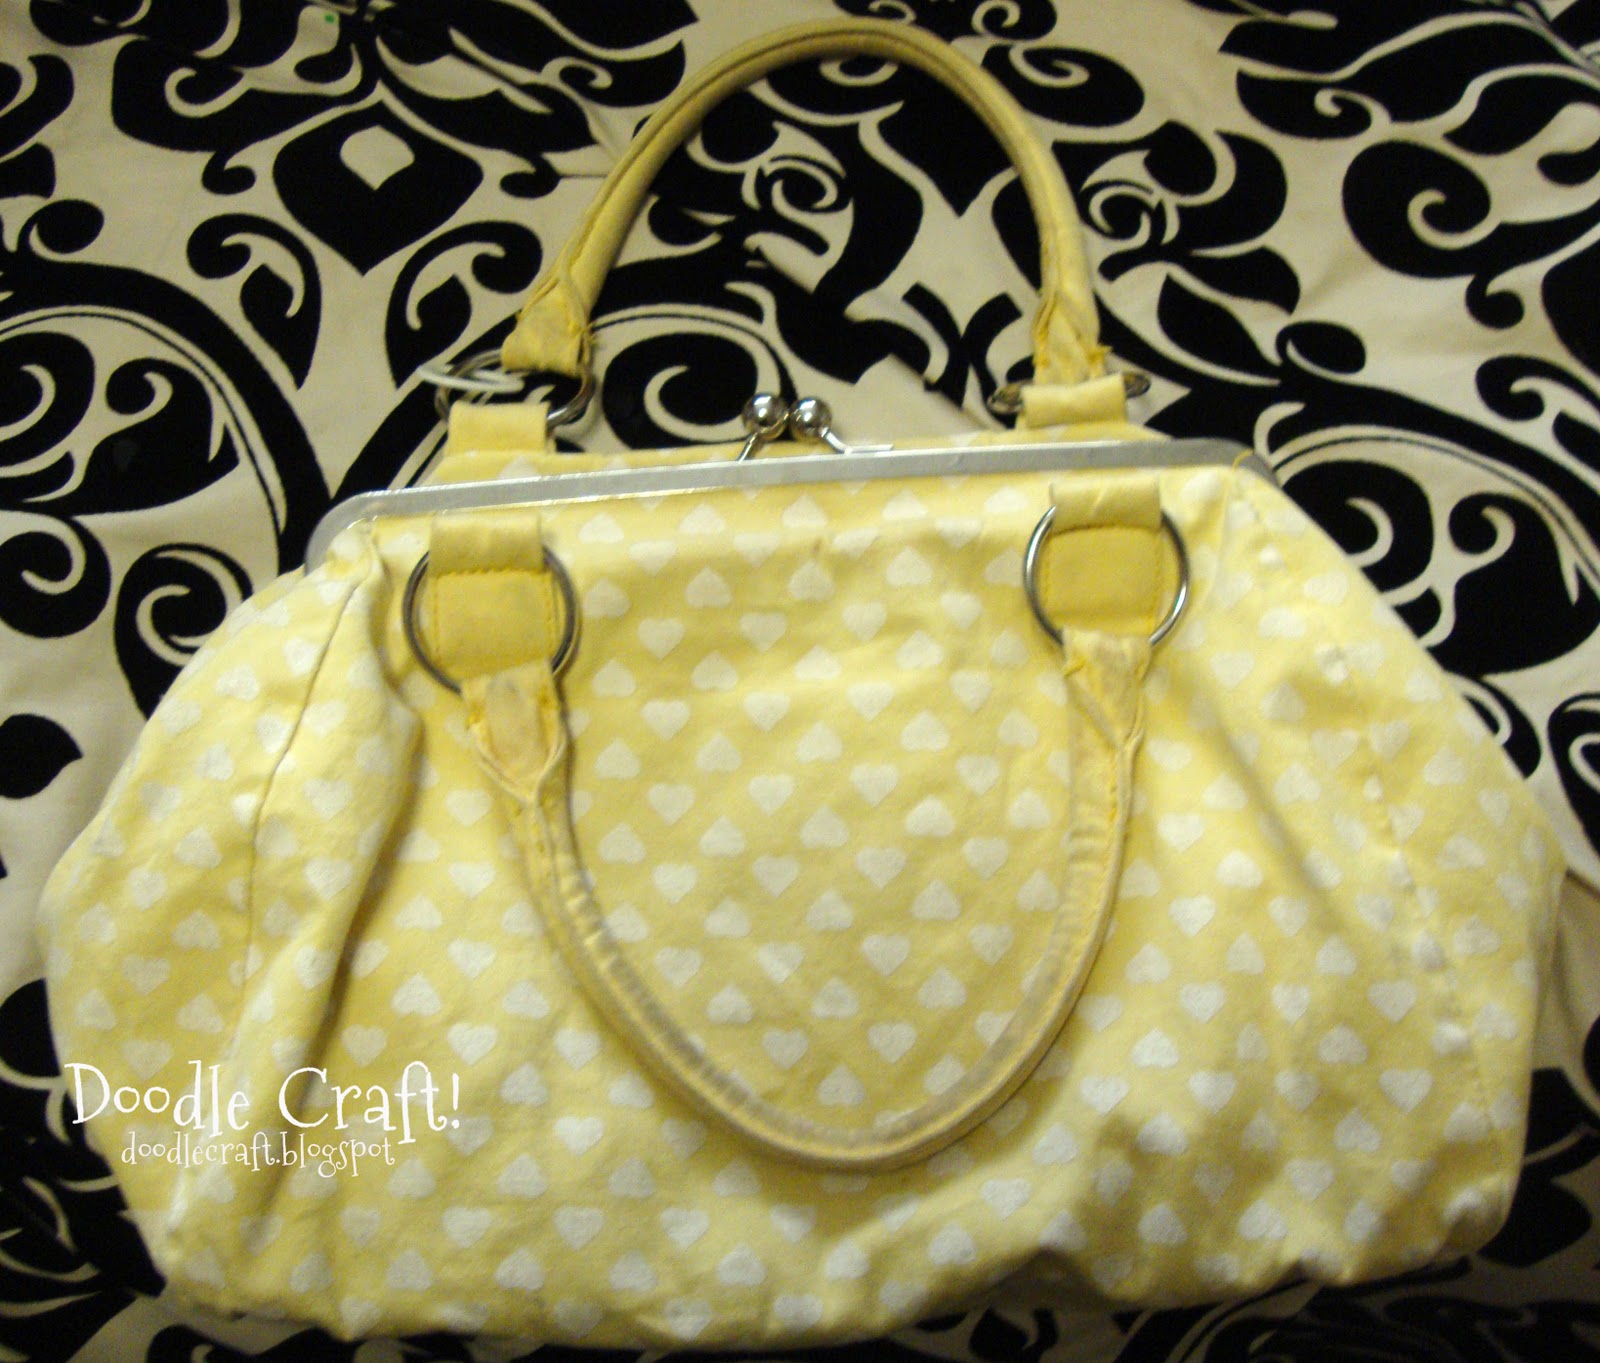
So I took it all apart and use the faded yellow hearts as a pattern...
And cut out the houndstooth fabric...following the pattern.

Decided I wanted a fat zipper a couple inches from the top...

Start by sewing in the zipper.
If you have a zipper foot for your machine,
that is the easiest way to sew in a zipper.
Just pin the zipper in place so you are sure it's going in the right way,
the sew the edges.
If you have a zipper foot for your machine,
that is the easiest way to sew in a zipper.
Just pin the zipper in place so you are sure it's going in the right way,
the sew the edges.

I knew the lining and accents HAD to be RED!
Needs a pop of color, right?
Needs a pop of color, right?

Cut a piece the same as the zipper side and sewed it together right sides out.

For the other side, the lining was made with pouchy pockets...
perfect for "Girl treats", cell phone, gum and 2 sharpies.
{always have sharpies with me. always.}

see. perfect.

Side piece has a weird angle, but I hemmed it all the same.

here's the basic pieces with the lining already stitched on...
you'll see my tactic in a second.

Ahh, of course! The Bow!
I was in love with the bow idea from the pillow too!
So I duplicated it in RED!

Then began sewing it to the side and bottom piece.

Then I used double fold binding (pink was all I had)
and went around the raw edges inside the bag.

See how pretty the insides are now?

Another shot of the outsides on the insides...

Flipped right sides out and then a little binding (this time white)
around the top edge.

Then the trusty, but next to nearly impossible to get on,
snappy thingy!

Yes, I used pliers, an exacto knife, a little hot glue,
and some kind of poker thing...
to cram that top edge into the said snappy thingy.

Nearly there. Granted, not the best factory job in the world,
but I love it nonetheless!

Here she is all snapped up!...oops--handles!!!

I used some woven fabric webbing...
and the rings from the original purse.
Sewn on with a little loop of houndstooth.

Ah, Ta da! The insides!
Perfect for all the things I carry around regularly...
and tons of room for more things...
like kids drawings, receipts and garbage...

Although not perfect, I love it!
I am by no means a perfectionist! :)
Here are a billion pictures of the finished
"Rockabilly" purse!

I think it looks like a monster with its mouth open!
"Rockabilly" purse!

I think it looks like a monster with its mouth open!


Comments